Are you having a hard time perfecting pot roast? Does it come out perfect one time and tough and chewy the next?
Every Sunday, my mom would make either fried chicken or a pot roast in the electric frying pan. She was the one who taught me as a young girl how to make the perfect gravy. The dark, crusty bits the roast left behind made for the BEST gravy ever.
However, bless my mamma's heart, sometimes the roast would be dry and chewy. No amount of gravy would change the texture. It seemed like I would chew on one bite for.....e......ver.....
Making pot roast the traditional way in the oven takes a long time, three or four hours, depending on the size of the roast, but the payoff is a moist, tender, melt in your mouth roast. I wanted to know how I can take my mom's pot roast and make it better, easier and faster in the pressure cooker.
You can read through this step by step post, or follow along with me in this video - you will learn a LOT and have a fork tender roast, every single time! Enjoy!
I went through several roasts, weighed them, timed them and could not get consistent results. I was baffled.
I read somewhere that I should be using the thickness of the roast to determine my cooking time.
Hip Pressure Cooking has great timing charts for just about everything. Her suggestion is to cook a beef roast for 75 minutes with a natural release. She doesn't mention weight or thickness.
Lorna Sass, of Pressure Perfect, lists BOTH weight and thickness for a boneless chuck roast, more than 2" thick, 2.5 pounds for 35-45 minutes with a full natural release.
Then America's Test Kitchen came out with their book, Pressure Cooker Perfection and in this book, they have 2 different pot roast recipes. One method takes 90 minutes, and the other recipe 30 minutes of cooking time, both with a 15 min natural release, not a full one. Really? What's the difference?
The shorter cooking method cuts the cooking time by 2/3rds and has the meat already portioned into serving sizes. Genius, I tell you!
ATK'S method made the most sense to me. When I cook veggies, they cook best if they are uniform in size. Why not for chuck roast? Cutting 2" slices against the grain levels the playing field so to speak and makes for a tender and moist chuck roast. It was simple to adapt their technique to my mom's recipe, cooking a roast under pressure for 30 min!
Chuck roast is the meat of choice for pressure cooking as it is not as lean and won't have a tendency to dry out as easily as other cuts. Start out with a 2.5 - 3 pound chuck roast.
1. Trim off any large sections of fat. This helps keep the gravy from being too oily. I love using kitchen shears for cutting and trimming.
2. Cut your roast against the grain into long , 2" wide strips. (Not cubes or chunks) Cut out any connective tissue you may find. The connective tissue is the silvery membranes and what takes a longer cook time to break down in the meat. You will shave off more than half the cooking time by taking 5-10 min to trim your meat.
3. Pat your meat completely dry with paper towels to help brown your meat.
4. Season your beef strips with salt, pepper, and any spices of your choosing.
My mom used Season-All. It's a great all purpose seasoning that works well with beef.
5. Choose the browning setting or on the Instant Pot pressure cooker, select SAUTE, then the ADJUST button once till you see MORE light up.
When the display says, "HOT," put 1 Tablespoon of cooking oil into your pressure cooker. When your oil is shimmering, you are ready to brown your meat.
6. Place only a few pieces of meat into the pan. You don't want to crowd the pan with too much cold meat and reduce the cooking temp.
Resist the urge to flip the meat until you begin to see a dark brown sear on your meat.
Brown all sides and set aside your browned meat until all the pieces have browned.
See that beautiful brown color? That's flavor. You do not want to skip this step, trust me. It's worth it!
7. Turn your pressure cooker off. Pour your broth mixture carefully into your pan. What we are doing now is "deglazing" or taking off the crusty, stuck on bits on the bottom of your pan. If you do not scrape this bits (fond), your pressure cooker will think food is burning and the safety features will kick in, shut your pressure cooker down and not allow it to come to pressure.
Using a flat edge spatula (wooden or metal) will help you scrape the bits off easier.
8. Put your browned meat into the pressure cooker, lock the lid, set the valve to sealing, for 30 minutes, HIGH pressure. After it is done cooking, you will want it to naturally release its pressure (NPR) for 15 minutes, then open the pressure valve. (Quick Release)
I like to add onion for some additional flavor. They will pretty much disintegrate, but that's ok with us.
9. While your chuck is cooking, begin prepping your veggies. Baby carrots or regular carrots cut into 2" lengths are perfect.
Wash, peel, and cut your potatoes into 1/2" to 3/4" slices or chunks. The more uniform your veggies are cut, the more likely they will all cook the same. If some pieces are bigger, they may be crunchy. If they are cut too small, they will get mushy. Just do your best. :-)
I am enjoying this steamer basket. It makes getting my veggies out of the pressure cooker so much easier. It comes with handles and if you bend them up or break them off, the basket will fit perfectly in your 6qt pressure cooker.
10. When your roast is done with the 15 min natural release, take the meat/onions out and put it on a plate. Cover it with foil to keep it warm.
**Next, you will want to put your entire lid into the fridge or run it under cold water for a couple of minutes to firm up the silicone seal inside the lid. During high heat, the seal softens, loosens and can cause sealing problems with your next batch of cooking.**
You will need to do this every time you do back-to-back cooking. You will want a good seal for cooking your veggies, as they will only need 5-6 minutes of cooking time.
11. Put your cut veggies in a steamer basket, directly into the hot broth. Close the lid, set the valve to sealing, and select HIGH pressure for 5-6 minutes with a quick release of pressure when the cooking is done. Open the lid and remove the strainer basket of veggies. Cover and set aside.
If you want to make gravy, it will only take an extra 10 minutes of time. Ready? Let's do it!
12. Mix equal parts all purpose flour and softened butter, till it forms a thick paste. Drop this into the meat broth and quickly whisk it smooth. I love the richness butter gives gravy since I'm not using the traditional method of making it with the browned bits or in the pan.
**If you didn't trim off a lot of fat off your meat prior to cooking, you will want to skim off the fat or pour it into a gravy fat separator. After the fat rises to the top, pull out the plug and pour the broth back into the pan.**
13. Turn the pressure cooker to browning or SAUTEMORE mode. Stir or use a whisk continuously (so the gravy won't burn on the bottom of the pan) till the gravy begins to bubble and thicken to your desired consistency.
Enjoy your creation!
I hope you will use these tips and techniques to perfect your favorite family roast recipe in your pressure cooker.
Thanks, mom. I love you!
print recipe
Pressure Cook Mom's Sunday Pot Roast & Veggies
by Frieda Franchina September-24-2016
Chuck is the preferred meat to use when pressure cooking. Follow these tips & techniques for a fork tender roast, perfectly cooked veggies and a silky smooth gravy. The secret to full flavor and short cook time is trimming the meat and browning it first. These techniques can be adapted to any roast recipe.
Ingredients
2.5 - 5 pounds Chuck roast, extra fat removed, connective tissue removed, cut across the grain in 2" slices, patted dry with paper towel
1 Tablespoon Season All or spices of your choice
1/2 teaspoon pepper
1 Tablespoon cooking oil
1 3/4 cup water or beef broth
2 teaspoons beef bouillon (omit if using beef broth)
1/4 cup Worcestershire sauce
1 medium onion, sliced thick
2 bay leaves
2 pounds potatoes, peeled, 1" cubes
1-2 cups baby carrots, or cut in 2" lengths
3 Tablespoons all purpose flour
3 Tablespoons softened, unsalted butter
Instructions
1. Put 1 Tablespoon cooking oil in pressure cooker. Select BROWNING or SAUTE (high). When pot is HOT, brown prepared meat in small batches in a single layer on all sides for 1-2 minutes.2. Remove meat from pressure cooker and turn it off.
3. In a large measuring cup, mix together water (broth) beef bouillon, and Worcestershire sauce. Slowly pour liquid mixture into the pot, scraping all the browned bits off the bottom of the pot.
4. Put browned meat back into the pot. Top with onions and bay leaves.5. Put lid on pressure cooker, close the pressure valve and select HIGH pressure for 30 minutes.6. When cook time ends, allow the pressure to naturally release for 15 minutes. After 15 minutes, open the pressure valve to release any remaining pressure. 7. Remove roast, put on a plate and cover with foil. 8. Using a steamer basket/trivet, put cut potatoes and carrots into the broth. 9. Close pressure cooker, close pressure valve, select HIGH pressure for 5-6 minutes. At the end of cook time, open the pressure valve for a quick release. Remove veggies and put onto a plate. Cover. 10. Mash softened butter and flour to form a paste. Select Saute/Browning on the pressure cooker and quickly whisk in flour mixture into the broth, stirring constantly until thickened to desired consistency.
Details
Prep time: Cook time: Total time: Yield: 6-8 servings
There are several pressure cookers that have a Yogurt function. GoWise , Instant Pot Duo, and the Instant Pot Smart are just a few that I have heard people use to make yogurt. So, if you have a yogurt maker or a pressure cooker with a yogurt function, let's get started!
UPDATE! I now have a complete Instant Pot Yogurt for Newbies Reference Guide!This includes every. single. thing. you would ever want to know about yogurt! I spent several months helping answer many, many questions, and now I have all the answers in one place, at your fingertips! Bookmark this page and refer to it with any questions you have. Enjoy!
If you want an even easier method for making yogurt that has fewer steps (pour milk/add starter/push yogurt button) you may want to check out this Cold Start Method that uses ultra pasteurized milks, like Fairlife milk.
Here's a video that I did that shows YOU how easy it is from start to finish!
And yes.
You get to see me in a bathrobe....
First, it is handy to have an digital thermometer. I currently have the LavaTools Javelin Digital thermometer and and a Thermapen digital thermometers. They both work accurately and read temps within 3-4 seconds.. I use this to measure the temps of all my cooked meats and check the temp of my yogurt. You can use any thermometer you have, as long as it is accurate and reads the temps of 90°F-190°F.
There are 2 temperatures important to making yogurt and it is helpful to know and measure with an accurate thermometer to ensure a successful batch of yogurt.
Next, find some yogurt. Yes, it takes yogurt to make yogurt!
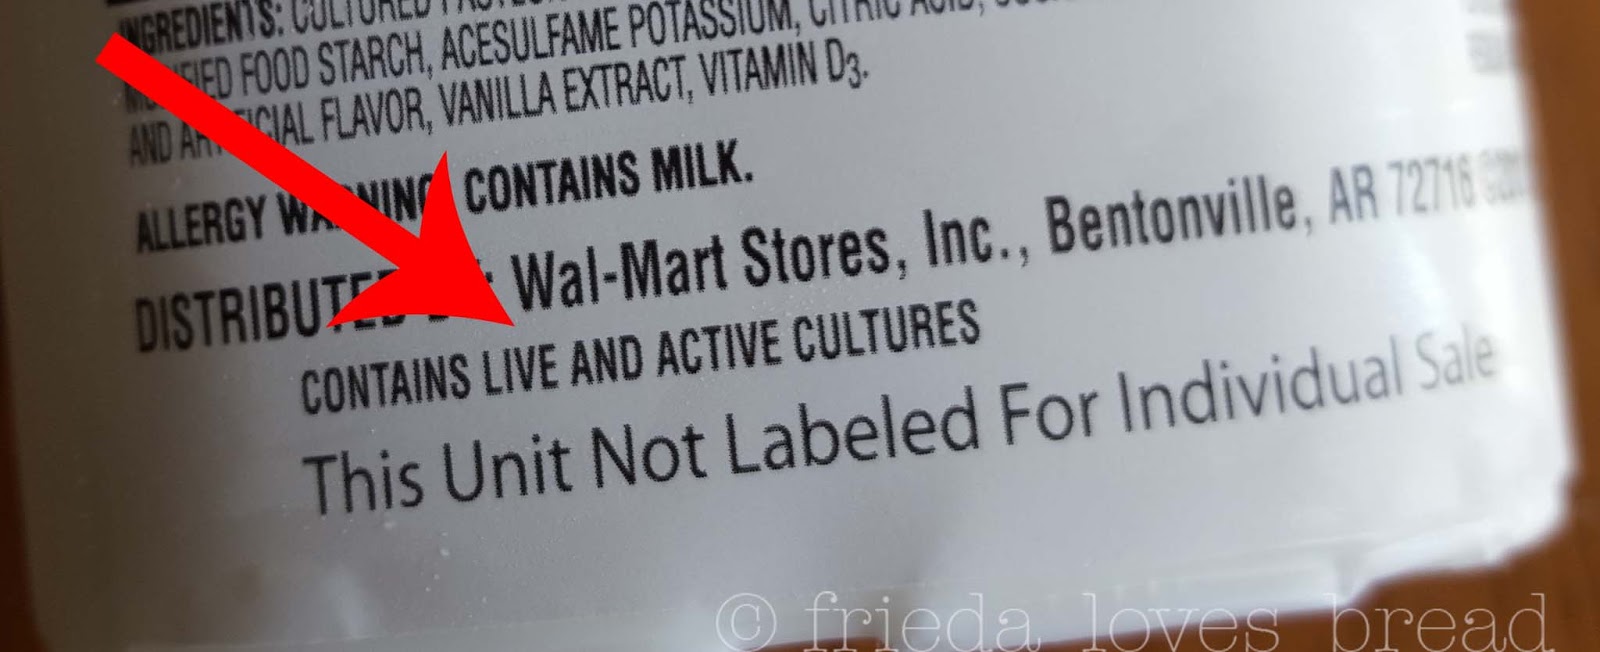
You can use any brand, or style of yogurt, just look for one that says CONTAINS LIVE AND ACTIVE CULTURES. *made with live/active cultures will NOT work. Your yogurt needs to say "contains" or list LIVE cultures in the ingredients.
- Fat content doesn't matter.
- Sugar content DOES matter. If you are using a flavored yogurt, look for one that has 9 grams of sugar or less per serving. Excess sugar can inhibit or slow down the culturing process.
- Make sure it is FRESHLY OPENED - once opened, the active cultures will die in less than 7 days, even though your yogurt is still good to eat.
I'm using Good Value Greek Yogurt from Walmart. It comes in a small 4 pack and has been working well for my yogurt. Fresh yogurt works best!
You don't have to purchase yogurt from the store. You can also get freeze dried starters online or after your first batch, reserve a few Tablespoons for your next yogurt. You can reserve some yogurt from your own yogurt as a starter, but it only lasts 5-6 generations. Some people make a batch of yogurt and freeze it in ice cube trays or silicone cups and let it thaw before using.
Milk. I have made yogurt using Whole, 2%, and 1% cow's milk from the store. I have found that the final yogurt yields more and is creamier with whole milk. I still get great results with 2% and prefer it over 1% or skim. You can use skim and low fat milks; the yield will be less if you strain it. You can use raw milk - it may be a little thinner than pasteurized milk, but it will work.
For your first time making yogurt, you will want to avoid using ultra pasteurized milk. Ultra pasteurized milks are heated to 280° for a few seconds, killing 99.9% of the bacteria in the milk, rendering it too sterile to culture yogurt properly. Organic milks are often ultra pasteurized. If all you can find are ultra pasteurized milk in your area, start with a half gallon and see if it works for you. Some ultra pasteurized milks work, some don't. It's hit and miss for making yogurt. Once you have made a successful yogurt with regular, pasteurized milk and are familiar with the process, try your favorite organic or ultra pasteurized milk and see if it works.
Lactose free milk can be used. Lactaid and Fairlife milks have been used with success. If you are highly lactose intolerant, you may want to try one of these milks. If you are lactose intolerant, but can tolerate Greek style yogurt, you will want to strain your yogurt. Straining the yogurt removes much of the lactose along with the whey. Another option is to incubate your yogurt for 15 or more hours, in which all the lactose is consumed by the cultures and result in a tangy, lactose free yogurt.
If you cannot have dairy or wish to make a Vegan yogurt, by all means you can! Folks have used Coconut Milk, Soy, Almond Milk, and others. Plant based milks need a thickening agent to help make yogurt, so an additional ingredient is needed.
This is a traditional heat/cool/add starter and incubate method. If you want a simple, no heat, no temp taking, dump and start method of using Fairlife milk to make yogurt, check here! This cold start method is only for UHT/UP milks. (Some UP milks work, some don't. Fairlife milk has worked).
Are you ready?
I like to start my yogurt about 45 minutes before I go to bed. This includes the heat up time, cool down time and stirring in the yogurt starter.
1. Set aside 1 Tablespoon of yogurt into a small bowl.
Make sure all your tools, and equipment are clean and ready to use. Use a clean liner, free of any soap residue.
**If your liner/pot are warm from previously cooked food, make sure you use a COLD liner and Pot. If it's still warm, the heat sensor at the bottom of your pressure cooker will not register the temp of your milk correctly and it will be more difficult to reach the temp on one boil cycle.
TIP: Put some ice cubes in your pot and let it sit for a few minutes. Dump the ice water out, but do not dry the pot. This tip also helps keep the cooked milk from sticking to the bottom of your pot!
I poured out the heated milk just to show you how little milk solids are cooked onto the pot. It really works!
2. Pour 8 cups (half gallon) of milk into the pressure cooker. I have made a full gallon before, but it is easier to make/strain smaller batches and it doesn't take as long to heat up or cool down.
3. Move the pressure valve to the SEALING setting. Make sure your sealing ring is in! If you are worried about a smelly ring transfer, you can use a glass lid from your pots or even a glass pie plate lid for the entire process. I use a separate sealing ring for yogurt/cheesecakes/rice.
4.Duo & Smart Models: Push YOGURT and quickly push ADJUST.
At first, your screen will read 8:00, but if you push ADJUST within 5 seconds, it should say BOIL.
**If you accidentally push ADJUST twice, your screen will say 24:00 you will get a lower temp that will not work for your yogurt. Push Keep Warm/Cancel and repeat step 4, till you see the words BOIL and MORE on the display.
ULTRA MODEL: Turn the dial to YOGURT Press the dial to select Turn the dial to TEMP Push the dial to select Select HIGH temp for BOIL Push START and the milk will heat. When the boil cycle has ended, the display will show YOGT. DUO PLUS or VIVA MODEL: Select YOGURT program Press the YOGURT key repeatedly until you see MORE on the display In 10 seconds, heating will begin. When the boil cycle has ended, the IP will beep 3 times and display YOGT.
MAX MODEL:
1. Select Yogurt.
2. Touch the Temperature field repeatedly to toggle between Boil, Yogurt, and Custom.
3. Select Boil.
4. Touch Start.
Yogurt + the Adjust button will heat up your milk
Half gallon will take about 25 minutes to reach 180°F or higher.
Full gallon of milk will need whisking every 10 minutes and take 50 min to reach 180°F.
This is where you test it with the thermometer. If it doesn't reach 180°F, you will be fine.
180°F is only if you want a custard style yogurt. You can still make a great yogurt without reaching this temp.
The IP was tested to reach 180°F temp with a half gallon of milk. If your Instant Pot is not reaching the 180°F temp the first time on the boil cycle, try the following tips:
Bring your milk out 30 minutes before starting.
Start with a cold pot - put some ice cubes in to cool it quickly.
Whisk every 10 minutes during the boil cycle.
Use a well fitting glass lid or the IP lid/seal/vent closed.
After following the above tips, you can carefully use the Saute LOW setting, while constantly whisking your milk, till it reaches 180°F.
Do you REALLY need to heat your yogurt?
First, heating the milk will kill any wild bacteria you may find, especially if you are using raw milk. These bacteria can compete with your yogurt loving strains of bacteria and affect your final outcome.
Second, whey, an abundant protein in milk, is fully denatured at 180°F and results in a firmer, thicker, custard style yogurt.
5. Next, bring your heated milk down to a reasonable 110°F. This temperature, is important.
Too hot, and it will kill your yogurt starter. Too cold, and your starter won't work quickly enough to outrun the bacteria that can spoil your milk. If your milk temp drops below 90°F, warm it back up to 110°F. It is fine to add your starter in the 90°F-110°F range.
Scrape off any "skin" from the top if you want a smooth yogurt.
You can let it sit at room temp for awhile to naturally (takes an hour for a gallon of milk) bring down the temperature, but I prefer to set the liner of heated milk in a larger bowl filled with ice water. You can use your sink filled with cool water or gel ice packs to help cool your milk quickly. The rapid cool down method does not harm your yogurt in any way.
RAPID COOL DOWN: Takes only 5 minutes for a half gallon of milk, 10 minutes for a full gallon.
Stir gently and constantly, WITHOUT SCRAPING THE BOTTOM, until the temperature hits the "zone" of 110°F. There are cooked milk solids on the bottom of your pot and you don't want little bits of cooked milk in your creamy, smooth yogurt.
Stirring while it is cooling will prevent "hot spots" in your milk and give you a more accurate temperature.
Use an ICE WATER bath to quickly bring the temperature down.
Cool down to 110°F
Remove the liner from ice water and wipe the outside of the liner with a clean kitchen towel.
Temper your yogurt
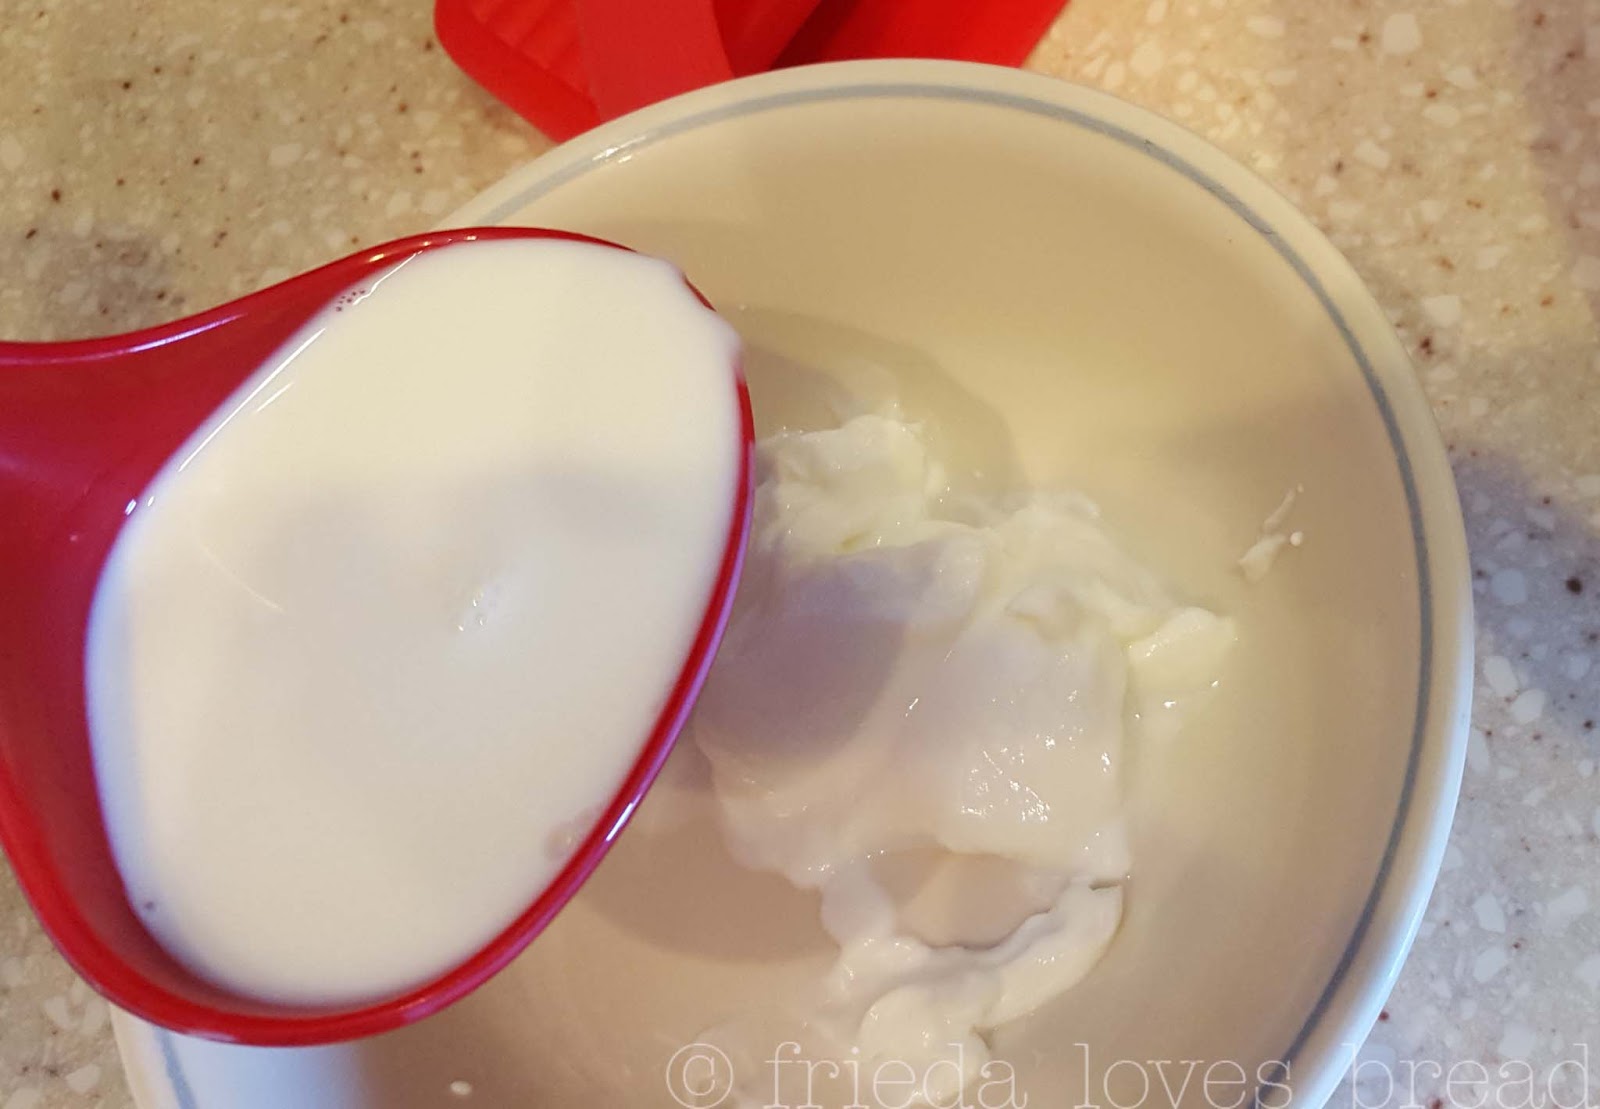
6. Take some cooled down milk and stir it into your 1 Tablespoon of yogurt starter. Mix till smooth.
Pour the warmed up starter back into the pot and give it a quick whisk. Don't scrape the bottom.
Put the liner into the Instant Pot.
This is the display you want to see to make successful yogurt. 8:00 and the word NORMAL.
7. Duo & Smart Models:Push the YOGURT button. It will say 8:00, and NORMAL meaning your yogurt will incubate for 8 hours. Your yogurt will begin to set around hours 5-6 and will be mild. If you want a "tangier" yogurt, you can push the (+) button and increase your time to 10 hours or longer.....8 hours is a good place to start.
That's it! Go to bed. Say "Good night" to your yogurt.
** If your IP keeps going back to the BOIL cycle, it has a memory of your last setting. Keep pushing the adjust button till you see 8:00 and normal on your display. The Adjust button will toggle between the MORE/NORMAL/LESS settings and the BOIL/8:00/24:00. Stop when you see 8:00 and NORMAL.
1 min video that shows how to find the Yogurt Normal Cycle on the Duo:
ULTRA MODEL: (2018 update: if you have the newest model of the Ultra, there is no Medium setting for yogurt. You will need to use the Custom setting) Turn dial to YOGURT Press to select Press the dial again to set TIME (5-24 hours, depending on how tart you like your yogurt) Press the dial to confirm Turn dial to TEMP (LOW, MED, HIGH, Custom) Select MEDIUM (107°F) or CUSTOM (you can choose between 100°F-110°F) Press dial to confirm Press the START button. Incubation will start. When cycle has ended, the display will show YOGT. DUO PLUS MODEL: Select YOGURTNORMAL Press +/- to set incubation time When finished, the IP will beep and display YOGT MAX MODEL 1. Select Yogurt 2. Touch the temperature field repeatedly to toggle between Boil, Yogurt, Custom. 3. Select Yogurt. 4. The yogurt setting will default to 8 hours. To change the time, - Touch the Hours field - Turn the central dial to adjust
5. Touch Start to begin.
Ta Da! Here is my yogurt at the 8 hour mark. But...
If you stir it, the yogurt will get thin. Why? Whey. There is liquid whey, floating around in the yogurt and when stirred, it will get thin. Not soupy, but thin - more like a traditional style yogurt.
8. If you want to have a THICK Greek Style yogurt, you will need to strain it.
*If you use cheesecloth, you will need to use several layers of cheesecloth OR to put your pot of yogurt into the fridge to chill completely for 4-6 hours. This "sets" the yogurt and won't run through the cheesecloth. It will take longer to strain chilled yogurt - about 6-8 hours.
You can strain right after incubation using any of the following material over a strainer:
heavy duty paper towels - don't use cheap ones, they'll tear and shred. Bounty is a good one.
I like to use large coffee filters because they don't let ANY milk solids through. I can strain right away without chilling first.
*If you don't want a super thick yogurt, put your liner in the fridge and let chill completely.
I like to use coffee filters as I have a bunch ... er.... hundreds of them on hand. Use and dispose. Easy.
I line my IKEA strainer with coffee filters and set it in my OXO Salad spinner bowl. Works like a charm. This is why I only use 1/2 gallon of milk at a time. I don't have a larger strainer or larger bowl and it's hard to divide a whole gallon's worth of yogurt into two strainers.
Cover your yogurt with plastic wrap or a large dinner plate and immediately strain for 2-3 hours in the fridge. 4 hours will give me a cream cheese like texture.
I end up with approximately 4-5 cups of thick, creamy yogurt and about 4 cups of whey.
If you feel that your yogurt is too thick, you can always add some whey back in.
Don't throw out the whey! I like to freeze my whey to use as STARTERS for my yogurt. Yes, it contains the same live cultures that your yogurt has - FREEZE RIGHT AWAY for best results. Here are 18 Ways to Use Whey. 36 Uses for Whey
9. Whisk your yogurt smooth and flavor your yogurt.
Now is the time to sweeten or flavor your yogurt. Take a taste. You may enjoy it plain, with some fruit.
I like to set aside some thick yogurt to use as STARTERS for my next batch - freeze right away in tablespoon portions in an ice cube tray. They will last up to 6 months! Bring out the cube at the beginning of the boil cycle at room temp and it will be thawed enough to mash when your milk has cooled.
Take some thick unflavored yogurt to use as a mayo or sour cream sub. Works great in sandwiches, or other recipes.
To the rest of my yogurt, I like to put 1/4 cup granulated sugar (or 2-4 tablespoons of warmed honey) and 1 teaspoon vanilla extract and whisk it smooth before scooping it into individual jelly canning jars. You can use any sweetener you like, honey, Stevia, Truvia, etc.
I like to use my 8 oz. jelly canning jars to store 5 oz of yogurt in each one. Weighing with a scale ensures that each of my boys have the same amount and no fighting over the "largest one."
Having a "space" above the yogurt lets my family choose any toppings, mix-ins or flavorings of their choice. Honey, brown sugar, granola, berries, etc. My mom likes to sprinkle a little bit of Lemon Crystal Light drink mix into hers. Whey protein powder, chocolate syrup and chocolate drink mix powders are also favorites. Experiment and have fun with different flavors!
Yogurt making is simple and you will be easily making it weekly for your family.
10. Enjoy!
Enjoy!
print recipe
Instant Pot Greek Style Yogurt
by Frieda Franchina July-14-2016
Greek Style yogurt is simply strained yogurt that is thick and high in protein. If you want a more traditional consistency, you can skip the straining step and chill your yogurt in the fridge.
Homemade yogurt has such a clean taste and the flavoring options are only limited to your imagination!
If this is your first time making yogurt, start with the smaller, half gallon batch. Make sure your yogurt is very fresh, and opened just before starting your yogurt.
Ingredients
HALF GALLON BATCH
8 cups Whole, 2%, 1% or Skim Milk
1 Tablespoon plain yogurt, room temperature
FULL GALLON BATCH
1 gallon (16 cups) Whole, 2%, 1% or Skim MIlk
2 Tablespoons plain yogurt, room temperature
several ice cubes
EQUIPMENT
Thermometer - test for accuracy prior to starting
Large mixing bowl with ice water
Ladle
Whisk
Strainer, colander or sieve
Straining material: coffee filters, heavy duty paper towels, flour sack towel, or several layers of cheesecloth
If making a gallon of yogurt, you may need 2 sets of strainers or a large nut milk bag
Instructions
1. Set out 1-2 Tablespoons of plain yogurt in a small bowl. Set aside. OPTIONAL: Put several ice cubes into the Instant Pot liner. Let the ice sit for a few minutes; swish to coat the bottom of the pot, and dump out the ice/water. Do not wipe the pot dry. 2. Pour your milk into the Instant Pot liner. Cover, set vent to Sealing. You can choose to use a glass lid or lid from your pots, pie plate, dinner plate or a flat silicone suction lid for the entire process.3. Select the Yogurt More/Boil setting, according to your model. Check my post for directions. If you have the Ultra, HIGH is the setting you need.
Cycle will take 20-25 minutes for a half gallon; 50 minutes for a full gallon of milk.4. At the end of the boil cycle, whisk the milk and take the temperature with a thermometer. It should read 180°F or higher. If there is a "skin' on top of the milk, carefully remove it with the whisk.5. Remove the pot of hot milk and set it over the bowl of ice water. Every couple of minutes, stir the milk gently with a whisk, being careful not to scrape the bottom of the pot. Take the temperature until the milk reaches 100°-110°F. Remove the pot from the ice water. Wipe the outside of the pot dry and place it into the Instant Pot. 6. Ladle 1 cup of the cooled milk into a small bowl. Stir your room temperature yogurt until completely dissolved. Pour this mixture into the pot of milk in the Instant Pot.7. Cover, close the pressure valve (Sealing) or use alternate lid as described above. 8. Incubate your yogurt, selecting the Yogurt Normal setting as per Instant Pot model. For the Ultra, Medium is the setting you need.9. Incubation Time: Yogurt setting automatically defaults to 8 hours. You can use the +/- buttons to increase/decrease the time. You can incubate for as little at 5-6 hours (mild yogurt) or as long as 24 hours (very tart yogurt). 8-10 hours is the average incubation time. Display Timer will count UP.10. When the incubation cycle finishes, your Instant Pot will beep and display YOGT. Your yogurt should look set, like a soft Jello. You can immediately pour your warm yogurt into your lined strainer, set over a larger bowl to catch the whey, cover and put in the fridge for 4-6 hours. Larger batches of yogurt will take 8-10 hours to fully chill. If your yogurt is too thick, you can whisk some whey back in, a little bit at a time, until you reach your desired consistency.Flavor: Add 1 teaspoon of vanilla extract and 2-4 Tablespoons of warmed honey or granulated sugar. Refer to my IP Yogurt Guide for Newbies for many other flavoring ideas!Store your yogurt in a glass or plastic container, with a well fitting lid. Yogurt will keep for at least 2 weeks.Whey: clear whey will keep in the fridge for up to 6 months.Unsweetened yogurt & whey can be frozen to use as starters for future batches of yogurt. Freeze in tablespoon portions right after chilling/straining your yogurt. When frozen, they will keep viable in the freezer for up to 6 months.
Hot, cheesy goodness with a buttered bread crumb topping.
It is one of the few comfort foods that can immediately transport any grown adult into their childhood with the very first bite...
Having owned a pressure cooker for several years, it has only been in the last couple of years that I have expanded my repertoire of recipes using my Cuisinart electric pressure cooker. Now, I own an Instant Pot pressure cooker. Yep! Electric pressure cookers are a really cool kitchen tool!
I have made veggies, meats, soups, and even *gasp* eggs & DESSERT using a pressure cooker, and recipes for macaroni and cheese have been on my mind.
Really? Can you cook pasta in a pressure cooker?
The answer is YES. I have used Country Pasta, a thick, homestyle egg noodle that is superb in my Creamy Chicken Noodle soup. These noodles typically take 18-20 minutes to cook, but using a pressure cooker, they only take 6 minutes!
Cooking pasta on the stove top only takes about 10-12 minutes of cooking time, so how does the pressure cooker stand up?
My son made a Mac N Cheese recipe from scratch and told me it took 45 minutes, from start to finish. Let's see if this recipe can cut our time, yet still retain its cheesy flavor.
When I make a recipe for the first time, I halve it if possible. When you use your pressure cooker, you need to have at least 1 cup of liquid in it, or it won't come up to pressure. The electric pressure cooker will automatically turn off if you have too much liquid or not enough in it. Cool, huh?
Watch the video or read along. I promise you won't be disappointed!
Dry macaroni and water go straight into the pot. Add salt and dry mustard powder for seasonings. Yes, mustard powder sounds weird, but trust me, it works. Doesn't overpower the dish and adds a depth to the mac n cheese.
Cover, lock, and align the pressure gauge with the dots. Set pressure to HIGH and the timer for 5 minutes. If you like your noodles more al dente, choose 4 minutes.
It took 4 minutes to bring to pressure.
At the 5 minute mark, QUICK release (in short spurts) the gauge and let all the steam release, about 1 minute.
**NOTE: Some brands of pasta will foam and when you do a quick release, it may SPEW out of the release valve, spraying noodle/water everywhere. You can add 1 tablespoon of oil to your mac/water before cooking to reduce foaming issues. Also, do the Quick Release in short, quick spurts. That will help.
Wow. The noodles absorbed all the liquid and they were perfect. Al dente.
Add evaporated milk to your pasta. Evaporated milk has about 60% off the water removed, resulting in a creamy style milk. Stir and watch till the milk begins to thicken, about 2-3 minutes.
Add your shredded cheese, handful by handful, till melty. This is the beauty of this recipe. You can add whatever cheeses you like: white cheddar, sharp cheddar, Colby, jack, pepper jack....
I used a combo of Cheddar/Jack. If you want your MacNCheese to be super creamy, use an American style cheese. *Do not use pre-shredded cheese. It is coated with potato starch that will make your mac n cheese grainy and gritty.
**NOTE: Your mac N cheese may appear soupy at first, but after stirring for a minute or two, it will thicken. You can turn on your browning/sauté setting, but stir constantly to avoid burning or scorching the bottom of the pan.
Growing up, our Mac N Cheese had bread crumbs on top. Transfer your Mac N Cheese to an oven safe dish and liberally sprinkle bread crumbs on top. Kitchen Tip: I save the crusts from bread and freeze them. When I need bread crumbs, I break up a couple of crusts into a food processor and pulse till I see fine crumbs. Want an extra crispy topping? Use Panko bread crumbs, tossed with melted butter.
Put under an oven broiler for 2-3 minutes. Again, DO NOT WALK AWAY.... bread browns quickly, depending how far away it is from the broiler.
From start to finish, I had homestyle Mac N Cheese in less than 15 minutes. Sweet, huh?
No boil-over on the stove, no soggy noodles, and only one pan to clean up.
Well, two...if you include the bowl I ate it in.
This tastes SO much better than the blue box!
Creamy.
Cheesy.
Toasty breadcrumbs.
I'm a kid again.
print recipe
Homestyle Macaroni & Cheese - Pressure Cooker
by Adapted from Pressure Cooker Perfection April-5-2016
Creamy, cheesy, macaroni & cheese can be made in your pressure cooker, start to finish, in 15 minutes! Top if off with buttered panko crumbs for a crunchy topping.
Ingredients
2 cups elbow macaroni
2 cups water
1 teaspoon salt
1 teaspoon dry mustard
pinch of cayenne pepper
1 Tablespoon cooking oil - to prevent foaming
12 ounces evaporated milk
1 cup Sharp cheddar cheese, freshly shredded
1 cup Monterey Jack cheese, freshly shredded
1 cup dried bread or Panko crumbs
2 Tablespoons butter, melted
OPTIONAL ADD-INS:
8 ounces cubed ham
1/2 cup frozen peas
15 ounce can drained diced tomatoes
8 ounces Keilbasa sausage, cut up
4 teaspoons whole grain Dijon mustard
Instructions
1. Pour dry macaroni into the pressure cooker.2. Pour water over the dry macaroni.3. Add salt, cooking oil, dry mustard and cayenne pepper. Stir well.4. Close lid, lock, & close the pressure valve.5. Select HIGH pressure and set the time for 5 minutes. (Choose 4 minutes for al dente pasta).6. At the end of cooking time, use a Controlled Quick Release by opening the pressure valve in short spurts until you can open the pressure valve all the way without any foaming. 7. Open the cooker & stir the pasta to break it up. Pour in evaporated milk. Stir in the cheese, a handful at a time, until melted.8. If sauce looks thin, use the Brown/Saute setting and stir constantly until thickened.9. If desired, put macaroni & cheese into an oven safe dish. Mix bread crumbs and melted butter. Sprinkle mixture on top of pasta. Broil in oven 6-8" from broiler for 2-3 minutes until golden brown and toasty. NOTE: Recipe can be cut in half, keep the same cook time.