Showing posts with label Pastry. Show all posts

11/10/16

5 Lemon Bars For a Crowd! (18x13 and 9x13 sizes)


I was asked to make some Peanut Butter Bars and Lemon Bars for a family who was celebrating their daughter's mission call to serve in California. Knowing my recipe for Lunch Lady Peanut Butter bars already filled a 13"x18" half sheet pan, I wondered if a 9x13 lemon bar recipe could be doubled and fit into a half sheet pan. You know, 9 doubled is 18, right?

First, a little bit about me. 
I am a daughter of a state-wide renown mathematics educator. My dad taught high school math/algebra/calculus for many years. He was on the State Mathematics Board. All through junior high and high school, every one of my math teachers, when they saw my name on their class list, said, "Are you Mr. Shell's daughter? The math teacher?" 

Mumbling, my response was barely audible, "Ummmmm....yeah..."

"He taught me math! You must be very good at math!" 

Ughhhh.

I am terrible at math. I use my fingers to count. It took me years before I figured that decimals, fractions and percents were actually the same thing. Calculators are my best friend. Tears have been shed over imaginary numbers and complex fractions. I squeaked by with barely a C in the lowest level math course offered in college. 

Nowadays, Google is my friend! I posed this very question to Google about doubling a 9x13 recipe and stumbled on King Arthur Flour's article, "When More Is Better," 

I was so relieved when the answer came right up at the beginning of the article: 
                                      multiply your recipe by 1.5

If you love math, read the rest of this article and revel in volume, square inches, percentages and all that fun stuff.

This recipe has the perfect ratio of crust to filling. The addition of cornstarch in the crust helps make it melt-in-your-mouth delicious. Did you know there is a recipe calculator available?

My Kitchen Calculator to the rescue!

*I highly recommend trying MEYER LEMONS, if they are available. They have a perfect citrusy blend of lemon and orange. They are seasonal, so if you can find them, I suggest zesting, juicing these lemons and freezing them for future lemon bars and other lemony recipes.  

1. Prepare your 13"x18" pan by lightly greasing it and lining it with parchment paper or aluminum foil. Lightly grease the foil/parchment paper. This will help get your lemon bars out of the pan easier.

2. Mix the flour, powdered sugar, and cornstarch in a large bowl or food processor.
     Add the room temperature butter squares and blend with a pastry blender, a fork or food processor, until it looks fine and crumbly.


3. Sprinkle the mixture into the prepared pan and level it with a rubber or offset spatula to create an even layer.

*Yes, I know this isn't a 13x18 pan ~ I couldn't find the picture! 


4. Press the mixture with a rubber spatula or sturdy glass firmly on the bottom and about 1/2" up the sides.

Refrigerate for 30 minutes.

Bake the crust in a preheated 350°F oven for 20 minutes.


5. Prepare the filling by whisking the eggs, sugar, salt and flour.


6. Add the lemon zest, juice and milk. Beat for 3 minutes until mixture is slightly thickened.


7. Pour the filling into the WARM crust and turn down the oven to 325°F. 

Bake for 18-20 minutes or till the filling feels slightly firm to the touch.

Cool the bars on a wire rack for 30 minutes.

Sprinkle with additional powdered sugar, cut with a sharp knife or pizza cutter and serve immediately.

Refrigerate any leftovers for up to 2 days.


print recipe

Lemon Bars for a Crowd 18"x13"
A large half-sheet baking pan (18"x13") is perfect for making a large batch of these perfect, sweet, & tangy lemon bars. The cornstarch in the crust helps create a melt-in-your mouth texture. I highly recommend using Meyer Lemons, which are a citrusy blend of a lemon & an orange. They are seasonal, so if you find them, juice and freeze them for these amazing cookie bars. Sprinkle a dusting of powdered sugar on cooled bars, just before serving.
Ingredients
  • CRUST
  • 2 2/3 cup all purpose flour
  • 1 cup powdered sugar, plus extra for dusting tops of lemon bars
  • 1/3 cup cornstarch
  • 3/4 teaspoon salt (omit if using salted butter)
  • 1 cup, plus 2 Tablespoons butter, cut into pieces, room temperature
  • FILLING
  • 6 large eggs
  • 2 cups granulated sugar
  • 4 1/2 Tablespoons all purpose flour
  • 3 teaspoons grated lemon zest (about 2 lemons)
  • 1 cup freshly squeezed lemon juice (about 4-5 lemons)
  • 1/2 cup milk (whole milk is best)
  • Pinch (about 1/8 teaspoon) salt
Instructions
1. Preheat oven to 350°F. Lightly grease a 13"x18" baking sheet pan and line it with parchment paper or aluminum foil. Lightly grease the top of the paper/foil.2. Mix together flour, powdered sugar, cornstarch (and salt, if using UNsalted butter) in a large bowl or food processor.3. Add the room temperature butter and using a pastry blender, 2 forks or food processor, mix till mixture is fine and crumbly.4. Sprinkle the mixture into the prepared baking sheet. Use a rubber or offset spatula to make an even layer and press firmly with the spatula or a sturdy drinking glass on the bottom and 1/2" up the sides of the pan.5. Refrigerate the crust for 30 minutes. Bake the crust for 20 minutes.6. Prepare the filling. Whisk the eggs, sugar, salt and flour in a medium bowl or electric mixer with whisk attachment. Add lemon zest, juice and milk. Beat for 3 minutes, until slightly thickened.7. Pour the filling into the WARM crust and REDUCE the oven temperature to 325°F.8. Bake for 18-20 minutes, or till the filling feels slightly firm to the touch.9. Cool the bars completely on a wire cooling rack, about 30 minutes. When bars have cooled, sprinkle tops of bars with powdered sugar and cut into bars. Serve immediately.Refrigerate any leftovers for up to 2 days.
Details
Prep time: Cook time: Total time: Yield: 4 dozen 2" squares


print recipe

Lemon Bars 9x13 size
Perfect, sweet, & tangy lemon bars, with just the right ratio of crust:filling. The cornstarch in the crust helps create a melt-in-your mouth texture. I highly recommend using Meyer Lemons, which are a citrusy blend of a lemon & an orange. They are seasonal, so if you find them, juice and freeze them for these amazing cookie bars. Sprinkle a dusting of powdered sugar on cooled bars, just before serving.
Ingredients
  • CRUST
  • 1 3/4 cup all purpose flour
  • 2/3 cup powdered sugar, plus extra for dusting tops of lemon bars
  • 1/4 cup cornstarch
  • 1/2 teaspoon salt (omit if using salted butter)
  • 12 Tablespoons (1.5 sticks) butter, cut into pieces, room temperature
  • FILLING
  • 4 large eggs
  • 1 1/3 cup granulated sugar
  • 3 Tablespoons all purpose flour
  • 2 teaspoons grated lemon zest (about 2 lemons)
  • 2/3 cup freshly squeezed lemon juice (about 3-4 lemons)
  • 1/3 cup milk (whole milk is best)
  • Pinch (about 1/8 teaspoon) salt
Instructions
1. Preheat oven to 350°F. Lightly grease a 9"x13" baking sheet pan and line it with parchment paper or aluminum foil. Lightly grease the top of the paper/foil.2. Mix together flour, powdered sugar, cornstarch (and salt, if using UNsalted butter) in a large bowl or food processor.3. Add the room temperature butter and using a pastry blender, 2 forks or food processor, mix till mixture is fine and crumbly.4. Sprinkle the mixture into the prepared baking sheet. Use a rubber or offset spatula to make an even layer and press firmly with the spatula or a sturdy drinking glass on the bottom and 1/2" up the sides of the pan.5. Refrigerate the crust for 30 minutes. Bake the crust for 20 minutes.6. Prepare the filling. Whisk the eggs, sugar, salt and flour in a medium bowl or electric mixer with whisk attachment. Add lemon zest, juice and milk. Beat for 3 minutes, until slightly thickened.7. Pour the filling into the WARM crust and REDUCE the oven temperature to 325°F.8. Bake for 18-20 minutes, or till the filling feels slightly firm to the touch.9. Cool the bars completely on a wire cooling rack, about 30 minutes. When bars have cooled, sprinkle tops of bars with powdered sugar and cut into bars. Serve immediately.Refrigerate any leftovers for up to 2 days.
Details
Prep time: Cook time: Total time: Yield: 2 dozen

11/13/12

4 Southern Pecan Pie & 6 Professional Pie Baking Tips


I have never been a fan of Pecan pie. Until now.

Why?  The filling is usually a lumpy, gelatinous mess, which to a texture eater like me, just doesn't settle well in my mouth.

It took a professional baker, who introduced me to this REAL Southern Pecan pie: a rich, buttery, silky and sweet filling with pecans and a crunchy cookie-like topping.

I just had to have the recipe ... and she gave it to me!

In a bowl, combine granulated sugar, light brown sugar and a couple tablespoons of flour (don't worry, the full recipe link is at the bottom of the page)...


Next, eggs, melted butter (not hot), evaporated milk and some coarsely chopped nuts.

Tip: Pan roast the nuts to bring out even more flavor!


Tip: Stir this with a spoon.  Why?  If you use beaters, it will cause too much of the sugar to dissolve and the top of your pie will burn while baking in the oven. (I did not know that!)


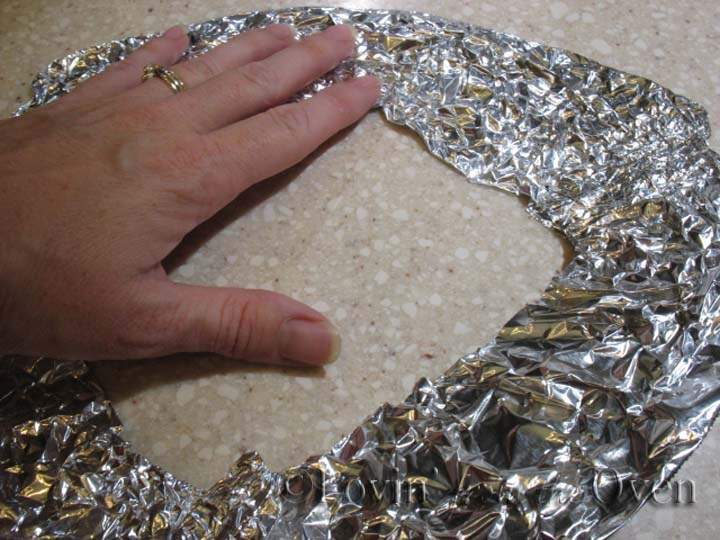
Tip: Next, create a 4" strip of foil that will fit around your pie.  It took three strips, ends pinched together, to go around this pie.  This will be your pie "shield" or "fence" that will prevent your crust from getting too brown while in the oven.  (I always thought the shield had to go on top of the crust)


Tip: This professional baker prefers to use glass pie pans.  Pour the filling in a premade, uncooked pie crust.

This is as full as I dared ~ this recipe will fill a deep pie dish. Luckily, I had two smaller 4" pie crusts in the freezer and pulled those out to hold the extra filling.

Tip:  Yes, you can freeze pie crusts!


Put the pie in a preheated 350°F oven and wrap the foil around the pie, pinching the ends and creating your pie "fence." Bake the pie until the middle no longer jiggles when you try to shake it.  During the last five minutes, remove the foil to allow the pie crust to brown nicely.

It is better to overbake than underbake, to make sure the pie crust gets cooked.

Tip:  Remove the pie from the oven, but DO NOT CUT INTO THE PIE WHILE WARM OR HOT!  The pie must be completely cooled before cutting or the filling will run ...


This pecan pie will be puffy and brown, but will settle a little bit during the cooling process.

I was thrilled that this pie had set ~ no runny, goopy mess!

Ohhhh .... look at that flaky pie crust ... I know you want a piece!


This is an extremely rich pie ~ you will want to cut it into much smaller pieces than you would normally cut a pie.


This recipe is a keeper ~ pin, share and made it for your next holiday meal!

Southern Pecan Pie

(4x6 recipe card download)     (full page printable recipe)


Five Pies to Try for Thanksgiving

Prebaked Pie Crust: Blind Baking

Double Pie Crust

Perfect Single Pie Crust

6/26/12

7 How to Eat Chocolate


I was invited with a group of bloggers to attend Chocolate 101:  Introduction to Fine Chocolate held at Tony Caputo's in Salt Lake City

We all love chocolate, don't we?  I was sure this would be an easy class, right?

Yes, it was easy, but it opened up my eyes and tastebuds to a whole new world of chocolate.

First, we were given a brief history of chocolate and where we get our chocolate.


Next, we were given some small samples of chocolate to taste. 

Before we could taste it though, we had to:

Look at the chocolate.

Smell the chocolate.

Pop it into our mouths and let it melt.  No chewing allowed.

Then we had to breathe in through our mouth and out our nose to get the full flavor(s) of the chocolate.

Try it sometime.

It will change your world.


What is quality chocolate?

Not all dark chocolate is considered quality chocolate, so be careful...

Fine chocolate should not smell like the Easter Bunny or Santa Claus.  It should smell like cacao.

It should melt in your mouth.

Breathe in the flavors while breathing out through your nose.  You should be able to detect earthy tones, lavender, coffee, citrus or any other components of the chocolate.  


These classes are taught monthly by Matt Caputo, a self-made chocolate connoisseur.  He samples chocolates from all over the world, eating anywhere from 1/4 lb. to 1 lb. of chocolate daily.  How does he do it?  Matt explains that you don't need a lot of quality chocolate before it becomes filling.


Did you know that one of the top chocolate makers is here in Utah?  Amano Artisan Chocolate is located in Orem Utah, producing quality chocolate for Tony Caputo's and many other establishments around the world.

At the end of the class, we sampled this chocolate cake....this is a half slice.  It was so moist and I could tell the icing had notes of lavender in it.


Next, we sampled this:


 Oh my.  My heart stopped.  My mouth wanted this moment to last forever...

Flaky layers of pastry sourround a mound of chocolate ganache in the middle, encased in  a crunchy, crispy, caramelized top....

What is this incredible pastry, you ask?


This French pastry (pronounced "Queen Ahmaan") is worth the trip to SLC.

While you're there, pick up a couple of bars of chocolate and sign up for a chocolate tasting class!


Worth reading:

Fine Chocolate Does Not Come From Beligium, by Janet Thaeler, organizer of this event!

Caputo's Chocolate Class, by Cariann of Sweet Basil

Want to buy some chocolate online?  Caputo's Fine Imported & Gourmet Chocolate Bars

You can follow Caputo's on Pinterest  , Facebook  and read their blog.


11/18/11

9 5 Pies to Try for Thanksgiving


Do you love pie?

Have you ever made Fresh Pumpkin pie?  If you do, you will never go back to the canned stuff.

How about a Dazzleberry pie?  This is better than the frozen stuff from the store...


There's nothing wrong with an Caramel Apple Crumb pie at Thanksgiving....it is always a favorite.  It's even better with a scoop of vanilla bean ice cream...


My favorite?  German Chocolate Cream pie.


How about a Southern Pecan Pie? This recipe post also include 6 Professional Pie making Tips!


If you have pie crust phobia, check out my Perfect Pie Crust 101 and Pre-Baked pie crust tutorials.

I'm ready to try a new pie.

What should I make next?

11/19/10

2 Pre-Baked Pie Crust 101: Blind Baking

Blind baking?  No, this recipe does not require a blindfold.  Whew.

Sometimes, a recipe will call for a pie crust that is already baked or partially baked.

This crust would be perfect for any custard type pie, such as coconut  or banana cream, butterscotch,  or lemon meringue.


First, follow the recipe and instructions for a single crust pie.

The post there describes a fluted edge.

I tried to make a rope-like edge like Cathy's post here...

Pinch and twist....pinch and twist...

Doesn't quite look the same, does it?

I just figured out why.


I went in the wrong direction.


Yup.

I'm directionally impaired.  I officially need a GPS for baking...

If you want yours to look like Cathy's and you're right handed, go in a clock-wise direction around the plate.

That's down and to the right.....

Next,  prick the bottom and sides of your pastry with a fork...

Don't go super crazy and poke a zillion holes...a dozen or so on the bottom and some fork pokes about 2" apart on the sides will do.

Stick it in the freezer to chill for 30 minutes.  This will help prevent shrinkage and the sides from slumping.

Fire up your oven.  Get your pastry out of the freezer and put a piece of parchment paper, large coffee filter, or heavy duty aluminum foil on it.

Fill it to the brim with dry beans or rice. 

Make sure the beans/rice fit snugly along the sides.  This is what "Blind Baking" a pastry is....you can't see the bottom, can you?

Pop it in the oven for 20 minutes.

Remove the beans and liner. 

Save the beans in a separate container to re-use for your next pie crust ~

Now you can see the bottom...looks a little pale, don't you think?

Return the pie crust to the oven for another ten minutes to brown up the bottom.   Ahhhhhh.....That's better!

Let it cool on a rack for at least an hour.

What are you going to put in your pre-baked pie crust?


Pre-Baked Pie Crust
(4x6 recipe download)    (full page printable recipe)

11/17/10

3 Double Pie Crust 101: Dazzleberry Pie

Welcome to Part Two of my pie crust tutorial!

Dazzleberry pie, a family favorite similar to Marie Callender's Razzleberry pie, is so easy to make.  Are you ready?


First, make your pie crust and divide it into two piles.

Check this POST to learn how to make and shape your pie dough.


For a double pie crust, you will need to trim the dough evenly with the pie plate.

This picture, from the single pie crust, is trimmed 1/2" from the edge.  For this pie, you'll want the knife right on the edge of the plate.

Cover with plastic wrap and put the shaped pie into the fridge.

Prepare your filling.

In this case, I have frozen raspberries and blackberries.


Add sugar


Instant tapioca,

(not the regular tapioca or pearls)


Lemon juice and salt.

You need the perfect balance of acidity and sweet.

A pinch of salt is a baker's secret to bring out the sweetness of the fruit.


Give everything a quick stir and let it sit.

Don't worry, all this will break down into juice in about 15 minutes.

Now's the perfect time to prepare our top crust ~


After rolling the second pie dough into a rough 12" circle,  you can cut some "vents" with a table knife.

Vents are necessary.  You don't want a fruit explosion in your oven, do you?

This wheat design is one of my grandmother's...passed down to me, and now to you.
 Fill your trimmed pie crust with your juicy berries and dot it with butter.

Why butter? 

Because it's the right thing to do.


You can roll up your top crust with your rolling pin, or you can fold it gently in half.


Either way.

You pick.

Lay it on top of your filling...


and trim the dough to 1/2" from the edge of the pie plate.


Now see how the top layer slightly overhangs the second layer?

That's what you want.

Fold the top layer over the bottom layer,


and press it down.

Do this all the way around your pie.

To flute your edge, use two fingers of one hand and the finger of the other to bring the edge of the pie crust up.

To create a shiny, pretty top, brush the surface of your pie with an egg wash (one egg mixed in with a little bit of water) or some cream.

Sprinkle the top with Turbinado or coarse sugar.

Regular granulated sugar will melt, so use the coarse stuff ~

Create a pie shield from three strips of aluminum foil joined together.

Place lightly on top of your pie.


This will keep the crust from darkening.
Bake your pie on a baking sheet to catch any filling that may spill over.

Look for bubbling in the slits to know when your pie is done.


Cool for at least two hours.  This will help the filling set.

Totally worth the wait!

If, and I mean if, you have any leftovers, cover and store in the fridge.

Want to make it?  I know you do.  Here are the recipes ~


Double Crust Pie Dough        
(4x6 recipe download)     (full page printable recipe)
Dazzleberry Pie
(4x6 recipe download)    (full page printable recipe)

Related Posts Plugin for WordPress, Blogger...
Pin It button on image hover