

One of the FIRST things I learned to do with my new Instant Pot pressure cooker was to make yogurt. Don't get me wrong, I still love and use my Cuisinart pressure cooker, but it doesn't make yogurt! There are SO many ways to make yogurt: yogurt maker, slow cooker, convection oven, heating pad, etc.
There are several pressure cookers that have a Yogurt function. GoWise , Instant Pot Duo, and the Instant Pot Smart are just a few that I have heard people use to make yogurt. So, if you have a yogurt maker or a pressure cooker with a yogurt function, let's get started!
UPDATE! I now have a complete Instant Pot Yogurt for Newbies Reference Guide! This includes every. single. thing. you would ever want to know about yogurt! I spent several months helping answer many, many questions, and now I have all the answers in one place, at your fingertips! Bookmark this page and refer to it with any questions you have. Enjoy!
UPDATE! I now have a complete Instant Pot Yogurt for Newbies Reference Guide! This includes every. single. thing. you would ever want to know about yogurt! I spent several months helping answer many, many questions, and now I have all the answers in one place, at your fingertips! Bookmark this page and refer to it with any questions you have. Enjoy!
If you want an even easier method for making yogurt that has fewer steps (pour milk/add starter/push yogurt button) you may want to check out this Cold Start Method that uses ultra pasteurized milks, like Fairlife milk.
Here's a video that I did that shows YOU how easy it is from start to finish!
Here's a video that I did that shows YOU how easy it is from start to finish!
And yes.
You get to see me in a bathrobe....
First, it is handy to have an digital thermometer. I currently have the LavaTools Javelin Digital thermometer and and a Thermapen digital thermometers. They both work accurately and read temps within 3-4 seconds.. I use this to measure the temps of all my cooked meats and check the temp of my yogurt. You can use any thermometer you have, as long as it is accurate and reads the temps of 90°F-190°F.
There are 2 temperatures important to making yogurt and it is helpful to know and measure with an accurate thermometer to ensure a successful batch of yogurt.
Next, find some yogurt. Yes, it takes yogurt to make yogurt!
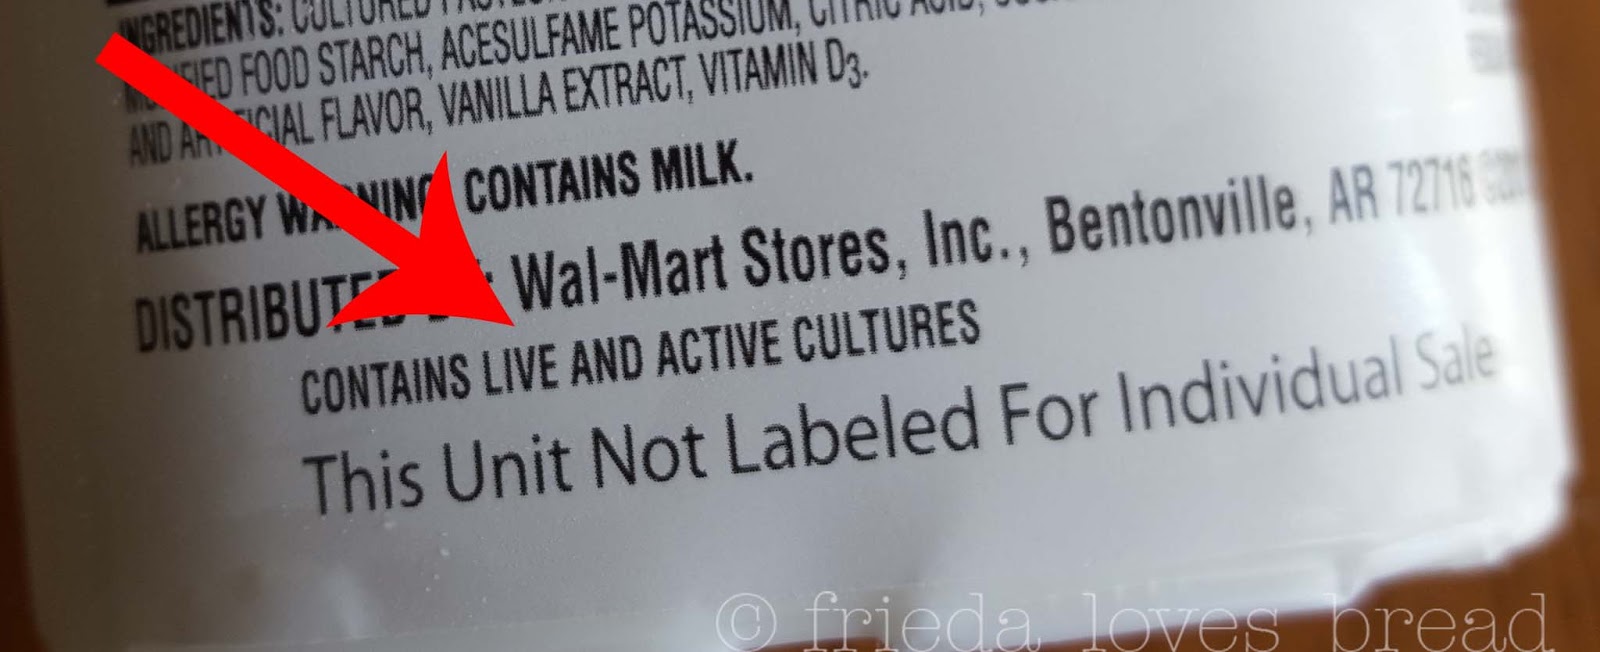
You can use any brand, or style of yogurt, just look for one that says CONTAINS LIVE AND ACTIVE CULTURES. *made with live/active cultures will NOT work. Your yogurt needs to say "contains" or list LIVE cultures in the ingredients.
- Fat content doesn't matter.
- Sugar content DOES matter. If you are using a flavored yogurt, look for one that has 9 grams of sugar or less per serving. Excess sugar can inhibit or slow down the culturing process.
- Make sure it is FRESHLY OPENED - once opened, the active cultures will die in less than 7 days, even though your yogurt is still good to eat.
I'm using Good Value Greek Yogurt from Walmart. It comes in a small 4 pack and has been working well for my yogurt. Fresh yogurt works best!
You don't have to purchase yogurt from the store. You can also get freeze dried starters online or after your first batch, reserve a few Tablespoons for your next yogurt. You can reserve some yogurt from your own yogurt as a starter, but it only lasts 5-6 generations. Some people make a batch of yogurt and freeze it in ice cube trays or silicone cups and let it thaw before using.
Milk. I have made yogurt using Whole, 2%, and 1% cow's milk from the store. I have found that the final yogurt yields more and is creamier with whole milk. I still get great results with 2% and prefer it over 1% or skim. You can use skim and low fat milks; the yield will be less if you strain it. You can use raw milk - it may be a little thinner than pasteurized milk, but it will work.
For your first time making yogurt, you will want to avoid using ultra pasteurized milk. Ultra pasteurized milks are heated to 280° for a few seconds, killing 99.9% of the bacteria in the milk, rendering it too sterile to culture yogurt properly. Organic milks are often ultra pasteurized. If all you can find are ultra pasteurized milk in your area, start with a half gallon and see if it works for you. Some ultra pasteurized milks work, some don't. It's hit and miss for making yogurt. Once you have made a successful yogurt with regular, pasteurized milk and are familiar with the process, try your favorite organic or ultra pasteurized milk and see if it works.
Lactose free milk can be used. Lactaid and Fairlife milks have been used with success. If you are highly lactose intolerant, you may want to try one of these milks. If you are lactose intolerant, but can tolerate Greek style yogurt, you will want to strain your yogurt. Straining the yogurt removes much of the lactose along with the whey. Another option is to incubate your yogurt for 15 or more hours, in which all the lactose is consumed by the cultures and result in a tangy, lactose free yogurt.
If you cannot have dairy or wish to make a Vegan yogurt, by all means you can! Folks have used Coconut Milk, Soy, Almond Milk, and others. Plant based milks need a thickening agent to help make yogurt, so an additional ingredient is needed.
This is a traditional heat/cool/add starter and incubate method. If you want a simple, no heat, no temp taking, dump and start method of using Fairlife milk to make yogurt, check here! This cold start method is only for UHT/UP milks. (Some UP milks work, some don't. Fairlife milk has worked).
Are you ready?
I like to start my yogurt about 45 minutes before I go to bed. This includes the heat up time, cool down time and stirring in the yogurt starter.
I like to start my yogurt about 45 minutes before I go to bed. This includes the heat up time, cool down time and stirring in the yogurt starter.
1. Set aside 1 Tablespoon of yogurt into a small bowl.
Make sure all your tools, and equipment are clean and ready to use. Use a clean liner, free of any soap residue.
**If your liner/pot are warm from previously cooked food, make sure you use a COLD liner and Pot. If it's still warm, the heat sensor at the bottom of your pressure cooker will not register the temp of your milk correctly and it will be more difficult to reach the temp on one boil cycle.

TIP: Put some ice cubes in your pot and let it sit for a few minutes. Dump the ice water out, but do not dry the pot. This tip also helps keep the cooked milk from sticking to the bottom of your pot!

I poured out the heated milk just to show you how little milk solids are cooked onto the pot. It really works!

2. Pour 8 cups (half gallon) of milk into the pressure cooker. I have made a full gallon before, but it is easier to make/strain smaller batches and it doesn't take as long to heat up or cool down.

3. Move the pressure valve to the SEALING setting. Make sure your sealing ring is in! If you are worried about a smelly ring transfer, you can use a glass lid from your pots or even a glass pie plate lid for the entire process. I use a separate sealing ring for yogurt/cheesecakes/rice.

4. Duo & Smart Models: Push YOGURT and quickly push ADJUST.
At first, your screen will read 8:00, but if you push ADJUST within 5 seconds, it should say BOIL.
**If you accidentally push ADJUST twice, your screen will say 24:00 you will get a lower temp that will not work for your yogurt. Push Keep Warm/Cancel and repeat step 4, till you see the words BOIL and MORE on the display.
ULTRA MODEL:
Turn the dial to YOGURT
Press the dial to select
Turn the dial to TEMP
Push the dial to select
Select HIGH temp for BOIL
Push START and the milk will heat.
When the boil cycle has ended, the display will show YOGT.
DUO PLUS or VIVA MODEL:
Select YOGURT program
Press the YOGURT key repeatedly until you see MORE on the display
In 10 seconds, heating will begin.
When the boil cycle has ended, the IP will beep 3 times and display YOGT.
MAX MODEL:
1. Select Yogurt.
2. Touch the Temperature field repeatedly to toggle between Boil, Yogurt, and Custom.
3. Select Boil.
4. Touch Start.
 |
| Yogurt + the Adjust button will heat up your milk |
Half gallon will take about 25 minutes to reach 180°F or higher.
Full gallon of milk will need whisking every 10 minutes and take 50 min to reach 180°F.
Full gallon of milk will need whisking every 10 minutes and take 50 min to reach 180°F.
This is where you test it with the thermometer. If it doesn't reach 180°F, you will be fine.
180°F is only if you want a custard style yogurt. You can still make a great yogurt without reaching this temp.
The IP was tested to reach 180°F temp with a half gallon of milk. If your Instant Pot is not reaching the 180°F temp the first time on the boil cycle, try the following tips:
- Bring your milk out 30 minutes before starting.
- Start with a cold pot - put some ice cubes in to cool it quickly.
- Whisk every 10 minutes during the boil cycle.
- Use a well fitting glass lid or the IP lid/seal/vent closed.
After following the above tips, you can carefully use the Saute LOW setting, while constantly whisking your milk, till it reaches 180°F.
Do you REALLY need to heat your yogurt?
First, heating the milk will kill any wild bacteria you may find, especially if you are using raw milk. These bacteria can compete with your yogurt loving strains of bacteria and affect your final outcome.
Second, whey, an abundant protein in milk, is fully denatured at 180°F and results in a firmer, thicker, custard style yogurt.
So, if your milk is pasteurized and you like a thin set yogurt, by all means, skip the initial heating step. You can still skip this boil step and strain your yogurt for a silky texture.
If you don't want to go through the steps of heating your milk, cooling, taking the temp, you may want to try the Fairlife milk Cold Start method of making yogurt.
If you don't want to go through the steps of heating your milk, cooling, taking the temp, you may want to try the Fairlife milk Cold Start method of making yogurt.
5. Next, bring your heated milk down to a reasonable 110°F. This temperature, is important.
Too hot, and it will kill your yogurt starter. Too cold, and your starter won't work quickly enough to outrun the bacteria that can spoil your milk. If your milk temp drops below 90°F, warm it back up to 110°F. It is fine to add your starter in the 90°F-110°F range.
Scrape off any "skin" from the top if you want a smooth yogurt.
You can let it sit at room temp for awhile to naturally (takes an hour for a gallon of milk) bring down the temperature, but I prefer to set the liner of heated milk in a larger bowl filled with ice water. You can use your sink filled with cool water or gel ice packs to help cool your milk quickly. The rapid cool down method does not harm your yogurt in any way.
RAPID COOL DOWN: Takes only 5 minutes for a half gallon of milk, 10 minutes for a full gallon.
RAPID COOL DOWN: Takes only 5 minutes for a half gallon of milk, 10 minutes for a full gallon.
Stir gently and constantly, WITHOUT SCRAPING THE BOTTOM, until the temperature hits the "zone" of 110°F. There are cooked milk solids on the bottom of your pot and you don't want little bits of cooked milk in your creamy, smooth yogurt.
Stirring while it is cooling will prevent "hot spots" in your milk and give you a more accurate temperature.
Stirring while it is cooling will prevent "hot spots" in your milk and give you a more accurate temperature.
 |
| Use an ICE WATER bath to quickly bring the temperature down. |
 |
| Cool down to 110°F |
Remove the liner from ice water and wipe the outside of the liner with a clean kitchen towel.
 |
| Temper your yogurt |
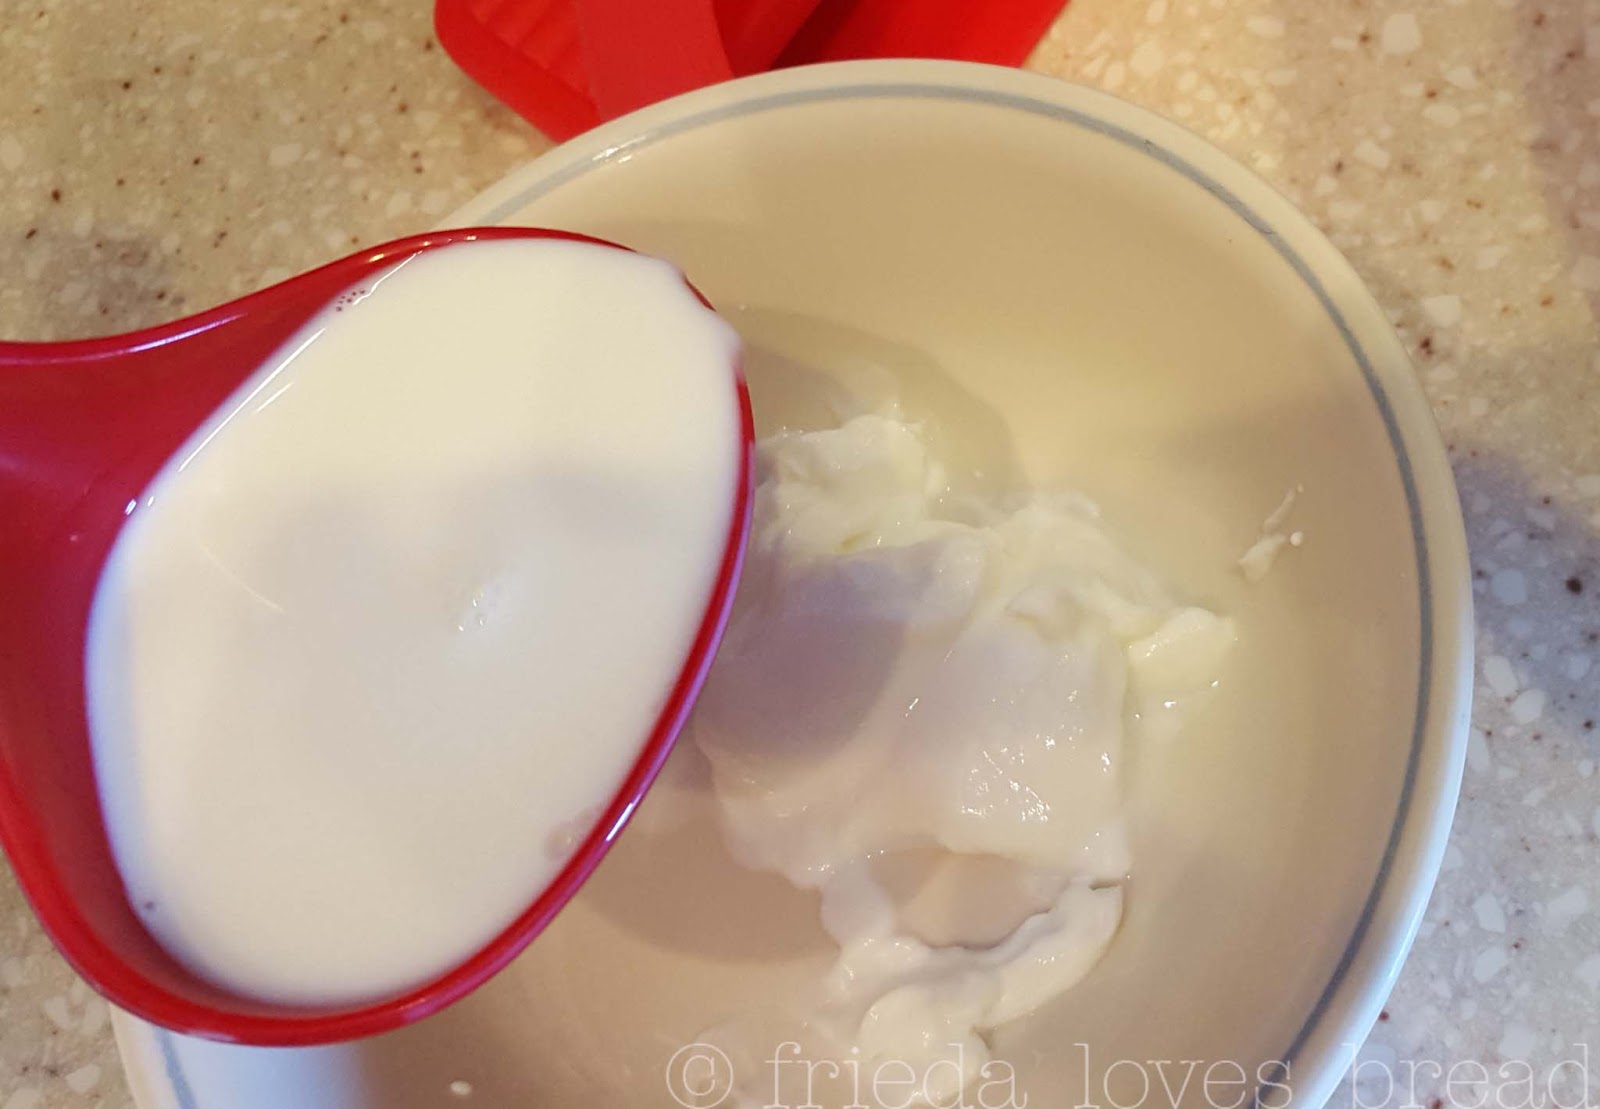
6. Take some cooled down milk and stir it into your 1 Tablespoon of yogurt starter. Mix till smooth.
Pour the warmed up starter back into the pot and give it a quick whisk. Don't scrape the bottom.
Put the liner into the Instant Pot.
Put the liner into the Instant Pot.
 |
| This is the display you want to see to make successful yogurt. 8:00 and the word NORMAL. |
7. Duo & Smart Models: Push the YOGURT button. It will say 8:00, and NORMAL meaning your yogurt will incubate for 8 hours.
Your yogurt will begin to set around hours 5-6 and will be mild. If you want a "tangier" yogurt, you can push the (+) button and increase your time to 10 hours or longer.....8 hours is a good place to start.
That's it! Go to bed. Say "Good night" to your yogurt.
** If your IP keeps going back to the BOIL cycle, it has a memory of your last setting. Keep pushing the adjust button till you see 8:00 and normal on your display. The Adjust button will toggle between the MORE/NORMAL/LESS settings and the BOIL/8:00/24:00. Stop when you see 8:00 and NORMAL.
1 min video that shows how to find the Yogurt Normal Cycle on the Duo:
ULTRA MODEL:
(2018 update: if you have the newest model of the Ultra, there is no Medium setting for yogurt. You will need to use the Custom setting)
Turn dial to YOGURT
Press to select
Press the dial again to set TIME (5-24 hours, depending on how tart you like your yogurt)
Press the dial to confirm
Turn dial to TEMP (LOW, MED, HIGH, Custom)
Select MEDIUM (107°F) or CUSTOM (you can choose between 100°F-110°F)
Press dial to confirm
Press the START button.
Incubation will start.
When cycle has ended, the display will show YOGT.
DUO PLUS MODEL:
Select YOGURT NORMAL
Press +/- to set incubation time
When finished, the IP will beep and display YOGT
MAX MODEL
1. Select Yogurt
2. Touch the temperature field repeatedly to toggle between Boil, Yogurt, Custom.
3. Select Yogurt.
4. The yogurt setting will default to 8 hours. To change the time,
- Touch the Hours field
- Turn the central dial to adjust
5. Touch Start to begin.

Ta Da! Here is my yogurt at the 8 hour mark. But...
If you stir it, the yogurt will get thin. Why? Whey. There is liquid whey, floating around in the yogurt and when stirred, it will get thin. Not soupy, but thin - more like a traditional style yogurt.
8. If you want to have a THICK Greek Style yogurt, you will need to strain it.
*If you use cheesecloth, you will need to use several layers of cheesecloth OR to put your pot of yogurt into the fridge to chill completely for 4-6 hours. This "sets" the yogurt and won't run through the cheesecloth. It will take longer to strain chilled yogurt - about 6-8 hours.
You can strain right after incubation using any of the following material over a strainer:
I like to use large coffee filters because they don't let ANY milk solids through. I can strain right away without chilling first.
*If you don't want a super thick yogurt, put your liner in the fridge and let chill completely.
*If you use cheesecloth, you will need to use several layers of cheesecloth OR to put your pot of yogurt into the fridge to chill completely for 4-6 hours. This "sets" the yogurt and won't run through the cheesecloth. It will take longer to strain chilled yogurt - about 6-8 hours.
You can strain right after incubation using any of the following material over a strainer:
- heavy duty paper towels - don't use cheap ones, they'll tear and shred. Bounty is a good one.
- xlarge coffee filters - 1 Gallon Size Half Gallon Size Unbleached Half Gallon Size
- clean white t-shirt
- Flat baby cloth diapers
- flour sack towels
- muslin fabric
- nut milk bags
- kitchen linen or tea towels - not the fuzzy kind
- Men's cotton handkerchief
- Cotton Pillowcase
- Euro Cusine Yogurt strainer - this holds half gallon of milk perfectly
I like to use large coffee filters because they don't let ANY milk solids through. I can strain right away without chilling first.
*If you don't want a super thick yogurt, put your liner in the fridge and let chill completely.
I like to use coffee filters as I have a bunch ... er.... hundreds of them on hand. Use and dispose. Easy.

I line my IKEA strainer with coffee filters and set it in my OXO Salad spinner bowl. Works like a charm. This is why I only use 1/2 gallon of milk at a time. I don't have a larger strainer or larger bowl and it's hard to divide a whole gallon's worth of yogurt into two strainers.
*If you want to strain a gallon of yogurt, these Commercial Coffee Filters will be perfect with this 5 quart stainless steel strainer!
*If you want to strain a gallon of yogurt, these Commercial Coffee Filters will be perfect with this 5 quart stainless steel strainer!
Cover your yogurt with plastic wrap or a large dinner plate and immediately strain for 2-3 hours in the fridge. 4 hours will give me a cream cheese like texture.
I end up with approximately 4-5 cups of thick, creamy yogurt and about 4 cups of whey.
If you feel that your yogurt is too thick, you can always add some whey back in.
If you feel that your yogurt is too thick, you can always add some whey back in.
Don't throw out the whey! I like to freeze my whey to use as STARTERS for my yogurt. Yes, it contains the same live cultures that your yogurt has - FREEZE RIGHT AWAY for best results.
Here are 18 Ways to Use Whey. 36 Uses for Whey
Here are 18 Ways to Use Whey. 36 Uses for Whey
9. Whisk your yogurt smooth and flavor your yogurt.
Now is the time to sweeten or flavor your yogurt. Take a taste. You may enjoy it plain, with some fruit.
- I like to set aside some thick yogurt to use as STARTERS for my next batch - freeze right away in tablespoon portions in an ice cube tray. They will last up to 6 months! Bring out the cube at the beginning of the boil cycle at room temp and it will be thawed enough to mash when your milk has cooled.
- Take some thick unflavored yogurt to use as a mayo or sour cream sub. Works great in sandwiches, or other recipes.
I like to use my 8 oz. jelly canning jars to store 5 oz of yogurt in each one. Weighing with a scale ensures that each of my boys have the same amount and no fighting over the "largest one."
I found the plastic reusable lids at Walmart. You can also find them on Amazon or at Target in the canning section.
Having a "space" above the yogurt lets my family choose any toppings, mix-ins or flavorings of their choice. Honey, brown sugar, granola, berries, etc. My mom likes to sprinkle a little bit of Lemon Crystal Light drink mix into hers. Whey protein powder, chocolate syrup and chocolate drink mix powders are also favorites. Experiment and have fun with different flavors!
Yogurt making is simple and you will be easily making it weekly for your family.
10. Enjoy!

Enjoy!
Instant Pot Greek Style Yogurt
Greek Style yogurt is simply strained yogurt that is thick and high in protein. If you want a more traditional consistency, you can skip the straining step and chill your yogurt in the fridge.
Homemade yogurt has such a clean taste and the flavoring options are only limited to your imagination! If this is your first time making yogurt, start with the smaller, half gallon batch. Make sure your yogurt is very fresh, and opened just before starting your yogurt.
Homemade yogurt has such a clean taste and the flavoring options are only limited to your imagination! If this is your first time making yogurt, start with the smaller, half gallon batch. Make sure your yogurt is very fresh, and opened just before starting your yogurt.
Ingredients
- HALF GALLON BATCH
- 8 cups Whole, 2%, 1% or Skim Milk
- 1 Tablespoon plain yogurt, room temperature
- FULL GALLON BATCH
- 1 gallon (16 cups) Whole, 2%, 1% or Skim MIlk
- 2 Tablespoons plain yogurt, room temperature
- several ice cubes
- EQUIPMENT
- Thermometer - test for accuracy prior to starting
- Large mixing bowl with ice water
- Ladle
- Whisk
- Strainer, colander or sieve
- Straining material: coffee filters, heavy duty paper towels, flour sack towel, or several layers of cheesecloth
- If making a gallon of yogurt, you may need 2 sets of strainers or a large nut milk bag
Instructions
1. Set out 1-2 Tablespoons of plain yogurt in a small bowl. Set aside. OPTIONAL: Put several ice cubes into the Instant Pot liner. Let the ice sit for a few minutes; swish to coat the bottom of the pot, and dump out the ice/water. Do not wipe the pot dry. 2. Pour your milk into the Instant Pot liner. Cover, set vent to Sealing. You can choose to use a glass lid or lid from your pots, pie plate, dinner plate or a flat silicone suction lid for the entire process.3. Select the Yogurt More/Boil setting, according to your model. Check my post for directions. If you have the Ultra, HIGH is the setting you need.
Cycle will take 20-25 minutes for a half gallon; 50 minutes for a full gallon of milk.4. At the end of the boil cycle, whisk the milk and take the temperature with a thermometer. It should read 180°F or higher. If there is a "skin' on top of the milk, carefully remove it with the whisk.5. Remove the pot of hot milk and set it over the bowl of ice water. Every couple of minutes, stir the milk gently with a whisk, being careful not to scrape the bottom of the pot. Take the temperature until the milk reaches 100°-110°F. Remove the pot from the ice water. Wipe the outside of the pot dry and place it into the Instant Pot. 6. Ladle 1 cup of the cooled milk into a small bowl. Stir your room temperature yogurt until completely dissolved. Pour this mixture into the pot of milk in the Instant Pot.7. Cover, close the pressure valve (Sealing) or use alternate lid as described above. 8. Incubate your yogurt, selecting the Yogurt Normal setting as per Instant Pot model. For the Ultra, Medium is the setting you need.9. Incubation Time: Yogurt setting automatically defaults to 8 hours. You can use the +/- buttons to increase/decrease the time. You can incubate for as little at 5-6 hours (mild yogurt) or as long as 24 hours (very tart yogurt). 8-10 hours is the average incubation time. Display Timer will count UP.10. When the incubation cycle finishes, your Instant Pot will beep and display YOGT. Your yogurt should look set, like a soft Jello. You can immediately pour your warm yogurt into your lined strainer, set over a larger bowl to catch the whey, cover and put in the fridge for 4-6 hours. Larger batches of yogurt will take 8-10 hours to fully chill. If your yogurt is too thick, you can whisk some whey back in, a little bit at a time, until you reach your desired consistency.Flavor: Add 1 teaspoon of vanilla extract and 2-4 Tablespoons of warmed honey or granulated sugar. Refer to my IP Yogurt Guide for Newbies for many other flavoring ideas!Store your yogurt in a glass or plastic container, with a well fitting lid. Yogurt will keep for at least 2 weeks.Whey: clear whey will keep in the fridge for up to 6 months.Unsweetened yogurt & whey can be frozen to use as starters for future batches of yogurt. Freeze in tablespoon portions right after chilling/straining your yogurt. When frozen, they will keep viable in the freezer for up to 6 months.
Details
Prep time: Cook time: Total time: Yield: Varies

Thank you so much for this post and video! I've had an InstaPot for 3 years but was too afraid to make yogurt. Your video took the fear out of it and I was able to see at every stage that things were going like they should. I have just made my 4th batch of yogurt. My husband takes it to work every day. I was buying organic yogurt and it was so expensive, but I am using organic milk for my batches and it has cut the price by a good third. Every time a make a batch, I am thankful for your instruction so I thought you should know that:)
ReplyDeleteYou are most welcome! I'm glad my video helped you make some amazing yogurt. Thanks for sharing your kind review. 🙂
DeleteThanks for the clear instructions that have led to many delicious batches of yogurt! I have heard people mention adding flavored creamer or sweetened condensed milk to a batch. Would I do this before heating? While adding the starter? Or when the batch is complete? I'm using the boil method because I have no yogurt button. Thank you!
ReplyDeleteYou would heat your milk to 180°F, add your creamer to help cool the milk somewhat,cool to 110°F, and add your starter. Creamer is ultra pasteurized and does not need to be heated with the milk. 🙂
DeleteCool, I'll add my sweetened condensed milk after boiling then.
DeleteI don't have a yogurt button. How do I make yogurt without it.
ReplyDeleteYou can follow the directions in this recipe, only if you are using regular pasteurized milk, you'll need to heat the milk to 180°F, cool to 110°F and add your starter. There's some incubation tips in the recipe - look for the words, "No Yogurt Button." :-)
Deletehttps://www.friedalovesbread.com/2017/06/easy-cold-start-yogurt-no-boil-method.html
Does this yogurt tastes better than store packaged yogurt? Or is it just the economics of it that would make you want to make it at home? I've never made yogurt and your instructions were so clear and it looks simple enough for a new cook like me.
ReplyDeleteThank you- it is very easy to make. In my opinion, it tastes superior to store bought yogurt. Store bought yogurt tastes "cooked," while homemade tastes much cleaner. You can also control how mild/tangy your yogurt will be by choosing a starter that you like and adjusting the incubation time. Longer incubation times will make yogurt more tart.
DeleteI follow your instructions with 2 exceptions: for 1/2 gallon, I use 2 Tbsps of starter (dry powder or regular Greek yoghurt) and at 180°F, I keep it there for 30 minutes. After overnight in the fridge, the top 1/3 is creamy and firm. As I go lower down in the Pot, it thins out (not quite runny)and gets a bit grainy and lumpy. Taste is fine. Thereafter, every time I open the container to get a portion, I find 2-3 Tbsp of white liquid that looks like milk but is a bit thicker. This very consistent and I have many 30 or more batches with same results. What am I doing wrong?
ReplyDeleteHi - 2 Tablespoons of starter (fresh yogurt) is in the correct range for 8 cups (half gallon) of milk. The 180°F temp is to denature, or change the milk proteins for a thicker yogurt. Holding your milk at this temp does *not* continue the denaturing process, but does allow for evaporation, which in theory, creates a thicker yogurt. However, holding it at this temp can cause texture issues that you describe, a grainy or gritty texture, especially near the bottom of your pot, which is near the heat source. Heating your milk slowly and evenly is the key to a creamy texture. The white liquid could be a mix of whey/yogurt or liquid from low fat milk.
DeleteYou may want to try only heating your milk to 180°F, cooling to 110°F (and test your thermometer for accuracy), adding your starter, and try straining your entire batch of yogurt for an even consistency throughout. If your yogurt is too thick, you can whisk some whey back into your yogurt. It is common for strained yogurt to be lumpy, but it will smooth out with a quick whisk. Hope this information is helpful! :-)
I use this method with one exception, I start with whole milk powder. I can use warm water to mix with the powder in an 8-cup measuring cup.and then follow your instruction to make the yogurt. using the boiling method.
ReplyDeleteThank you for the clear instructions!
I do have a question, why would it be sealed if boiling the yogurt? I read elsewhere, yogurt boiling, the pressure isn't used, so wouldn't matter either way.
You are most welcome! Although yogurt doesn't use pressure, I prefer to move the pressure valve to the sealing position in both the boil and incubation settings to get the milk to temp and to keep the cultures warm and happy. :-)
DeleteThank you! I used a sealing ring just for the yogurt and it was happy and made me nice, creamy yogurt!!
DeleteI use this method with one exception, I start with whole milk powder. I can use warm water to mix with the powder in an 8-cup measuring cup.and then follow your instruction to make the yogurt. using the boiling method.
ReplyDeleteThank you for the clear instructions!
I do have a question, why would it be sealed if boiling the yogurt? I read elsewhere, yogurt boiling, the pressure isn't used, so wouldn't matter either way.
Sooo....I tried it. When it beeped Yogt I opened it and it held up a spoon and seemed solid...until I started pouring it out for straining. It’s like it was already separated? I assume that’s not normal?
ReplyDeleteYou are correct, that doesn't sound right. Usually when that happens, it means that your starter was too weak or that your IP did not incubate at the correct temperature.
DeleteIf you incubated using Yogurt Low/Less, that can be the culprit. This setting is too low to culture yogurt properly. If you are certain that you incubated using the correct yogurt setting (normal/Medium/custom), then you will want to test your IP yogurt setting with 4 cups of water, incubate 45 minutes and use a thermometer to take the temp. It should be in the 100°-110°F range.
The only other thing I can think of is if you used ultra pasteurized or organic milk. Ultra pasteurized milks can take at least 10 hours to culture or set,and organic milks can be hit/miss for making yogurt.
You can use your thin yogurt in smoothies or add a small box of instant pudding mix to help thicken it. 🙂
Wonderful explanations! Perfect! Looking forward doing your boil version using fully the IP.
ReplyDeleteThank you Frieda.
J
Alexandra D. Parnos-Athanassiou
Hello! Have you ever added probiotics (purchased separately) when making your homemade yogurt? Will it change the procedure? Thank you!
ReplyDeleteIt is not a good idea to mix bacterial strains from probiotics along with the yogurt bacterial strains in the yogurt. It will change the balance of bacterial strains in the yogurt colony and may make you sick or do nothing.
DeleteI am suddenly getting thin/runny yogurt. Notice that all the instruction call for the “MODE” to be NORMAL. My Instant Pot Duo 6 does not have a manual button. When doing the test incubating for 45 minutes the water only gets to 95 degrees.. My instant pot duo 6 does not have a MANUAL button. How can I get the MODE selection to NORMAL
ReplyDeleteYou have your Yogurt setting on Less. You will need to push the Yogurt button repeatedly until Normal on the display lights up. Hope this information helps! :-)
DeleteI do not recommend using the ingredients you mention for making yogurt. They are different bacterial strains and incubate at a much lower temperature than the yogurt settings on the Instant Pot and other yogurt makers. :-)
ReplyDeleteWith the cold start method can I use canned coconut cream to flavor/sweeten it instead of or in addition to sweeten condensed milk?
ReplyDeleteYou can;however, since it's not a dairy product,you may have a thinner yogurt as a result. 🙂
DeleteWonderful explanation! I was always hesitant about making yogurt, but this has me thinking I'll finally try it. You said in the milk section that with plant based milks you need an extra thickener...what is that ingredient, how much, and when would I add it? When I'm heating the milk? TYIA
ReplyDeleteCultures for Health website has great information on thickening agents for yogurt. There's several and they have different amounts & heat temperatures needed for activation.
DeleteYou can use boxed soy,Ripple or Silk Blend milks without a thickener AND use my easy Cold Start yogurt method. These milks have pea protein as a thickener. Use Silk almond yogurt or Kite Hill yogurt as your starter & at least a 12-15 hour incubation. 🙂