I didn't until last week. I grew up with this CRUNCHY whole wheat cereal as a child and still love it to this day. I enjoy it with cold milk, heated as a hot cereal, or as toppings in my homemade yogurt.
Apparently, due to the pandemic, GrapeNuts has been in short supply. Post hopes to get this cereal back on the shelves by late Spring, but in the meantime, you can make your own!
I couldn't believe how easy this was to make....
Ingredients
White Wheat Flour - I grind my own wheat flour, but you can use King Arthur Whole White Wheat or Prairie Gold White Wheat flour. I prefer the color and mild taste of white wheat flour, but you can definitely use red wheat flour for a heartier, nuttier taste. Weighing your flour will give you more consistent results.
Brown Sugar - I used light brown sugar, but you can use dark brown sugar for a deeper, darker color and stronger flavor. This recipe tastes sweeter than the original GrapeNuts, but you can cut it back to 3/4 cup.
Buttermilk - Gives moisture and a slight tang to the recipe. I used milk & lemon juice (or vinegar) to create a soured milk that works great in place of buttermilk. You can use powdered buttermilk and water as well.
Salt -added to enhance the flavors
Baking Soda -neutralizes the acid (from the buttermilk), adds tender texture and leaving (rising).
1. Mix all the ingredients together, scraping the sides of the bowl. I really enjoy my Kitchen Aid Flex Edge beater that scrapes the sides.
4. Remove and let cool completely, about 45 minutes.
5. Once cool, break into large chunks and place into a food processor. Pulse until mixture resembles coarse crumbs. Don't pulse too many times or it will become a powder. 6. Spread the crumb mixture onto 2-3 large cookie sheets or in a couple of 9x13 baking pans and place in the oven. Bake, stirring mixture every 15 minutes or until crisp.
7. Cool the cereal completely and store in an airtight container for up to two weeks. For longer storage, put cereal in the freezer for up to three months.
The cereal tasted great, was super crunchy, but the real test comes with pouring milk...
These little nuggets stayed crunchy and were perfectly sweet, without any need for sugar.
I plan on making this again and again, as I always have the ingredients on hand. I hope you try this recipe and let me know your results. Enjoy!
Homemade Grape Nuts Cereal
Yield: 8 cups
Author: Frieda Franchina, adapted from HeavenlyHomemakers recipe
Prep time: 10 min Cook time: 1 hour 15 min Total time: 1 hour 30 min
A crunchy, nutty-sweet cereal that is great with cold or hot milk, or as a topping on yogurt.
Ingredients:
3 1/2 cups whole wheat flour, 532g/18oz
1 cup brown sugar, 217g/7.6oz
3/4 teaspoon salt
1 teaspoon baking soda
2 cups buttermilk (or 2 Tablespoons lemon juice & enough milk to make 2 cups)
Instructions:
Homemade Grape Nuts Cereal
In a large mixing bowl, or stand mixer, combine the wheat flour, sugar, salt, & baking soda.
Pour the buttermilk into dry ingredients, mixing well. Mixture should resemble a thick batter.
Prepare a 13x18 baking sheet with a silicone baking mat, parchment paper, or grease it well with butter or shortening.
Spread the batter onto the prepared baking sheet, into an even layer.
Bake in a preheated 375°F oven for 15 minutes.
Remove pan from oven and allow to cool completely, about 45 minutes.
Once cooled, break the bread into large chunks and place into a food processor. Pulse until the mixture looks like coarse bread crumbs. Don't over process into a powder.
Divide crumbs between 2 or 3 large 13x18 cookie sheets and spread into a single layer.
Reduce oven temperature to 250°F, place baking sheets with crumbs and bake for 1-1.5 hours, stirring mixture every 15 minutes, or till crisp.
Remove from oven & cool completely, about 30 min and store in an air tight container for up to two weeks. For longer storage, put cereal in freezer safe baggies for up to three months.
Notes: You can use white or red wheat flour. I like to use white wheat for a more mild flavor. You can use light or dark brown sugar. Dark sugar will give your cereal a darker color and more pronounced flavor. For a malt flavor, try adding 1 teaspoon barley malt powder or flour.
Thick, soft & chewy, these popular cookies got their start in Logan, Utah in 2017 and now are in several states. These cookies also remind me of bakery style cookies that bend instead of break. I tried SO many copycat recipes that simply didn't turn out.
I did a lot of research into what makes a soft, thick, & chewy cookie, tested several batches of cookies with various combinations of butter, sugars, flours, bake times, and THIS happened.....
One bite and I was like, "EUREKA!"
Doesn't that look perfect? I'm so excited to share my recipe, but FIRST, please read through all the tips here, so you can get the perfect Crumbl chocolate chip cookie.
MY SECRETS & TIPS FOR PERFECT CRUMBLE COOKIES
Using more brown sugar than granulated sugar = moist & chewy
Swapping one of the eggs for only an egg yolk = chewy texture
Adding cornstarch to the flour = crumbly, tender texture
Using a combination of butter & margarine = flavor and moisture for a softer cookie
*Using all butter made cookies dry out
*Use stick margarine, not tub (spread) margarine, which has more water & less fat
Examples: Fleischmann, Land O Lakes, Blue Bonnet, Parkay margarine sticks
Weighing the dry ingredients using a kitchen scale = consistency from batch to batch
*If you don't have a scale, give your flour a quick stir. Scoop your flour with a measuring cup and level it with the straight edge of a table knife. Don't shake or tap your measuring cup, as flour will settle and cause you to use more flour than necessary.
Mix by hand, if possible = Over mixing causes flatter cookies
*If using a stand mixer, use LOW speed and stop just as flour is incorporated.
Using a cookie scoop for even portions = even baking
Chilling the dough for 1 hour before baking = less spread during baking
*TIP: Scoop balls of dough FIRST before chilling, as dough hardens in the fridge and smaller portions chill more quickly.
Use an oven thermometer to make sure oven is heated to correct temperature.
Aluminum baking sheetsbake better than dark non stick, which bakes hotter & burns cookies
Using the bottoms of the cookie sheet or baking sheet with NO sides for even browning.
Use a cooled cookie sheet, never a hot one from the oven.
Don't crowd cookies on baking sheet. Leave at least 2" between cookie dough on the sheet.
Rotate cookie sheet halfway through baking for even browning.
Do not over bake!
Cool cookies on the HOT baking sheet, not on a wire cooling rack.
*Cookies will continue to cook while on the baking sheet, setting the centers.
This quarter sheet pan with lid works perfectly for chilling my scooped cookie dough. You can use a plate or a plastic container with a lid.
Cookie dough on plastic wrap lined tray for chilling
Here, you can see that I bake all my cookies using the BOTTOM of the baking sheet. This allows the hot air in the oven to circulate more evenly, browning the cookies better.
This picture also shows the difference between chilling the dough (cookie on the left) and not chilling the dough (cookie on the right). The cookie on the left has a deeper caramel color and less spreading than the cookie on the right.
Chilling cookie dough results in less spread, better flavor
Enjoy!
Thick, Soft & Chewy Chocolate Chip Cookies Crumbl Copycat
Yield: 12 Extra large (3.5") cookies
Author: Frieda Franchina, adapted from several recipes
Prep time: 15 min Cook time: 12 min Total time: 1 hour, 45 min
A thick, soft & chewy cookie that is sure to be a winner! A higher ratio of brown sugar & an extra egg yolk contribute to the chewy texture. Using a combination of butter & margarine keeps the cookie soft and buttery tasting. Cornstarch added to the flour is the equivalent of using cake flour, resulting in a softer cookie with great texture. Since the butter is melted, this cookie dough doesn't need an electric mixer. Chilling the dough for at least an hour helps keep the dough from spreading too thin while baking.
Ingredients:
1/2 cup (113 g, 1 stick) of salted butter (increase the salt if using unsalted butter)
1/4 cup (55 g) 1/2 stick margarine (not the soft tub margarine)
3/4 cup (150g) light brown sugar
1/2 cup (100g) granulated sugar
1 large egg
1 large egg yolk
1 teaspoon vanilla extract
2 1/4 cups (280g) all purpose flour (stir flour, then measure)
2 Tablespoons cornstarch
1 teaspoon baking soda
3/4 teaspoon salt (Increase salt to 1 teaspoon if using UNsalted butter)
1 cup semi-sweet chocolate chips
Instructions:
Thick, Soft & Chewy Chocolate Chip Cookies
In a small saucepan, melt the butter and margarine. Let cool slightly.
In a large mixing bowl, or electric stand mixer, combine brown sugar and granulated sugar.
Pour the cooled, melted butter over the sugars, mixing well.
Add egg & egg yolk to mixture, quickly whisking to combine.
Add vanilla extract to egg/sugar mixture, stirring well.
In a medium bowl, combine flour, cornstarch, baking soda & salt.
Add flour mixture to sugar mixture, mixing or stirring till all the flour is incorporated. Do NOT over-mix, as this will make your cookies spread out more.
Add chocolate chips, stirring by hand till evenly distributed.
Line a large plate or small baking sheet with plastic wrap. Using a large ice cream scoop (1/4 cup), portion the cookie dough onto the prepared plate, making 12 equal portions. Cover with plastic wrap and place in the fridge to chill for at least 1 hour or up to 3 days. Overnight is what I like to do.
Preheat oven to 350°F, with oven rack placed in the middle of the oven.
Place 6 cookies on a prepared baking sheet, lined with parchment or a silicone baking mat.
Bake cookies for 12-14 minutes, rotating pans half way through baking. Cookies should have dry tops and be very lightly browned. Cookies may look undercooked, which is OK.
Remove cookies from the oven & allow cookies to stay on the hot baking sheet for at least 10-15 minutes or until cooled before removing them onto a wire cooling rack. Cookies will continue to bake & set while on the hot baking sheet.
Once cooled, put cookies in an airtight storage container to enjoy for up to 7 days.
Freezing Cookie Dough: You can freeze portioned cookie dough balls in a freezer baggie for up to 3 months. To bake, do not thaw cookie dough. Bake as directed, adding an extra minute to baking time.
Freezing Baked Cookies: Wrap cooled cookies in plastic wrap and place in freezer baggie for up to 3 months. Thaw a room temperature.
Smaller Cookies: 2 Tablespoon cookie scoop, place 12 on baking sheet, Bake for 10-12 minutes.
Chocolate Chips: Crumbl uses Guittard milk chocolate chips. You can use milk, semi-sweet or any of your favorite chunk chocolate chips.
This recipe starts with browned butter. I use browned butter in my Old Spaghetti Factory Mizithra pasta recipe. Browned butter has a nutty, caramelized flavor, and it is perfect in this cookie.
Browned butter is very easy to make. Simply melt the butter over medium heat on the stove. It will foam, so stir it and when it turns a dark brown color after a couple of minutes, you are done. I love using this flat wire whisk for melting butter and making all my gravies & sauces.
Tip:Weighyour dry ingredients. Using a kitchen scale will help you get consistent results in chew & spread, every time. Look at this cookie. It has bump in the middle & didn't spread out very much. I didn't weigh my flour or oatmeal, so I'm guessing there's too much, which created a denser, smaller cookie.
Tip: Don't add too many chocolate chips, nuts or raisins. If you add too many, the dough doesn't hold together very well, spilling chips onto the cookie sheet instead of staying in the cookie.
I love using a combo of butterscotch, semi-sweet (Choco/Scotch) or these Heath toffee bits in my oatmeal cookies.
Tip: Press your cookies slightly before baking. Use a clear drinking glass to press the cookies slightly. This will help the cookies cook more evenly and prevent the "bump" that you see in the picture above. Two of my favorite baking tools are my 2Tablespoon Cookie scoop and Silpat baking sheets. Amazon carries a more budget friendly silicone baking sheet that works just as well.
Don't press too hard, or your cookie will fall apart. Just lightly flatten the tops.
Tip: After baking, leave cookies on the hot baking sheet for 5 minutes. The cookies will continue to bake (called Transfer Baking) and firm up.
After resting, transfer the cookies to a wire rack to cool.
Make these. Today.
Enjoy!
print recipe
Perfect Crispy & Chewy Oatmeal Cookies
by Frieda Franchina, from America's Test Kitchen July-9-2020
Follow the tips in this recipe for a crispy, chewy oatmeal cookie, every time. No need to chill the dough. Browning the butter adds a nutty caramel flavor to the cookie. Weigh your ingredients for consistent results & you won't be disappointed.
Ingredients
4 Tablespoons butter (reduce the salt if using salted butter)
3/4 cup (5.25 ounces) packed brown sugar
1/2 cup (3.5 ounces) granulated sugar
1/2 cup vegetable or canola oil
1 large egg, plus 1 egg yolk
1 teaspoon vanilla extract
3 cups (9 ounces) old fashioned rolled oats
1 cup (5 ounces) all purpose flour
3/4 teaspoon salt (reduce to 1/2 teaspoon if using salted butter)
1/2 teaspoon baking soda
OPTIONAL: 1/4 teaspoon ground cinnamon, 1/2 cup of raisins, chocolate chips or toffee bits
Instructions
1. In a medium saucepan over medium heat, melt the butter, stirring constantly until butter has reached a deep brown color.2. In a stand mixer, combine brown sugar, granulated sugar and oil. Pour the browned butter into this mixture and combine.3. Add egg, egg yolk & vanilla extract to the sugar mixture, mixing well.4. In a large bowl, combine oatmeal, flour, salt & baking soda. Add this mixture to your stand mixer, a cup at a time, until incorporated. Mixture will be stiff.5. Add optional ingredients, making sure you don't exceed 1/2 cup.6. Using a 2 Tablespoon cookie scoop, portion dough onto parchment lined or Silpat baking sheets, 2 inches apart.7. Using the bottom of a drinking glass (or palm of your hand), flatten each ball of dough to about 2.5 inches.8. Bake in a preheated 375°F oven for 8-10 minutes, rotating baking sheet half way through baking, until lightly brown and centers are still soft.9.Remove from oven and allow cookies to sit on hot baking sheet for 5 minutes, then transfer to a wire rack to cool.
Details
Prep time: Cook time: 10Total time: 3Yield: 26 cookies
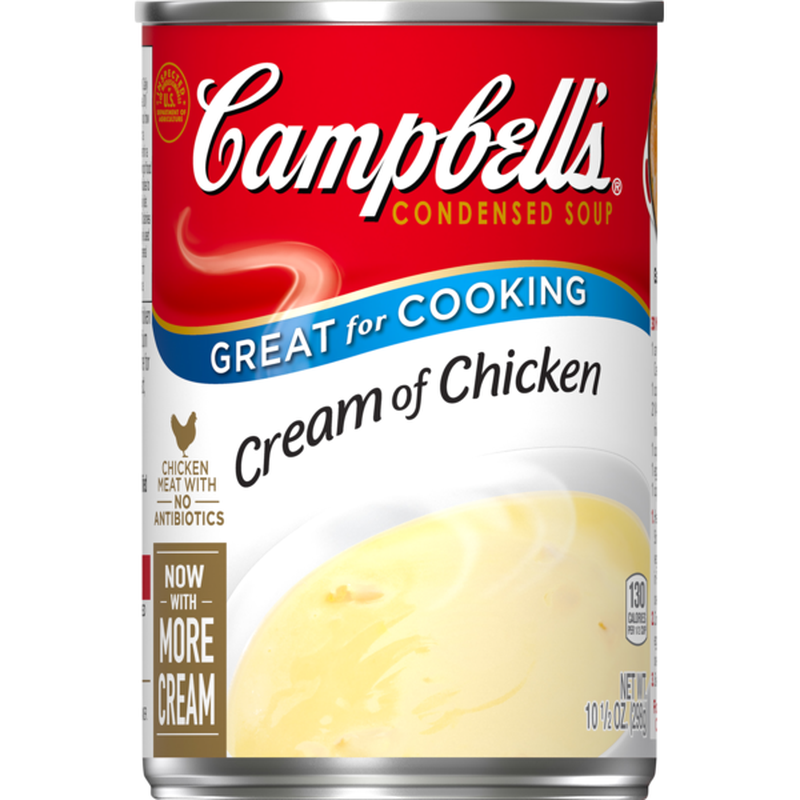
Did you know that you can easily make your own condensed cream of chicken soup with 4 simple ingredients and in less than 10 minutes??
The secret? Using Better Than Bouillon, a chicken base. It's basically a very thick, concentrated chicken stock. This has more flavor and stores well in the fridge for up to a year. 1 teaspoon of base, mixed with 1 cup of water, is equivalent to 1 cup of chicken stock. When adding milk instead of water to chicken base, you get a creamy texture that is similar to cream soups.
Need a low sodium option? Use unsalted butter and the reduced sodium option of Better Than Bouillon.
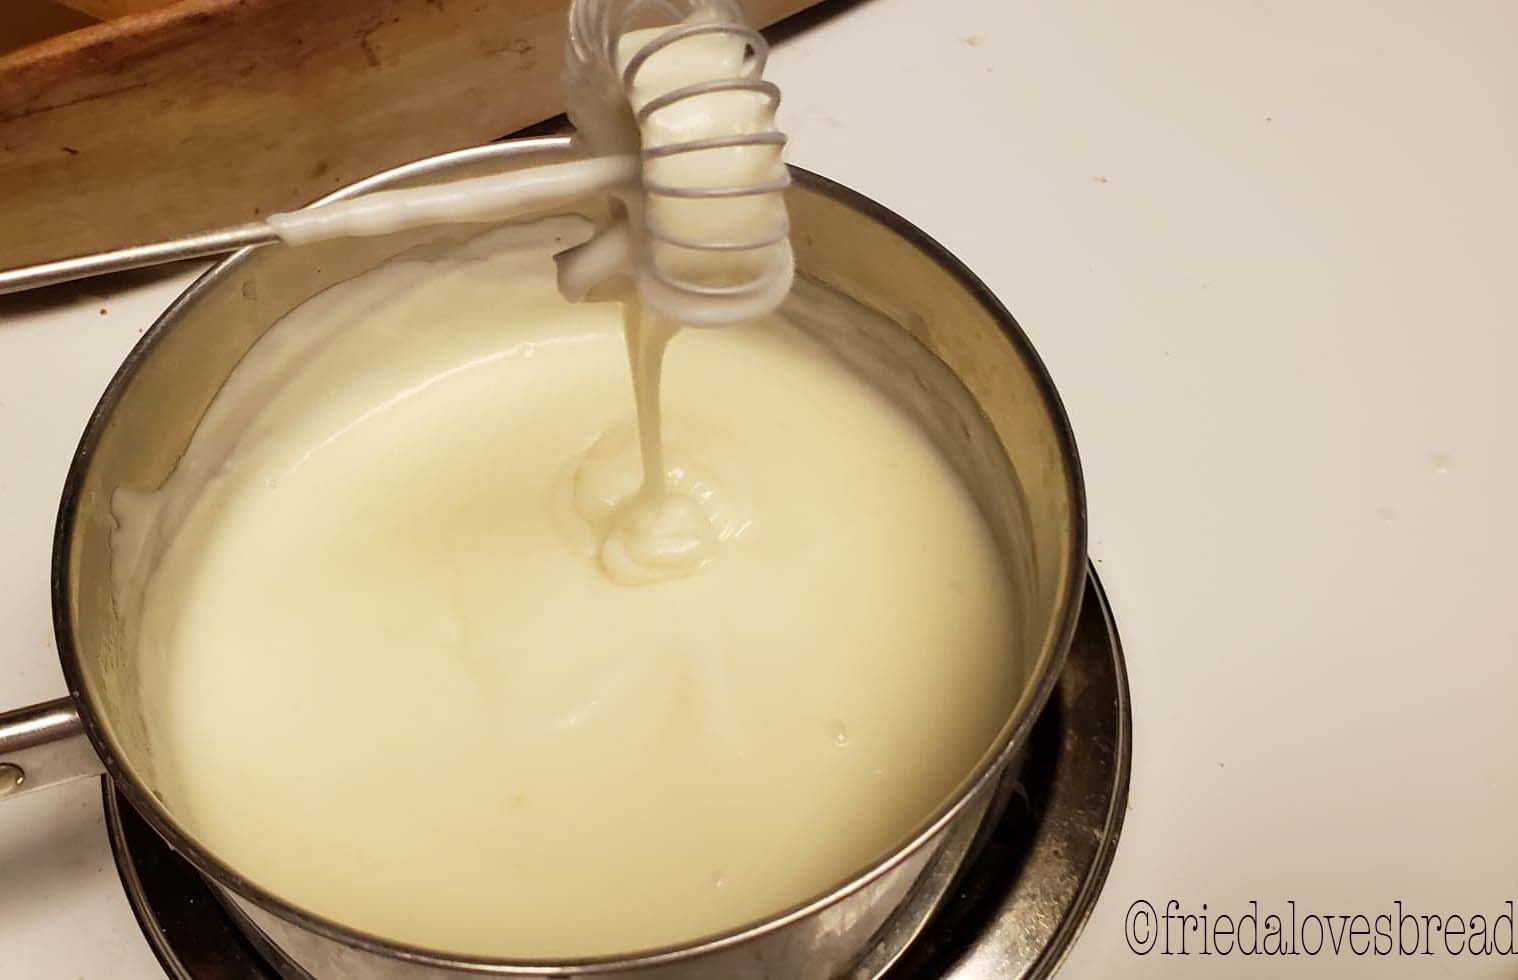
1. Melt the butter & Better than Bouillon chicken base together. 2. Add all purpose flour 3. Stir, mixing flour well and cook for one minute. I LOVE using this flat wire whisk for all my sauces & gravies. It scrapes the bottom and cleans all the sides while stirring.
4. Quickly stir in milk
5. Stir and cook over medium heat until thick and bubbly.
That's it!
This recipe will make 1.5 cups of thick, creamy condensed cream of chicken soup. If you need it to be thicker for a particular recipe, you can reduce the amount of milk or increase the amount of flour to 1/3 cup. Store in the fridge and use within 7 days.
Enjoy!
Recipes I love that use canned cream of chicken soup (now you can make your own!): Tater Tot Casserole
Homemade Substitute for Canned Cream of Chicken
Yield: 1 1/2 cups
Author: Frieda Franchina, adapted from KitchenStewardship
Prep time: 2 min Cook time: 5 min Total time: 10 min
Have a favorite recipe that calls for canned cream of chicken? This is a perfect replacement that is so easy to make and tastes better too! See notes below for variations.
Ingredients:
1/4 cups butter (salted or unsalted)
1 teaspoon chicken base or bouillon (Better Than Bouillon)
1/4 cup all purpose flour
1 1/3 cups milk
Instructions:
How to Make Homemade Substitute for Canned Cream of Chicken
In a medium saucepan over medium heat, melt the butter.
Once the butter has melted, add the bouillon and flour, stirring it into a thick paste. Continue to cook for one minute, stirring, to remove any raw flour taste.
Pour the milk, all at once, into the flour mixture, stirring until incorporated.
Continue to cook over medium heat, until the sauce is the consistency of a thick gravy, about 5 minutes.
Use as directed for your recipe calling for canned cream soup or store in the fridge for up to 7 days.
Note: If you need your soup to be thicker for a particular recipe, you can reduce the amount of milk or increase the flour to 1/3 cup.
Low Sodium: Use reduced sodium chicken base and unsalted butter. Cream of Mushroom: Saute 1/2 cup of diced mushrooms in the butter/bouillon mixture Cream of Celery: Saute 1 stalk of finely diced celery in the butter/bouillon mixture Cream of Broccoli: Add a couple of cooke florets, chopped, after thickening the soup Cream of Cheddar Cheese: Add 3/4 cup of grated sharp cheddar cheese after thickening the soup
I love a crusty loaf of artisan sourdough bread, but this soft, tender, sliceable sourdough bread is perfect for an every day sandwich bread! The dough is silky soft and so easy to work with. I have made several loaves and hamburger buns with it. It doesn't have the overly sour tang, but it still has a great flavor.
This recipe from King Arthur Flour. This is an easy and simple recipe, but has a couple of specialty ingredients that I did not have on hand, so I adapted it with great results.
ADDED YEAST?
It took me by surprise that this recipe calls for two teaspoons of yeast. The reason for this is two fold:
It speeds up the rising process, and
It keeps the flavor very mild (not overly sour).
So, why use the sourdough starter if yeast is used?
Sourdough starter adds flavor, increases dough strength, and enhances the shelf life of the bread. I'm also certain that the acidic qualities of the starter also tenderize the bread for a softer texture.
This recipe is also an "enriched" bread that has milk, butter and sugar, so it is possible that the addition of yeast helps.
Next time, I will omit the yeast (as long as my starter is active), and see how it turns out. I may also try adding 1/4 teaspoon of citric acid, which will increase the tang of the bread, allowing me a shorter rising time.
LEVAIN
The first thing the recipe has you make is a levain. Levain is French for "starter," but in this case, it means what you use for the recipe, not what you keep in the fridge to store as your starter. If you have never made a sourdough starter, you can find my step by step process here.
The levain uses a "fed" sourdough starter. This means using a sourdough starter that has been fed within the last 12 hours. I remove 2 oz of starter and feed it with a 1:1:1 ratio, meaning 2 oz starter, 2 oz water, 2 oz flour. Any remaining starter goes into a "Discard" jar for using in pancakes, waffles or crepes. TIP: Using a digital kitchen scale is VERY HELPFUL when making bread, ensuring you get consistent results each and every time. If you don't have a kitchen scale, you can use this chart to convert the measurements. Be sure to stir or fluff up your flour before using a measuring cup! TIP: Feed your starter in the morning, and use it to make the levain in the evening, the night before you want to make bread, as it can take up to 12 hours at 70°F to double or ripen. This will allow you more time to make your bread during the day. Use an elastic or hair ponytail holder on the jar to mark the initial level of your starter. You can see in the picture above that my "fed" starter has doubled, and is ready to make levain.
Levain doubled and ready to use. Dough smooth and elastic. Dough proofed and ready to shape.
DOUGH Milk vs Dry/Instant Powdered Milk
Once the levain has doubled, you can make your bread dough by hand or in a stand mixer with a dough hook. The recipe calls for Special Dry Milk or instant powdered milk, but I choose to use fresh milk and warm it up in my microwave with the butter to 90°-100°F. A thermometer is handy, but not necessary, as you can stick a clean finger into your milk and see if it's "baby bottle warm," not too hot, not too cool.
Special Dry Milk is powdered milk that is heated to a higher temperature and used in many commercial bakeries. You can easily use powdered milk, if you have that on hand. Powdered milk is expensive where I live and goes rancid easily (I store it in my freezer for a longer shelf life), and using fresh milk worked well in this recipe.
The ingredients came together, making a soft, smooth dough that wasn't sticky. TIP: If you find that your dough is sticky, try kneading it for an additional 5-10 minutes.
SHAPE, RISE, & BAKE
Since this bread makes two loaves, I decided to use half of the dough to make hamburger buns. I cut 4 oz portions and shaped them into balls, another great reason to have a digital scale! Dough is ready to bake with it has risen about 1" above the rim of the 8x4 loaf pan or doubled in size.
Bake in your preheated oven for 30-35 min (15-20 min for hamburger buns) TIP:Lightly spray your clean counter with oil spray instead of using flour while rolling and shaping. If you have a natural stone (granite) counter, make sure it is sealed; otherwise it will soak up the oil. For a "floured" look, I dusted the tops of my shaped dough with all purpose flour. TIP: Cover the dough lightly with plastic wrap while shaping, to prevent them from drying out.
Allow the dough to come to about double in size and bake in your preheated oven. TIP: Use the correct loaf pan size for your recipe. I really like the medium 8"x4" loaf pan size, as the slices fit nicely in a sandwich size baggie. Lightly grease your pans, even if they are non-stick. TIP: Immediately remove your bread from their pans and place them on a cooling rack. Resist the urge to cut into hot bread as it is still cooking inside. Cool completely before slicing!
I love, love, LOVE this bread and will make it many more times! It is giving me an incentive to keep my starter fed weekly (Friday Feed Day) and experimenting with new recipes. Recipes: Egg Salad Sandwich Juicy Hamburger Patties Corn Chowder
by Frieda Franchina, adapted from KingArthurFlour May-25-2020
This soft, tender & chewy sourdough bread is perfect for sandwiches, hamburger buns or dinner rolls. Refresh (feed) your starter (2 oz of each: starter, water, flour) in the morning and make your levain with it the night before, allowing you to bake your bread the next day.
Ingredients
LEVAIN
3 Tablespoons (44g) fed sourdough starter
1/2 cup +1 Tablespoon (128g) room temp water
1 cup +1 Tablespoon (128g) unbleached all purpose or bread flour
DOUGH
All the levain
1 1/2 cups (360g) milk*
4 Tablespoons butter or margarine, cut into 4-8 pieces
5 1/4 cups (631g) unbleached all purpose or bread flour
2 teaspoons of instant yeast**
1/4 cup (50g) granulated sugar
2 teaspoons salt
Instructions
1. Make the levain: Mix the fed starter, water, and flour together in a glass or food safe plastic container (with room to double), and cover lightly with plastic wrap. It will take about 12 hours to double at room temperature.2. Make the dough: Put the levain in a bowl or stand mixer.3. Put the milk and butter into a medium bowl and warm it in the microwave (50% power 4 minutes), until butter is almost melted. You can also use the stove warm the milk, if desired. Temperature should be between 90°F- 100°F.4. Pour this mixture into the bowl of levain.5. Add the flour, yeast, sugar and salt on top.6. Using a dough hook and the lowest setting of your mixer, gradually increasing to the next setting, knead the dough until dough cleans the sides of the bowl & you have a smooth and slightly tacky dough (not wet or sticky).7. Place the dough into a lightly greased bowl, turning over to coat, and cover with plastic wrap. Let the dough rise in a warm, draft free place until doubled, about 1-2 hours. 8. Divide the dough in half and shape into two 8" logs, pinching seams closed. Place dough seam side down into lightly greased 8"x4" loaf pans. Cover lightly with plastic wrap. Let the shaped loaves rise until they are about 1" above the rim of the pan, about an hour.10. Preheat the oven to 375°F and bake for 30-35 minutes, covering the tops loosely with aluminum foil during the last 10 minutes to prevent over browning. Immediately remove from loaf pans and place on a cooling rack. Let cool completely before slicing. Hamburger Buns: Divide dough into 12 equal portions (4 oz), forming into balls, pinching seams closed and placing on lightly greased baking sheet, seam side down. Bake in preheated 375°F oven for 15-20 minutes. Dinner Rolls: Divide dough into 24 equal portions (2oz), put on lightly greased baking sheet, and bake in a preheated 375°F oven for 12-14 minutes. NOTES *Replace with instant powdered milk (6Tablespoons or 50g) and 1 1/2 cups room temp water **Can omit instant yeast, but plan on adding more rising time, about 4-5 hours till double.
Details
Prep time: Cook time: Total time: Yield: 2 loaves, 12 buns or 24 rolls
Skip the hassle of rolling your tortillas and try this EASY layered white chicken enchiladas. While I love a traditional red enchilada sauce, this recipe is a true contender. The creamy white sauce pairs well with chicken, allowing the tang of sour cream and spices from the chilies to come through and shine in this family favorite.
This recipe comes from my sweet sister in law, who has adapted her time honored family recipe to meet the tastes of her children. She has tried various sauces, canned, homemade, tweaking the spice level and has settled on this recipe, which I'm so pleased to share with you. Please feel free to tweak it to your family's preferences.
The original recipe calls for a can of cream of chicken soup, but I have been able to make my own homemade version, using butter, flour, milk & Better than Bouillon chicken base. I really love having this BTB chicken base on hand and it keeps in the fridge for at least a year. I use it regularly in chicken soup, my red enchilada sauce, Mexican rice, chicken pot pie, chicken gravy, and much, much more.
Look how creamy and thick! Doesn't this look better than the canned cream of chicken?
The recipe also originally called for canned chicken or turkey. You can cook your own chicken and shred it. I used to thaw/cook my boneless chicken in the microwave. Now, I plunk the frozen chicken into my Instant Pot pressure cooker, add 1/4 cup water, and let it do all the work. This recipe here will show you how easy it is to cook frozen chicken in your pressure cooker.
Do you have an electric hand mixer or stand mixer? Then use it to quickly shred your chicken! Pulse it, so you have control over how chunky you want it. This is my trusty Kitchen Aid stand mixer that I've had for more than 25 years.
Mix together your grated cheese, drained green chilies, chicken and sour cream. This is your FILLING.
For the SAUCE, mix together the cream of chicken soup and your green enchilada sauce.
You can use corn or flour tortillas. I like white corn tortillas, so I dip them into the sauce and line six of them into my 9x13 baking dish.
Add half of your filling and another layer of six tortillas.
Pour the white enchilada sauce over the top and sprinkle with a cup of shredded mozzarella cheese.
Bake uncovered, for 45-60 minutes until golden brown and bubbly.
TIP: Allow this to sit for 20-30 minutes before cutting. This allows it to thicken a little bit for easier cutting into squares. If you try to cut into it while hot, it'll look soupy and be hard to cut.
Top with shredded lettuce, chopped tomatoes, sour cream or guacamole and serve it with a side of Mexican rice or refried beans.
Enjoy!
print recipe
White Chicken Enchiladas
by Frieda Franchina, adapted from a family recipe May-04-2020
Layers of corn or flour tortillas are sandwiched in a simple filling and topped with a creamy sauce and cheese. Corn tortillas more readily absorb the sauce while flour holds their shape more readily. You can use this easy casserole layering style or fill each tortilla individually.
Ingredients
1 pound of cooked chicken, cubed or shredded
1 pound shredded mozzarella cheese (reserve 1 cup for topping)
1-2 small cans green chiles, drained (use 1 can for a mild flavor)
16 oz carton of sour cream
SAUCE
1/4 cup butter
1 teaspoon chicken Better than Bouillon
1/4 cup all purpose flour
1 1/3 cup milk
1 large 28oz can green enchilada sauce
1 package of white corn tortillas (12-18)
1 small can of sliced black olives (optional)
Instructions
1. Make the filling: In a medium bowl, mix together cooked chicken, shredded cheese, drained chilies and sour cream. Set aside.2. Make the sauce: In a medium sauce pan over medium heat, melt the butter. Once melted, add the bouillon and flour, stirring it into a thick paste. Cook & stir for one minute, to cook out the raw flour taste.3. Pour the milk all at once into this mixture, stirring until incorporated. Continue to cook over medium heat, stirring until it's the consistency of a thick gravy.4. Remove from the stove and add the entire can of enchilada sauce, mixing well.5. Pour about a cup of this sauce onto a shallow plate or pie dish. 6. Dip a corn tortilla into this mixture, flip it over, coating both sides, and place it into a 9x13 baking pan. Repeat, layering six tortillas.7. Spread half of the meat/cheese filling on top of prepared tortillas. 8. Dip remaining six tortillas, one at a time, placing on top of meat/cheese filling. Spread other half of filling on top, and if desired, layer another six coated tortillas on top. 9. Pour remaining sauce over entire dish and top with 1 cup of reserved shredded cheese. 10. Bake in a preheated 325°F oven for 45-60 minutes or until top is browned and bubbly. Remove from oven and let sit for 20-30 minutes. Cut into squares and serve with shredded lettuce, chopped tomatoes, sour cream or guacamole. NOTES: Can use 12-16 oz of canned chicken/turkey. Can use 1 can (10.5oz) cream of chicken soup in place of butter, bouillon, flour and milk. Can use 1 cup of chicken broth instead of bouillon. Reduce the milk by 1 cup. Can be made the night before. Cover with plastic wrap and store in the fridge. Remove plastic wrap prior to baking.
Details
Prep time:15Cook time: Total time: 1Yield: 6-8 servings


 6. Spread the crumb mixture onto 2-3 large cookie sheets or in a couple of 9x13 baking pans and place in the oven. Bake, stirring mixture every 15 minutes or until crisp.