Showing posts with label Kitchen Tips. Show all posts

6/15/21

1 Old Fashioned Strawberry Shortcake


Forget about those yellow round pound cake cups that you get at the store. This vanilla cake is light, tender and perfect for holding freshly whipped cream and sliced strawberries.  This is a cake, NOT a biscuit. It is SO easy to make, I've made this recipe several times with rave reviews from all my family members. 

Here are some great time saving tips for this recipe.

Quick Slicing: Here's a great time saving tip! Use your egg slicer to quickly and evenly slice your strawberries! I use this tip for cutting mushrooms, too. 


Macerate the strawberries: Adding a couple of tablespoons of granulated sugar to the sliced strawberries softens the berries and releases some of its flavor, making a light sauce that soaks into the cake...

Make a Foil Sling: This helps you remove and cut the cake easily for a great presentation. 

Make Fresh Whipped Cream: all you need is heavy cream, granulated sugar & vanilla extract. 

In under an hour, you will have a fresh, classic dessert that will be enjoyed by everyone. I know you will enjoy this recipe as much as we did and make it again and again.


Old Fashioned Strawberry Shortcake

Old Fashioned Strawberry Shortcake

Yield: 9 servings
Author: Frieda Franchina, adapted from J.Becker AllRecipes
Prep time: 15 min
Cook time: 25 min
Total time:  40 min
This soft, tender not-too-sweet vanilla cake is the perfect compliment for fresh strawberries with whipped cream. You can substitute the shortening with butter, but it will change the cake's texture, becoming more dense. 

Ingredients:

  • 1/4 cup shortening (can use softened butter)
  • 2/3 cup (4.6 oz/132g) granulated sugar 
  • 1 large egg, room temperature* (see Tips, below)
  • 1 teaspoon vanilla extract
  • 1 1/2 cups (6.4 oz/180g) all purpose flour
  • 1/4 teaspoon salt
  • 2 teaspoons baking powder
  • 1/2 cup whole milk* (if you only have low fat milk, see TIP below)
  • Whipped Cream
  • 8 oz heavy cream
  • 1/4 cup granulated sugar
  • 1/2 teaspoon vanilla extract
  • 2 quarts of fresh strawberries, washed, hulled and sliced
  • 2 Tablespoons granulated sugar

Instructions:

Old Fashioned Strawberry Shortcake

  1. In a medium mixing bowl, cream together the shortening and sugar.
  2. Add egg and vanilla, mixing well.
  3. In a separate bowl, combine flour, salt, and baking powder.
  4. Alternate milk & flour to shortening mixture, until *almost* all the flour is mixed in. Over-mixing will cause the cake to be dense. Use a spoon or silicone spatula to hand mix in the rest of the remaining flour.
  5. Prepare a foil sling for your 9"x9" pan by folding two pieces of aluminum foil as described in the TIPS below. Grease foil lightly.
  6. Pour cake batter into prepared foil sling, spreading it evenly into the pan.
  7. Bake in a preheated 350°F oven for 20-25 minutes, or until a toothpick inserted in the center comes clean or with very few crumbs. Cool on wire rack.
  8. Wash, hull and slice the strawberries, putting them into a small container. Sprinkle 2 Tablespoons of sugar onto cut strawberries and stir till coated. Cover and set in the fridge for 45 minutes. Sugar will pull out some of the juices for a light sauce.
  9. Make the whipped topping: Pour heavy cream into a bowl. Using beaters or electric stand mixer with whisk attachment, whip heavy cream until soft peaks form. While mixing, sprinkle 1/4 cup granulated sugar into mixture until stiff peaks form. Add vanilla extract.
  10. Using the foil sling, remove cooled cake from pan. Cut into 9 equal squares. Cut each square horizontally in half. Remove the top of the cake, adding a dollop of whipped cream, strawberries, replacing the top of the cake, add more whipped cream and strawberries on top. 
TIPS 
Egg: Quickly bring your egg to room temperature by putting it in a bowl or drinking glass filled with HOT tap water. Let sit for 5-10 minutes.
Whole Milk: If you only have low fat milk, add 2 Tablespoons of melted/cooled butter to your milk.
Egg slicer: Use to quickly slice washed & hulled strawberries.

Foil Sling: Fold two pieces of aluminum foil and place shiny side up into your 9x9 pan. Foil should extend up the sides and about 1" over the top of the pan. Lightly grease the pan with shortening or oil spray. 


4/1/21

0 Creamy Peanut Butter Chocolate Easter Eggs


I couldn't believe how easy it was to make these peanut butter filled chocolate eggs! Just imagine being able to use your favorite chocolate and dipping them...these are dipped in melted semi-sweet chocolate. The filling for this recipe is SO much more creamy than the store bought peanut butter eggs. 

Using this recipe for the filling, I simply roll it 3/4" thick between two sheets of plastic wrap, much like these gingerbread cut outs in this picture. 


I like using this 2.5" Egg cookie cutter dipped in powdered sugar.


Chill your cutouts and then dip in your favorite melted chocolate. 

Enjoy plain or melt some white chocolate to decorate your chocolate eggs. Use this awesome trick for putting your melted chocolate into your icing bag for easier clean up. It's SO cool!


Enjoy!


Peanut Butter Filling Recipe


2/2/21

2 Cumbl Copycat: Thick, Soft & Chewy Bakery Style Chocolate Chip Cookies


Have you tried a Crumbl cookie? 
Thick, soft & chewy, these popular cookies got their start in Logan, Utah in 2017 and now are in several states. These cookies also remind me of bakery style cookies that bend instead of break. I tried SO many copycat recipes that simply didn't turn out. 
I did a lot of research into what makes a soft, thick, & chewy cookie, tested several batches of cookies with various combinations of butter, sugars, flours, bake times, and THIS happened..... 


One bite and I was like,  "EUREKA!"

Doesn't that look perfect? I'm so excited to share my recipe, but FIRST, please read through all the tips here, so you can get the perfect Crumbl chocolate chip cookie.

MY SECRETS & TIPS FOR PERFECT CRUMBLE COOKIES 

Using more brown sugar than granulated sugar = moist & chewy
Swapping one of the eggs for only an egg yolk = chewy texture
Adding cornstarch to the flour = crumbly, tender texture
Using a combination of butter & margarine = flavor and moisture for a softer cookie
*Using all butter made cookies dry out 
*Use stick margarine, not tub (spread) margarine, which has more water & less fat 
     Examples: Fleischmann, Land O Lakes, Blue Bonnet, Parkay margarine sticks 
Weighing the dry ingredients using a kitchen scale = consistency from batch to batch
*If you don't have a scale, give your flour a quick stir. Scoop your flour with a measuring cup and level it with the straight edge of a table knife. Don't shake or tap your measuring cup, as flour will settle and cause you to use more flour than necessary. 
Mix by hand, if possible = Over mixing causes flatter cookies
*If using a stand mixer, use LOW speed and stop just as flour is incorporated.
Using a cookie scoop for even portions = even baking
Chilling the dough for 1 hour before baking = less spread during baking
*TIP: Scoop balls of dough FIRST before chilling, as dough hardens in the fridge and smaller portions chill more quickly.
Use an oven thermometer to make sure oven is heated to correct temperature.
Aluminum baking sheets bake better than dark non stick, which bakes hotter & burns cookies
Using the bottoms of the cookie sheet or baking sheet with NO sides for even browning.
Use a silicone baking mat or parchment paper for cookies that don't stick to the pan.
Use a cooled cookie sheet, never a hot one from the oven.
Don't crowd cookies on baking sheet. Leave at least 2" between cookie dough on the sheet.
Rotate cookie sheet halfway through baking for even browning.
Do not over bake! 
Cool cookies on the HOT baking sheet, not on a wire cooling rack. 
*Cookies will continue to cook while on the baking sheet, setting the centers.

This quarter sheet pan with lid works perfectly for chilling my scooped cookie dough. You can use a plate or a plastic container with a lid. 
Cookie dough on plastic wrap lined tray for chilling

Here, you can see that I bake all my cookies using the BOTTOM of the baking sheet. This allows the hot air in the oven to circulate more evenly, browning the cookies better. 

This picture also shows the difference between chilling the dough (cookie on the left) and not chilling the dough (cookie on the right). The cookie on the left has a deeper caramel color and less spreading than the cookie on the right. 

Chilling cookie dough results in less spread, better flavor

Enjoy! 

Thick & Chewy Chocolate Chip Cookie

Thick, Soft & Chewy Chocolate Chip Cookies
Crumbl Copycat

Yield: 12 Extra large (3.5") cookies 
Author: Frieda Franchina, adapted from several recipes
Prep time: 15 min
Cook time: 12 min
Total time:  1 hour, 45 min
A thick, soft & chewy cookie that is sure to be a winner! A higher ratio of brown sugar & an extra egg yolk contribute to the chewy texture. Using a combination of butter & margarine keeps the cookie soft and buttery tasting. Cornstarch added to the flour is the equivalent of using cake flour, resulting in a softer cookie with great texture. Since the butter is melted, this cookie dough doesn't need an electric mixer. Chilling the dough for at least an hour helps keep the dough from spreading too thin while baking.

Ingredients:

  • 1/2 cup (113 g, 1 stick) of salted butter (increase the salt if using unsalted butter)
  • 1/4 cup (55 g) 1/2 stick margarine (not the soft tub margarine)
  • 3/4 cup (150g) light brown sugar
  • 1/2 cup (100g) granulated sugar
  • 1 large egg
  • 1 large egg yolk
  • 1 teaspoon vanilla extract
  • 2 1/4 cups (280g) all purpose flour (stir flour, then measure)
  • 2 Tablespoons cornstarch
  • 1 teaspoon baking soda
  • 3/4 teaspoon salt (Increase salt to 1 teaspoon if using UNsalted butter)
  • 1 cup semi-sweet chocolate chips 

Instructions:

Thick, Soft & Chewy Chocolate Chip Cookies

  1. In a small saucepan, melt the butter and margarine. Let cool slightly.
  2. In a large mixing bowl, or electric stand mixer, combine brown sugar and granulated sugar. 
  3. Pour the cooled, melted butter over the sugars, mixing well. 
  4. Add egg & egg yolk to mixture, quickly whisking to combine.
  5. Add vanilla extract to egg/sugar mixture, stirring well.
  6. In a medium bowl, combine flour, cornstarch, baking soda & salt.
  7. Add flour mixture to sugar mixture, mixing or stirring till all the flour is incorporated. Do NOT over-mix, as this will make your cookies spread out more.
  8. Add chocolate chips, stirring by hand till evenly distributed.
  9. Line a large plate or small baking sheet with plastic wrap. Using a large ice cream scoop (1/4 cup), portion the cookie dough onto the prepared plate, making 12 equal portions. Cover with plastic wrap and place in the fridge to chill for at least 1 hour or up to 3 days. Overnight is what I like to do. 
  10. Preheat oven to 350°F, with oven rack placed in the middle of the oven.
  11. Place 6 cookies on a prepared baking sheet, lined with parchment or a silicone baking mat.
  12. Bake cookies for 12-14 minutes, rotating pans half way through baking. Cookies should have dry tops and be very lightly browned. Cookies may look undercooked, which is OK.
  13. Remove cookies from the oven & allow cookies to stay on the hot baking sheet for at least 10-15 minutes or until cooled before removing them onto a wire cooling rack. Cookies will continue to bake & set while on the hot baking sheet. 
  14. Once cooled, put cookies in an airtight storage container to enjoy for up to 7 days. 
Freezing Cookie Dough: You can freeze portioned cookie dough balls in a freezer baggie for up to 3 months. To bake, do not thaw cookie dough. Bake as directed, adding an extra minute to baking time. 
Freezing Baked Cookies: Wrap cooled cookies in plastic wrap and place in freezer baggie for up to 3 months. Thaw a room temperature.
Smaller Cookies: 2 Tablespoon cookie scoop, place 12 on baking sheet, Bake for 10-12 minutes.
Chocolate Chips: Crumbl uses Guittard milk chocolate chips. You can use milk, semi-sweet  or any of your favorite chunk chocolate chips. 


8/4/20

0 Buttery & Flaky Sourdough Biscuits

This is a simple & easy recipe that is a great way to use up any of your sourdough discard. Don't have starter? Then go here to make your own sourdough starter that is ready in 5-7 days, or try this Flaky Biscuit recipe that uses buttermilk. 


Look at those layers!

Now imagine taking a bite.... crispy & buttery outside, with a soft, tender inside,  & a hint of sourdough, just begging for a large pat of butter and sweet jam...or a drizzle of honey.


TIP: Weigh your flour, using a kitchen scale. Use too much, and your biscuits will be heavy & dense. Use too little, and they'll spread out and be thin. 

TIP: Cover your kitchen scale with a large plastic bag or plastic wrap, to keep it clean. 🙂


TIP: Grate your butter. This works better if your butter is COLD. Frozen butter is a little harder to grate, but cold refrigerated butter works well, too. I love this grater that doubles as a container.


Stir the COLD butter into the flour mixture. 

SOURDOUGH TIP: Use a 100% hydrated sourdough starter. This means an equal ratio of starter/flour/water by weight. For example, 2oz starter, 2oz water, 2 oz all purpose flour. For me, this pours out more easily and mixes into the flour more readily.


Stir until mixture looks like this. It's ok if there are a few dry pieces. This is a NO KNEAD dough, so you don't want to handle it too much or add too much flour. If dough is too dry and crumbly, you can add a touch of milk or starter until it looks like this...


Pat this dough onto a clean & lightly floured surface and fold it into thirds like a letter....1/3 to the middle...
 
...and the other third on top. This will create the LAYERS that are so desirable in a buttery, flaky biscuit.


Roll lightly into a 10"x4" rectangle that is 1" thick. Cut with a sharp knife, or sharp 2.5" biscuit cutter. I like cutting these into squares to avoid re-rolling the scraps, which can toughen the dough. 

Look at those LAYERS!


Hurry and brush these biscuits with cream or milk (makes 'em golden & crispy) and get those puppies into the oven while the dough is still COLD. The blast of heat from the oven will help these buttery biscuits RISE & create those lovely LAYERS.


Here are the biscuits, fresh out of the oven....


You gotta have one of them hot....with melted butter. Oh, so good!


Flaky Buttery Sourdough Biscuits

Flaky Buttery Sourdough Biscuits

Yield: 6 biscuits
Author: Frieda Franchina, adapted from King Arthur Flour
Prep time: 10 min
Cook time: 10 min
Total time: 30 min
This is a great way to use up any sourdough discard. I use 100% hydration* starter. It's important to weigh your ingredients and use COLD butter for best results. Enjoy alone, as a breakfast biscuit, or try any of the savory options below.

Ingredients:

  • 1/2 cup COLD butter, grated or thinly sliced (salted or unsalted)
  • 1 cup (120 grams) all purpose flour 
  • 2 teaspoons baking powder
  • 1/2 teaspoon salt (increase to 3/4 teaspoon if using Salted butter)
  • 1 cup (227 grams) sourdough starter discard (or unfed starter)
  • 1 Tablespoon of milk or cream, to brush on top

Instructions:

How to Make Flaky Buttery Sourdough Biscuits

  1. Preheat the oven to 425°F. Prepare a large baking sheet: lightly greasing, using parchment or silicone baking liner.
  2. Grate the cold butter or thinly slice it. Set it aside.
  3. Combine the flour, baking powder and salt.
  4. Add the cold, grated butter to the flour mixture, coating all the butter pieces. 
  5. Add the starter, mixing gently by hand or by spatula. Dough should come together, with a few dry pieces.
  6. Place dough onto lightly floured surface and pat it down to 1" thick rectangle. Fold the dough into thirds: Lift one end of the dough and fold it to the middle. Lift the other end of the dough and fold it over on TOP of the first fold. 
  7. Lightly flour and roll to a 10"x4" rectangle that is 1" thick. With a sharp knife, cut into 6 equal squares.  *For Round Biscuits: Roll into a circle and use a sharp 2.5" round cutter. Gently push the scraps together to form a single biscuit that is 1" thick. 
  8. Place biscuits on prepared baking sheet, about 2" apart. Brush tops of biscuits with milk or cream.
  9. Bake for about 20-22 minutes, or until golden brown.
  10. Remove biscuits from oven & serve hot. Or cool, put into baggie and store at room temp for up to a week, or freeze for up to 3 months.
Note: If your starter is thick and your dough is dry and crumbly, add a tablespoon of milk until the dough comes together. *100% hydration is equal parts of starter, water and flour by weight. 
Savory Biscuits: Before "folding" the biscuit dough into thirds, add any of the following - grated sharp cheddar cheese, caramelized onions, cooked bacon pieces, freshly chopped chives, etc. Fold dough into thirds and roll into a 10"x4" rectangle. Cut into 6 squares or triangles & bake as directed.


6/17/20

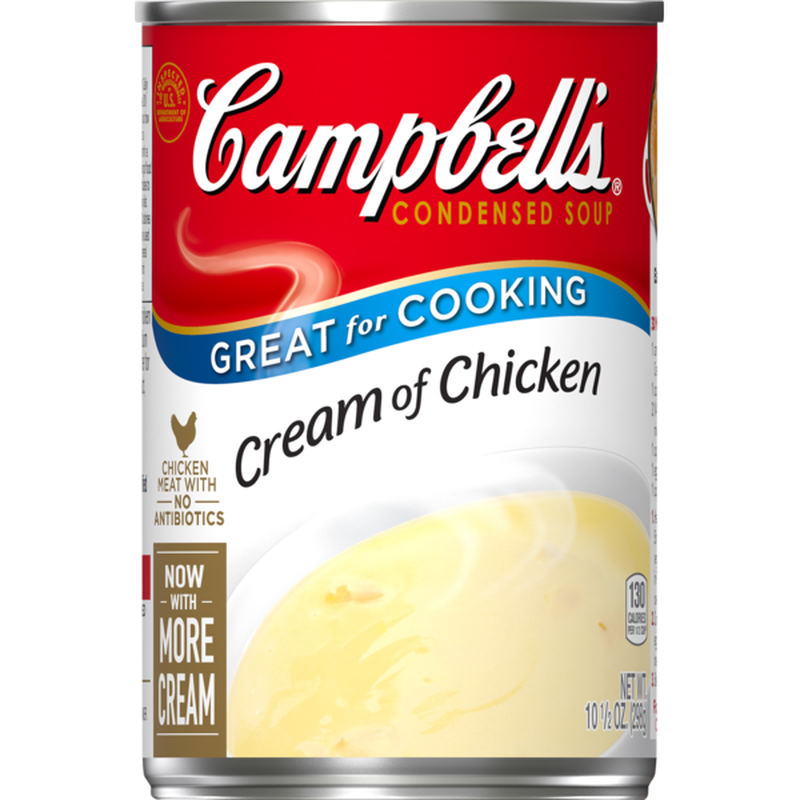
0 Homemade Substitute for Condensed Cream of Chicken Soup


Did you know that you can easily make your own condensed cream of chicken soup with 4 simple ingredients and in less than 10 minutes??

The secret? Using Better Than Bouillon, a chicken base. It's basically a very thick, concentrated chicken stock. This has more flavor and stores well in the fridge for up to a year. 1 teaspoon of base, mixed with 1 cup of water, is equivalent to 1 cup of chicken stock. When adding milk instead of water to chicken base, you get a creamy texture that is similar to cream soups.

Need a low sodium option? Use unsalted butter and the reduced sodium option of Better Than Bouillon.

1. Melt the butter & Better than Bouillon chicken base together.
2. Add all purpose flour
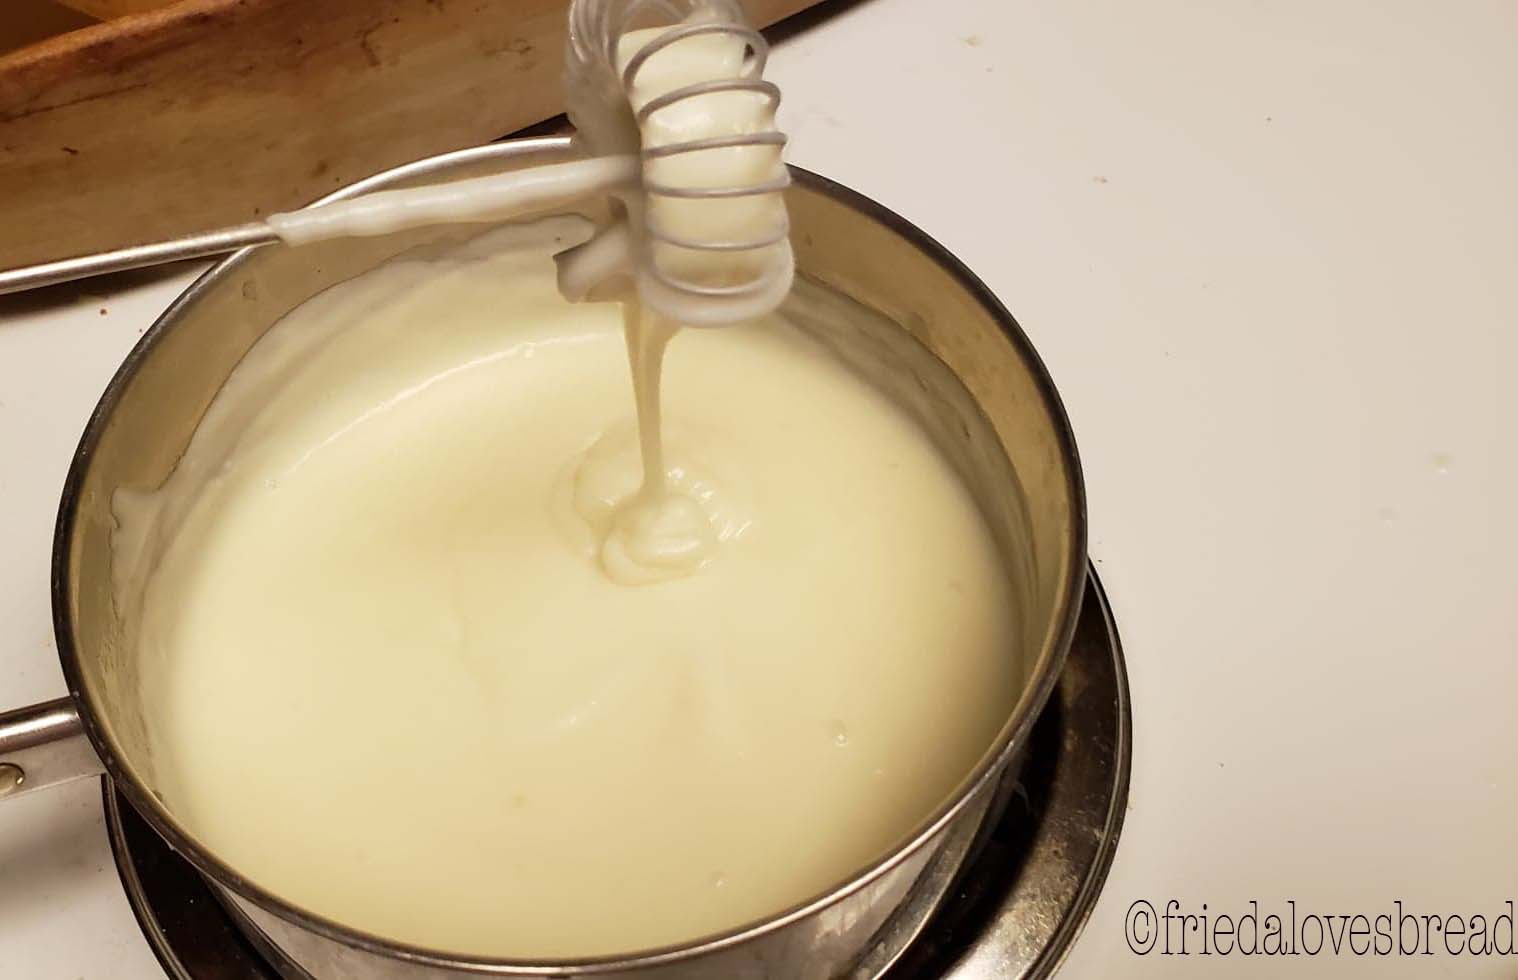
3. Stir, mixing flour well and cook for one minute. I LOVE using this flat wire whisk for all my sauces & gravies. It scrapes the bottom and cleans all the sides while stirring.

4. Quickly stir in milk
5. Stir and cook over medium heat until thick and bubbly.

That's it!

This recipe will make 1.5 cups of thick, creamy condensed cream of chicken soup. If you need it to be thicker for a particular recipe, you can reduce the amount of milk or increase the amount of flour to 1/3 cup. Store in the fridge and use within 7 days.

Enjoy!
Recipes I love that use canned cream of chicken soup (now you can make your own!):
Tater Tot Casserole

Homemade Substitute for Canned Cream of Chicken

Homemade Substitute for Canned Cream of Chicken

Yield: 1 1/2 cups
Author: Frieda Franchina, adapted from KitchenStewardship
Prep time: 2 min
Cook time: 5 min
Total time: 10 min
Have a favorite recipe that calls for canned cream of chicken? This is a perfect replacement that is so easy to make and tastes better too! See notes below for variations.

Ingredients:

  • 1/4 cups butter (salted or unsalted)
  • 1 teaspoon chicken base or bouillon (Better Than Bouillon)
  • 1/4 cup all purpose flour
  • 1 1/3 cups milk

Instructions:

How to Make Homemade Substitute for Canned Cream of Chicken

  1. In a medium saucepan over medium heat, melt the butter.
  2. Once the butter has melted, add the bouillon and flour, stirring it into a thick paste. Continue to cook for one minute, stirring, to remove any raw flour taste.
  3. Pour the milk, all at once, into the flour mixture, stirring until incorporated.
  4. Continue to cook over medium heat, until the sauce is the consistency of a thick gravy, about 5 minutes.
  5. Use as directed for your recipe calling for canned cream soup or store in the fridge for up to 7 days.
Note: If you need your soup to be thicker for a particular recipe, you can reduce the amount of milk or increase the flour to 1/3 cup.
Low Sodium: Use reduced sodium chicken base and unsalted butter.
Cream of Mushroom: Saute 1/2 cup of diced mushrooms in the butter/bouillon mixture
Cream of Celery: Saute 1 stalk of finely diced celery in the butter/bouillon mixture
Cream of Broccoli: Add a couple of cooke florets, chopped, after thickening the soup
Cream of Cheddar Cheese: Add 3/4 cup of grated sharp cheddar cheese after thickening the soup

5/1/20

0 Restaurant Mexican Rice - Instant Pot or Stove Top


Every time I go to a Mexican restaurant, I judge their quality by the chips, salsa, and rice. Rice should be moist, not oily, fluffy, full of flavor and not have any of that extra stuff....chunks of peppers, onions and whatnot. Your entree is the star of the show, and the rice should be the supporting actor, complementing your main attraction.

This recipe comes from a good friend of mine, who is Hispanic and has shared her authentic recipes with me. One of her time saving secrets is using Caldo de Tomate, a powdered tomato/chicken bouillon and spices that is so good in rice, enchilada sauce, added to shredded chicken for tacos, enchiladas, tacquitos, and much, much more. I keep a jar of this in my fridge, which keeps well for at least a year. If you don't have access to this seasoning, I provide the ingredients in my recipe below that will still make a fantastic Mexcian style rice.


One of the first steps to cooking this recipe is to brown the rice in a little bit of oil. Why? This not only helps keep the rice grains separate, it adds some caramelization and flavor to the rice, so don't skip this step!

There's no need to rinse the rice in this recipe, which is a time saver.

Another secret is using Better Than Boullion, a chicken base, instead of chicken broth. You only need a couple of teaspoons and it also lasts up to a year in the fridge.


I have been making this rice for years on the stove top, but this recipe is easily converted for a pressure cooker. You don't need to use as much liquid, since a pressure cooker keeps much of the liquid inside during cooking. You'll find both methods in my recipe below.

Enjoy!

Pressure Cooker Notes:
*Turn Keep Warm Off. It can cause the rice to stick and burn to the bottom of the pot.
*Rice setting automatically adjusts the time based on the VOLUME of white rice added to the pot. (This is ONLY for white rice)
*Never fill the insert more than half full, as rice foams during cooking.
*Rinsing is not necessary unless directed in the recipe. Rinsing removes starch, but also adds water to the recipe. In pressure cooking, the residual water after rinsing can compensate for what little is lost during the time it takes to bring the cooker to pressure.
*Altitude, location, hardness of your water, age and dryness ALL affect the outcome of your rice.
*Use a 1:1 ratio (1 cup rice, 1 cup water/broth).
*Take notes and adjust the cook time to your preference. Longer cook times result in a softer texture.
*Add more water if you want your rice a little softer.
*Reduce the water if you see water in the cooker after fluffing the rice.


print recipe

Restaurant Mexican Rice - Stove Top & Pressure Cooker
Light, fluffy, moist and perfectly flavored rice that is the perfect accompaniment to any Mexican entree. No need to rinse your rice! Use the other half of your 8oz can of tomato sauce to make enchilada sauce or freeze it for your next batch of rice. If you do not have Caldo de Tomate, use the onion, salt & garlic as directed in the recipe. See Notes in my post for Pressure Cooker adjustments & reduce the broth as noted in the ingredients.
Ingredients
  • 1 cup long grain white rice
  • 1 Tablespoon cooking oil
  • 1 1/2 teaspoons Caldo de Tomate (if using, omit the onion, salt & garlic)
  • 1/4 cup diced onion*
  • 1/2 teaspoon salt*
  • 1/2 teaspoon garlic powder* (or two pressed garlic cloves)
  • 1/2 cup tomato sauce (half of a 8oz can)
  • 2 cups chicken broth (or 2 teaspoons Better Than Bouillon +2 cups water)
  • Pressure Cooker: REDUCE the broth to 1 cup (6qt cooker) or 1,5 cups for 8 qt cooker
Instructions
1. In a medium saucepan, heat oil over medium-high heat.2. Pour in dry long grain rice and stir, cooking until golden brown.3. Toss in Caldo de Tomate -OR- onion, salt and garlic, stirring until fragrant.4. Slowly pour in tomato sauce and chicken broth, stirring to completely coat the browned rice.5. Cover, and bring rice to boil, then quickly reduce heat to LOW.6. Simmer for 20-25 minutes.7. Remove from heat and fluff the rice with a fork, serving immediately. PRESSURE COOK DIRECTIONS1.TURN KEEP WARM OFF. Select Saute Low. Add oil to insert. 2. When Hot, add dry rice, stirring until golden brown.3. Add Caldo de Tomate -OR- onion, salt & garlic, stirring until fragrant.4. Add broth, tomato sauce and stir well.5. Cover, close pressure valve, and select RICE or High Pressure for 8-10 minutes.6. After the cook time has ended, let the cooker naturally release pressure for 11-13 minutes (NPR).7. Open pressure valve, remove the lid and fluff the rice with a fork. Serve immediately. 
Details
Prep time: Cook time: Total time: Yield: 4-6 servings


4/15/20

0 EASY Instant Pot Refried Beans - No Soaking!


Refried beans, a classic Mexican staple at most restaurants and Hispanic homes, are perfect for burritos, tostadas, as a dip, 7 Layer Dip or by themselves. The beauty of making refried beans at home is that you can make them as spicy or as chunky/creamy as you want.

I can almost guarantee that you will find a pressure cooker in just about every Hispanic home. Why? Because pinto beans cook SO quickly and easily for refried beans. The old fashioned stove top recipe has you soak your beans overnight and cook them for 2.5 - 3 hours. With a pressure cooker, no soaking is needed and the whole process from start to finish is under two hours.

Pinto beans are a good source of protein and a great item to have in your long term food storage. The older the beans, the longer the cook time needed to soften them.
Shelf Life: Beans should be stored in a cool, dark place and will keep for at least 3-5 years. After that, beans can be used, but may take much longer to cook to soften.
TIP: To soften old beans, add 1/4 teaspoon baking soda for every pound of beans in your recipe.


Many recipes will caution against using salt until the beans are cooked; however, with pressure cooking, adding salt along with the beans not only enhances their flavor, it helps them hold on to their skins and keep their shape.

Canned green chilies are an easy way to add flavor and control the heat.

TIP: Freeze your chopped onions. I chop, measure, label and freeze. Frozen onions work great in cooking. Don't use frozen onions for recipes that call for raw, uncooked onion (ie. salsa).


Beans cook more evenly in a lot of liquid and any remaining liquid can be used as a broth or to fry the beans in a skillet. You can use water or vegetable broth, or a combo of the two. After cooking, I strain the liquid and put about 1-2 cups back into the pot, along with the cooked beans.


Use an immersion blender if you want smooth and creamy refried beans, or use a potato masher if you like chunky. I like smooth, and my husband likes chunky, so I mash first, take some out for him, and then blend the rest for me.


I use my saute/browning setting to help thicken the beans in my pressure cooker. You can use the traditional method of putting 1 Tablespoon of oil in a heavy, non-stick pan, adding 1 cup of water to the pan, and cooking the beans over low heat until the desired consistency is reached.

Enjoy!


print recipe

Easy No Soak Refried Beans - Pressure Cook
Cooking beans in the pressure cooker are so much faster than cooking them on the stove & no soaking is required! If you have very old beans, try adding 1/4 teaspoon baking soda to the mixture to help soften. Use refried beans in burritos, 7 layer bean dip, tostadas, Mexican pizza
Ingredients
  • 2 cups dried pinto beans (one pound)
  • 1 Tablespoon olive oil, vegetable oil, or bacon grease (helps prevent foaming)
  • 1 cup chopped onion (can use 1 T. onion powder or 3 T. dried onion flakes)
  • 2 Tablespoons minced garlic (1/2 teaspoon garlic powder or 1.5 teaspoons garlic flakes)
  • 1 (4oz) can of diced green chilies (you choose the heat)
  • 1 teaspoon salt
  • 8 cups of water, vegetable broth or combo of the two

  • Instructions
    1. Pick over your dry beans and discard any broken or shriveled beans.2. Rinse beans and drain.3. Put rinsed beans in the pressure cooker.4. Add oil or bacon grease, onions, garlic and chilies to the pressure cooker.5. Cover with 8 cups of water and stir.6. Close the lid, lock the cooker and select HIGH pressure.7. Set the time for 30-35 minutes (previously soaked beans = 20-24 minutes. 8. Allow the pressure cooker to release naturally (NPR). 9. Remove lid away from face & strain the beans in a colander or strainer, reserving the liquid. 10. Puree with an immersion blender or mash with a potato masher to desired consistency. If you wish, you can put 1 Tablespoon of oil in a heavy, non-stick skillet, adding 1 cup of reserved bean water to the pan. Cook beans in pan over low heat, stirring until desired consistency is reached, about 10 minutes. Leftover beans can be frozen in individual portions for up to 3 months.
    Details
    Prep time: 15Cook time: Total time: Yield: about 5 cups
Related Posts Plugin for WordPress, Blogger...
Pin It button on image hover