If you are making homemade yogurt on a regular basis, and love thick, Greek style yogurt, you will want to have this Cool Kitchen Tool:Euro Cuisine Yogurt Strainer. I have used this strainer many, many times and LOVE it!
On the box, it calls itself a "Yogurt Maker" but in reality, it is a strainer. You can use it to strain yogurt or cheese.
You can watch my video below and see how easy it is to use and clean. Pssst.... I'm giving one away to one lucky reader! Giveaway is located at the end of this post.
I used 1% milk, Siggi's Vanilla Skyr yogurt as a starter, poured the warm yogurt into the strainer, and put it into the fridge for 4 hours...
There are two versions of this strainer. They both are made from plastic, but one has a plastic mesh liner and the other has stainless steel liner. The stainless steel one is about $10 more.
Both strainers are NOT dishwasher safe, so I recommend hand washing. Some readers have reported some tearing with the plastic mesh, but if you are careful with removing your yogurt and cleaning it, you shouldn't have a problem.
The Euro Cuisine strainer only holds 8 cups of yogurt, but you can easily divide a gallon of yogurt between two strainers and stack them in your fridge.
Why Strain your Yogurt?
Straining your yogurt accomplishes a few things:
Increases the thickness. The longer you strain, the thicker your yogurt will become.
Increases the protein in your yogurt.
Reduces the tang of yogurt.
Very thick yogurt can be used as a substitute for cream cheese. Greek style yogurt is thick yogurt that is high in protein.
5 Tips for using your Euro Cuisine Yogurt strainer
1. Strain your yogurt warm. As long as your yogurt appears set, you can pour it into your Euro Cuisine yogurt strainer while warm and stick it in the fridge. Some people prefer to chill their yogurt first, but it isn't necessary. I've done it both ways, and have found that the whey takes twice as long to go through chilled yogurt. It only takes 4 hours to fully strain 8 cups of yogurt in the fridge.
2. Put a damp coffee filter over the center cone. (Optional) For clear whey and no yogurt loss, you can put a damp coffee filter over the center cone.
I have found only about 1 teaspoon of yogurt in my whey when I don't use a coffee filter. This doesn't bother me.
3. For best results and ease of removing, fully strain your yogurt. You will have a very thick yogurt, but very little will stick to the fine mesh screen. You can thin your yogurt to your desired consistency, by whisking some of your drained whey back into your yogurt.
4. Invert your strainer over a plate, bowl, or use the Euro Cuisine strainer lid. Tap it a couple of times and the yogurt will fall onto the plate. Do not attempt to use a spoon or spatula to scrape off any yogurt from the fine mesh, as it can tear easily.
5. Hand wash & use a kitchen sprayer to clean. Fill the clear Euro Cuisine strainer bowl with hot, soapy water. Place the strainer into the soapy water and allow it to soak for a few minutes. Rinse with warm water or use a sink sprayer to remove any yogurt. Air dry. I have had my Euro Cuisine Yogurt strainer for over two years, use it weekly, and it still works great!
Follow these tips and your Euro Cuisine Yogurt strainer will last you for years to come. Enjoy!
To enter the Giveaway, click on the Facebook link below or enter in your email address. Good luck!
This creamy, homemade low carb yogurt is delicious on its own, can be used as substitute for mayonnaise or sour cream in many recipes. Add fresh herbs for a tasty veggie dip or salad dressing. Strain your yogurt for a yogurt "cheese" that can be used in place of cream cheese.
If you are on a low carb or Keto diet, this recipe will help you immensely in your journey. The Instant Pot will help you make yogurt, oh - so - easy. In fact, it is the *main* reason I purchased my Instant Pot - just for the yogurt setting. Making your own yogurt will pay for your Instant Pot in just a very short time.
See how easy it is to make, right here!
Why make your own low carb yogurt?
1. Diet & Control the Ingredients. You can avoid artificial sweeteners, additives and chemicals that are often in store bought yogurt to thicken, increase the shelf life and improve the flavor. (Check out the ingredients in the CarbMaster yogurt below). If you are sensitive to lactose, artificial sweeteners, or on a low carb diet, making your own yogurt makes sense.
2. Cost. Making your own yogurt can cost less, depending on where you live and how much milk costs in your area. Low carb, lactose free, and other specialty yogurts can cost much more. How does .39 cents per serving sound?
4. Flavor. Making your own yogurt, has a fresh flavor, much unlike the "cooked" taste of store bought yogurt. You can control the level of tang by choosing your starter and incubation times.
5. Recipes. Use your homemade yogurt as a substitute for mayonnaise or sour cream in many recipes. Add herbs for a veggie dip. Make your own creamy vanilla frozen yogurt. Save some yogurt and freeze it for starters to make even more yummy yogurt!
CarbMaster Yogurt Ingredients: Water, Milk Protein concentrate, Milk Protein isolate, cream, skim milk, modified corn starch, natural flavor, salt, gelatin, tricalcium phosphate, pectin, agar, cultured dextrose, sucralose, acesulfame potassium, lactase enzyme, vitamin A palmitate, Vitamin D3, Active cultures with L. Acidophilus and L.bifidum.
The recipe in this post uses the Original Cold Start method, which was researched, developed and named, right here on this site. The only requirements for this method are: *You must have a yogurt setting or use a yogurt maker *You must use an ultra pasteurized or shelf stable milk
Can I use the Traditional (boil) method with this recipe?
Absolutely. You can use heavy whipping cream, half & half milk or any combination. Heat your milk, cool to 100°-110°F, add your starter and incubate from there. Traditional (boil) method.
What if I don't have the yogurt setting?
You can still make yogurt. Try this workaround. My best tip for this method is to wrap your pot of milk in a large towel, and put it in your oven with *only* the oven light on, to maintain the incubation temps.
That's it! Let's get started!
Choosing your milk: Milk has naturally occurring sugars, or lactose in the milk. Let's compare some milks and see what the carb counts are for 1 cup of milk:
Information from MyFitnessPal
The milk with the lowest amount of carbs per cup is Heavy Whipping Cream, but it also has the most calories, at 800 per cup!
Lower fat milks have a higher water content and when used for making yogurt, ends up being fairly thin unless non fat milk powder is added or if the yogurt is strained. Straining yogurt concentrates the proteins, reduces the lactose, thickens your yogurt and reduces the yield.
Choosing your Starter:
1-2 tablespoons of your favorite plain or vanilla yogurt as your starter.
The starter you use will have an impact on the taste and texture of your yogurt, so choose a starter that you like. If you like mild yogurt, try Fage or Oui yogurt as your starter. If you like more tang, try Siggis, Chobani or Greek Gods. Check here for more information on yogurt starters.
Oui is one of our favorite yogurts and you can see why: Oui vanilla yogurt: 170 cal 16 carbs Fat 8 Protein 5 Sodium 85 Sugar 15
My goal: Create the thickest, no strain yogurt, that tastes like OUI, with the lowest number of carbs.
Recipe: 1 carton of Whole Fairlife milk + 1 cup heavy whipping cream + Oui vanilla yogurt as the starter. Entering the whole recipe amounts into the MyFitnessPal Recipe Calculator and dividing it into 12 (5oz/142g) servings, this is the result:
5 grams of carbs? That is great! Less sugar, more protein, and fewer calories are a bonus! You may find store bought yogurt listing 3 or 4 grams per serving, but most often, the serving sizes are much smaller.
In store bought yogurt, the carb count stabilizes around 4-5 grams per cup, as lactic acid produced (by the whey) continues to be made and the live bacteria become dormant.
Tips for reducing the carb count even more!
1. Incubate your yogurt 15-24 hours. At this point, the friendly yogurt bacteria consume all the lactose. Keep in mind that the longer you incubate, the more tang you will develop in your yogurt. Increased whey separation is also common with longer incubation times. Most commercial yogurt does not ferment long enough at warm temperatures for the maximum consumption of lactose by the bacteria. Although fermentation continues after chilling, it is much slower.
2. Strain your yogurt. Straining yogurt removes liquid whey, which contains lactose (milk sugars). Not only does this thicken your yogurt, it increases the protein levels by concentrating it in your remaining yogurt. Straining your yogurt also makes it Greek style. The longer you strain, the thicker your yogurt will be, almost like cream cheese. Straining yogurt is simple, and this section of my IP Yogurt Guide for Newbies will give you some ideas how. Low Carb Toppings or Mix-ins
1. Alternative sweeteners
2. Pure vanilla extract (recipe here)
3. Peanut Butter
4. Nuts
5. Fruit: Strawberries, raspberries, & blackberries are the lowest
print recipe
Low Carb Yogurt - Pressure Cook
by Frieda Franchina, July-9-2018
Make this very easy, creamy, low carb yogurt in your Instant Pot or yogurt maker! Choose an Ultra Pasteurized (UHT) filtered milk, half & half, heavy whipping cream or a combination for the lowest amount of carbs. You MUST use an ultra pasteurized or Ultra High Temp milk with this recipe. Flavor or sweeten as desired or use your plain yogurt as starters, a substitute for mayonnaise/sour cream in many recipes. Add fresh herbs to make a veggie dip or salad dressing. Strain very thick to make a yogurt "cheese" that can be substituted for cream cheese.
Ingredients
1 (52 ounce) carton of Whole Fairlife milk (MooTopia, CarbMaster or Natrel Lactose Free)
1 cup of heavy whipping cream
1-2 Tablespoons of fresh, plain or vanilla yogurt, with live/active cultures (freeze the rest of your yogurt in tablespoon portions in a ice cube tray)
1 teaspoon vanilla extract, sweetener of your choice, toppings
Instructions
1. Make sure your Instant Pot & utensils are clean and free of any soap residue.2. Pour the contents of your milk & heavy whipping cream & yogurt starter into the pot insert, whisking well.3. Cover your Instant Pot with the lid & close the pressure valve. If your IP silicone seal is smelly, you may use a lid from your pots & pans, dinner plate, pie plate, or flat silicone suction lid.4. Select Yogurt Normal, according to your model. If you have the Ultra, this can be Medium or a customized setting in the 100°F-110°F range. If you have another model, check my Original Cold Start Yogurt recipe for your model and follow the directions there.5. Select the incubation time for 8 hours. You can choose a longer time, up to 24 hours, by pushing the (+) button for more tang to your yogurt.6. The IP will beep, and begin counting UP. When finished, the IP will beep and your display will show YOGT.7. Remove your pot of yogurt, cover with a paper towel and lid, and chill in the fridge for at least 4-6 hours. 8. If you want, you can transfer your yogurt to another container or strain by slowly pouring your yogurt - No stirring or scooping the yogurt until it has fully chilled. 9. After chilling, you can add your sweetener of choice and vanilla extract. I use 1 teaspoon of pure vanilla extract for this recipe. Save some plain, unflavored yogurt for starters or use a subs for mayo or sour cream.10. Yogurt will keep for at least 2-3 weeks in the fridge. When frozen in tablespoon portions for starters, yogurt will remain viable for up to 6 months. Thaw starter at room temp for 30 minutes prior to mixing in with your milk.
Details
Prep time: Cook time: Total time: 12Yield: 12 (5oz) servings Calories: 151 Carbs: 5 g Total Fat: 11 g Protein: 7 g Sodium: 73 mg Sugar: 4 g
Food pouches are a fun treat and great to have on hand in the car, at the park, or grab on the go with your kiddos.
Why not make your own food pouches? They are easier to make than you think!
I used my homemade yogurt and added a touch of cinnamon to my homemade applesauce for these fun animal pouches from Squooshi. Not only will you know what is in your food pouches, think of the savings you will have by making your food/puree/smoothies, and reusing these pouches!
I choose Squooshi because these pouches are Reusable. I also wanted something that was Easy to fill, and didn't leave a big mess with a lot of waste. This post and video is not sponsored by Squooshi.
Take a look at how easy and cute these are!
Aren't they fun? I ordered the Squooshi bundle that has a fill station and includes 6 large (6oz) refillable pouches.
It's not a complicated set-up and it is very easy to use. I also found cleaning the pouches and the tank very easy.
If you watched the video, you may have noticed that I put some of the yogurt/applesauce on the orange silicone part of the plunger.
This is to lubricate the plunger and make it easier to push the food, smoothie, or puree through the tank.
Pouch Info
Pouches are BPA-free, Phthalate-free, PVC free and Lead-free.
This little guy had a hard time choosing which animal he wanted, but ended up choosing the strawberry yogurt Panda.
Does it pass the test?
It sure does!
There are other, smaller reusable pouches available, and they fill from the bottom. You have to be careful filling them, as food or seeds can get trapped in the zippered bottom and won't seal very well.
I used a total of 4.5 cups of yogurt/applesauce to fill these pouches and will definitely be ordering another cute Squooshi animal set!
Do you love egg nog? Don't you wish you could have it year round?
Although egg nog is a traditional, seasonal drink, it is only sold in stores from about late October through January.
If you make it yourself, you can enjoy egg nog any. Time. You. Want.
And it's gluten free, soy free, and can be vegan!
I have seen powdered egg nog online, but really wanted to make my own. What is great about a powdered egg nog mix is that you can add it to your milk of choice, yogurt, milk shake, or smoothie.
It also makes a great gift.
After more searching, I found this recipe and was surprised by one of the ingredients...
Well, yeah - I've made vanilla pudding and yes, it does use eggs...
But boxed pudding doesn't use eggs to thicken; it uses cornstarch to thicken.
Custards are made with eggs, puddings are made with cornstarch. I learn something new every day!
Boxed pudding is gluten free, soy free and vegan!
Saco Buttermilk Powder Blend is an ingredient that I have used often for many of my recipes. It is a blend of buttermilk, sweet cream, dairy whey, and lactic acid. It's great, as it is gluten free & nut free. This helps bring a creamy texture to your egg nog, with a very slight tang.
Instant Powdered Milk is what you will want to use for this recipe. Instant powdered milk dissolves more easily than traditional powdered milk that needs hot water to help it dissolve. You can use regular or sugar free pudding, but it must be instant, not the cooked kind. Instant milk powder is not vegan, but you can try a vegan substitute for powdered milk.
Ground nutmeg is traditional for making egg nog. If you have access to whole nutmeg, and a microplane grater, even better! You would be amazed how wonderful freshly grated spices taste in cooking and baking.
Granulated sugar is added to the mix, but you can use your choice of an alternative powdered sweetener.
That's it - five simple ingredients is all that it will take to make this Egg Nog drink mix.
Put everything together in a 7 cup or larger blender or food processor.
Pulse till fully combined.
Put your mix in a container, with a well fitting lid.
Or find a cute jar...
You can use Avery.com to design some custom labels, download a template, or use stickers from a craft or office supply store.
Use a light spray of E6000 adhesive to stick craft paper labels to your glass. This is the only stuff I have found that works. If you use too much, it will saturate the paper and cause it to wrinkle.
Use a little or a lot, let it sit for a minute or two, stir and enjoy!
Egg Nog Drink Mix adapted from M. Hansen, Taste of Home
Ingredients
3 1/3 cup Instant non fat milk powder (or vegan substitute)
1 (5.1 oz) large pkg of Instant Vanilla Jello pudding (can be regular or sugar free)
1/2 cup SaCo Buttermilk Blend powder
1/3 cup granulated sugar - or alternative sweetener of your choice
1 1/2 teaspoons ground nutmeg
Instructions
Put all ingredients in a food processor or blender.
Pulse until completely blended.
Store in an airtight container in a cool dry place for up to 6 months.
To make your egg nog:
1 cup of cold milk
3-5 heaping teaspoons of Egg Nog Mix
Stir the egg nog powder into the milk and let it sit for a minute or two, to help dissolve any lumps.
Stir again, till smooth and creamy.
You can use a blender or immersion hand blender to smooth out any lumps.
Try adding egg nog mix to your yogurt, milkshake, smoothie, or in baked goods.
A thick, crisp, light and fluffy Belgian waffle, drenched in syrup, gets a makeover with spices and buttermilk syrup. Buttermilk Waffles are a weekend favorite, as you can fill each square with the perfect amount of syrup, just right for each bite.
With the holidays around the corner, I looked for a spiced waffle and this Gingerbread Waffle recipe from King Arthur Flour fits the bill. The buttermilk syrup is just right, adding a sweet touch and compliments the spices.
Granted, I don't have all the ingredients to make these festive waffles, but there are some substitutions you can use.
For instance, the recipe calls for sour cream and molasses. I used homemade yogurt, which works just as well as sour cream, adding a slight tang and providing moisture to the batter. You can also use soured milk (lemon juice + milk) or buttermilk as a substitute. If you make your own yogurt, you can use whey as an acid to sour the milk.
Molasses is something that I have on hand for making soft gingerbread men cookies, but I don't use it year round for anything else. To me, it has a very strong taste. You can use brown sugar (dark or light), dark corn syrup, or even maple syrup as a substitute for molasses. I opted to use brown sugar.
Buttermilk syrup is soooooo good. It is sweet, slightly tangy, and made with pure vanilla extract, I think it would be great to bottle and give as gifts. It's fantastic as a pancake/waffle syrup, sauce, or ice cream topping.
I have Saco buttermilk powder on hand for making bread, biscuits, pancakes and waffles, but it was easier to make soured milk. Soured milk is made by putting 1 tablespoon of lemon juice (you can use white vinegar) into a measuring cup and filling the measuring cup up to 3/4 cup line. Let the milk sit for a few minutes and it will begin to curdle and sour. It's a great substitute for buttermilk in many recipes: Waffles, Flaky Biscuits, etc)
Heat the sugar, buttermilk (soured milk) and butter in a heavy bottom 3 quart sauce pan. Using this size of pan is important, as the syrup will double in size while heating. A thick, heavy bottom pan will help keep the mixture from burning.
You will want to stir it constantly, to keep the bubbling under control. A flat whisk is a great tool for this. After it reaches a boil, cook it only for 5 minutes, then remove it from the stove. Wait till the bubbling subsides and add the baking soda and pure vanilla extract.
The baking soda gives the syrup a foamy, airy texture and the extract will give it a lovely vanilla flavor.
TIPS: Use a large pot. The syrup will foam, bubble and double in size. Stirring constantly helps keep the bubbling under control. Do not cook it for very long. If you cook it longer, it will become darker and more like a caramel candy. It will also set firmer and not be as syrup-y if cooked longer. It will become more chewy. Do not walk away. Stir it and stir it constantly. If you walk away, it will double in size and possibly overflow, creating a big, sticky mess.
Gingerbread Waffles Adapted from King Arthur Flour
2 cups all purpose flour (can use a mix of whole white wheat and all purpose flours)
2 Tablespoons baking powder
1/2 teaspoon baking soda
1/2 teaspoon salt
2 teaspoons ground powdered ginger
1/4 teaspoon ground nutmeg
1/4 teaspoon ground cloves
4 large eggs
6 Tablespoons butter, melted and cooled
1 cup milk
1/2 cup plain yogurt or sour cream
3 Tablespoons brown sugar, molasses, maple syrup or dark corn syrup
Preheat your waffle maker.
In a mixing bowl, whisk together flour, baking powder, baking soda, salt, and spices.
In another separate bowl, mix together eggs, melted butter, milk, yogurt and brown sugar.
Pour the milk/egg mixture into the flour/spice mixture, stirring until just combined.
A few lumps is o.k.
Ladle about 3/4 cup batter into your waffle maker and cook according to your waffle maker directions.
Makes about 5-6 Belgian style waffles.
Can make ahead and store in freezer bags.
Reheat by putting your waffles in the toaster.
Enjoy!
Buttermilk Syrup
1/2 cup butter
1 1/2 cups granulated sugar
3/4 cup butter milk -or- 1 tablespoon lemon juice and enough milk to make 3/4 cup. Let sit 5 minutes.
1 teaspoon baking soda
1 1/2 teaspoons vanilla extract
In a heavy 3 qt saucepan, melt the butter. Add sugar and buttermilk (or soured milk).
Stir to dissolve.
Over medium heat, allow mixture to come to a rolling boil, stirring constantly for 5 minutes.
Remove saucepan from heat. Wait for bubbles to subside.
Add baking soda - stir vigorously, as it will foam.
Add vanilla extract.
Serve warm over pancakes, waffles, cake or ice cream.
Making yogurt has never been simpler, now that I am using my Instant Pot pressure cooker to make it. You have so many choices when making yogurt: what milk to use, type of starter, how long to incubate, how thick, and how sweet. So many options!
Goat milk is a good option for those who have a dairy allergy, as it is easier to digest, is naturally homogenized, has less lactose, and has 89% less of the alpha S1 casein, which is common in cow's milk and more likely to cause a dairy allergic reaction in some individuals. The fermentation process breaks down the proteins in the milk for better digestion. You can find out more about Goat vs Cow milk for making yogurt here.
Milk: The fresher the milk, the less "goaty"it will taste. Goat milk has a stronger taste than cow's milk. I am using pasteurized goat's milk from the Drake Family Farm. My grandson got to visit this farm, adopt a goat and give it a name. So fun!
Starter: You can use a plain, unflavored dairy yogurt for your starter (that contains Live/Active cultures) all you need it 1-2 tablespoons. The small amount shouldn't affect any dairy allergies, but if you are concerned, you can use a non dairy yogurt, such as SoDelicious, as your starter. You can also use a powdered direct starter, such as Yogurmet, that can be found online or at health food stores. You can read more about yogurt starters here , how to choose them and where to find them. Heating the Milk: You will need to heat your milk to at least 100°-110° for the yogurt cultures to work. While researching, I found that the higher you heat your goat milk yogurt, the more "cooked" it will taste. Brod & Taylor found that keeping the goat milk under 165°F gave a fresher taste to their yogurt, so that is the temp that I used.
Thickeners: Because of the different structure of the proteins in goat's milk, it makes a thin, pourable yogurt. If you want it to be thicker, you will need to add a thickener. Brod & Taylor suggest using cornstarch or agar agar powder, dissolving it into a little bit of cold milk and adding it to the hot milk. You can view a list of suggested thickeners, how to use them, and the pros/cons of each here, at Cultures for Health.
I used cornstarch, and added it to the 165° milk. It did not thicken much at all, and then it dawned on me....
I'm pretty sure that you need to heat your milk to a higher temp in order to activate the cornstarch, much like when making a gravy.... *sigh*
So, I ended up using Knoxx unflavored gelatin as my thickener, which worked much better! 1T. of powdered gelatin per 4 cups is all you need.
It's important to sprinkle the gelatin into cold milk to let it soften, and then add it to hot milk to dissolve it. If you add the gelatin to cold or warm milk, you will have little bits of gelatin floating throughout your yogurt. Are you ready? Let's make yogurt!
1. Clean, Cold Pot: Start with a very clean pot, free of any soap residue. No need to sanitize or sterilize the pot.
Add some ice cubes to your Instant Pot liner. Let it sit for a couple of minutes, then pour the ice water out. Do not wipe dry.
This will help keep the milk from sticking to the bottom of your pot, making it easier to clean.
2. Milk: Pour the milk directly into the chilled pot liner.
3. Heat Milk: Since the Instant Pot heats milk in the 160°-180°F range, I opted to use a probe thermometer to make sure the milk didn't get above 165°F. If you don't want your milk to go over 165°, you can check the temp mid-cycle at 15 minutes, and test the temp with your thermometer. You can use the complete yogurt cycle and reach a higher temp, if you wish - the yogurt will have a more "cooked" taste.
To find the Boil setting on your Instant Pot:
DUO & SMART Models:Push Yogurt and quickly push ADJUST
DUO PLUS MODEL:
Select the Yogurt program
Press the YOGURT key repeatedly until you see MORE on the display
In 10 seconds, heating will begin
When the boil cycle has ended, the IP will beep 3 times and display YOGT.
ULTRA MODEL:
Turn the dial to YOGURT
Press the dial to select it
Press the dial to select TIME (30 min for a half gallon, 50 min for a full gallon)
Press the dial to confirm the time
Turn the dial to TEMP
Push the dial to select
Select HIGH temp for BOIL
Pus START and the milk will heat
When the boil cycle has ended, the display will show YOGT.
This ThermPro remote thermometer is pretty easy to use, and is relatively inexpensive. The unit on the left is portable and flashes green while the milk is getting to temperature. The unit on the right is connected to the probe, which is in the milk.
You don't need to use the IP lid for making yogurt. You can use any lid from your pots/pans, a glass lid, a dinner plate, glass pie plate, or a flat silicone suction lid.
4. Bloom Starter & Check Temp: While your milk is heating, sprinkle your unflavored gelatin into some cold milk.
The ThermPro flashes red and beeps when the temperature is reached.
I tested the milk temp with my highly accurate Thermapen, and it read 2 degrees warmer. I may need to calibrate my ThermPro thermometer and adjust it for more accuracy.
5. Remove the skin from the surface of the milk. This will help your yogurt stay smooth and creamy.
6. Stir in Gelatin: Mix the bloomed/softened gelatin into the hot milk. Whisk well.
7. Cool the Milk & Check Temp: Place the bowl into another bowl of ice water to help cool the milk to 100°F-110°F, whisking while taking the temp. It should less than 5 min.
You will want to shoot for this range to add your starter, as it is the optimal temp zone for it to culture properly. Any higher temps will kill your starter and result in a thin milk, not yogurt.
Wipe the outside of the bowl dry before placing it back into the IP.
8. Temper Starter: Take a cup of your cooled milk and whisk in your starter, dissolving it well. Pour this mixture into your milk and give it a good stir. Tempering brings your starter to the temperature of your cooled milk and helps dissolve it better.
9. Incubate: This means to keep the milk and yogurt cultures at a constant 100°-110° temp for several hours.
Incubate on Yogurt Normal for at least 6-8 hours for a mild yogurt, 9-10 hours for more tang.
To find the Normal Yogurt setting on your Instant Pot:
DUO & SMART Models:Push Yogurt once. It will say 8:00 & Normal. If not, keep pushing the adjust button until it displays 8:00 and Normal is lit.
DUO PLUS MODEL:
Select the YogurtNormal
Press +/- to set incubation time.
When finished, the IP will beep and display YOGT.
ULTRA MODEL:
Turn the dial to YOGURT
Press the dial to select it
Press the dial to select TIME (5-24 hours, depending on how tangy you like your yogurt)
Press the dial to confirm the time
Turn the dial to TEMP (LOW, MED, HIGH, Custom)
Select MED (107°F) or CUSTOM (You can choose a temp between 100°F-110°F)
Press dial to confirm
Push START Incubation will begin.
When the yogurt cycle has ended, the IP will beep and display YOGT.
10. Add your flavoring: Your yogurt will look thin. No worries! Putting your yogurt into the fridge will activate the gelatin and help it set and firm up.
Add your vanilla and choice of sweetener at this time, if desired. I like to use 1 teaspoon of vanilla extract and 2-4 tablespoons of warmed honey or granulated sugar. Mix in well.
You can now do one of 2 things:
Pour your yogurt into a single plastic container with a well fitting lid -OR-
Pour your yogurt into individual jars. Glass or plastic canning jars work well.
Allow your yogurt to chill in the fridge for at least 4-6 hours, or until the gelatin has set.
Enjoy your yogurt!
print recipe
Thick Goat Milk Yogurt - Instant Pot
by Frieda Franchina August-2-2017
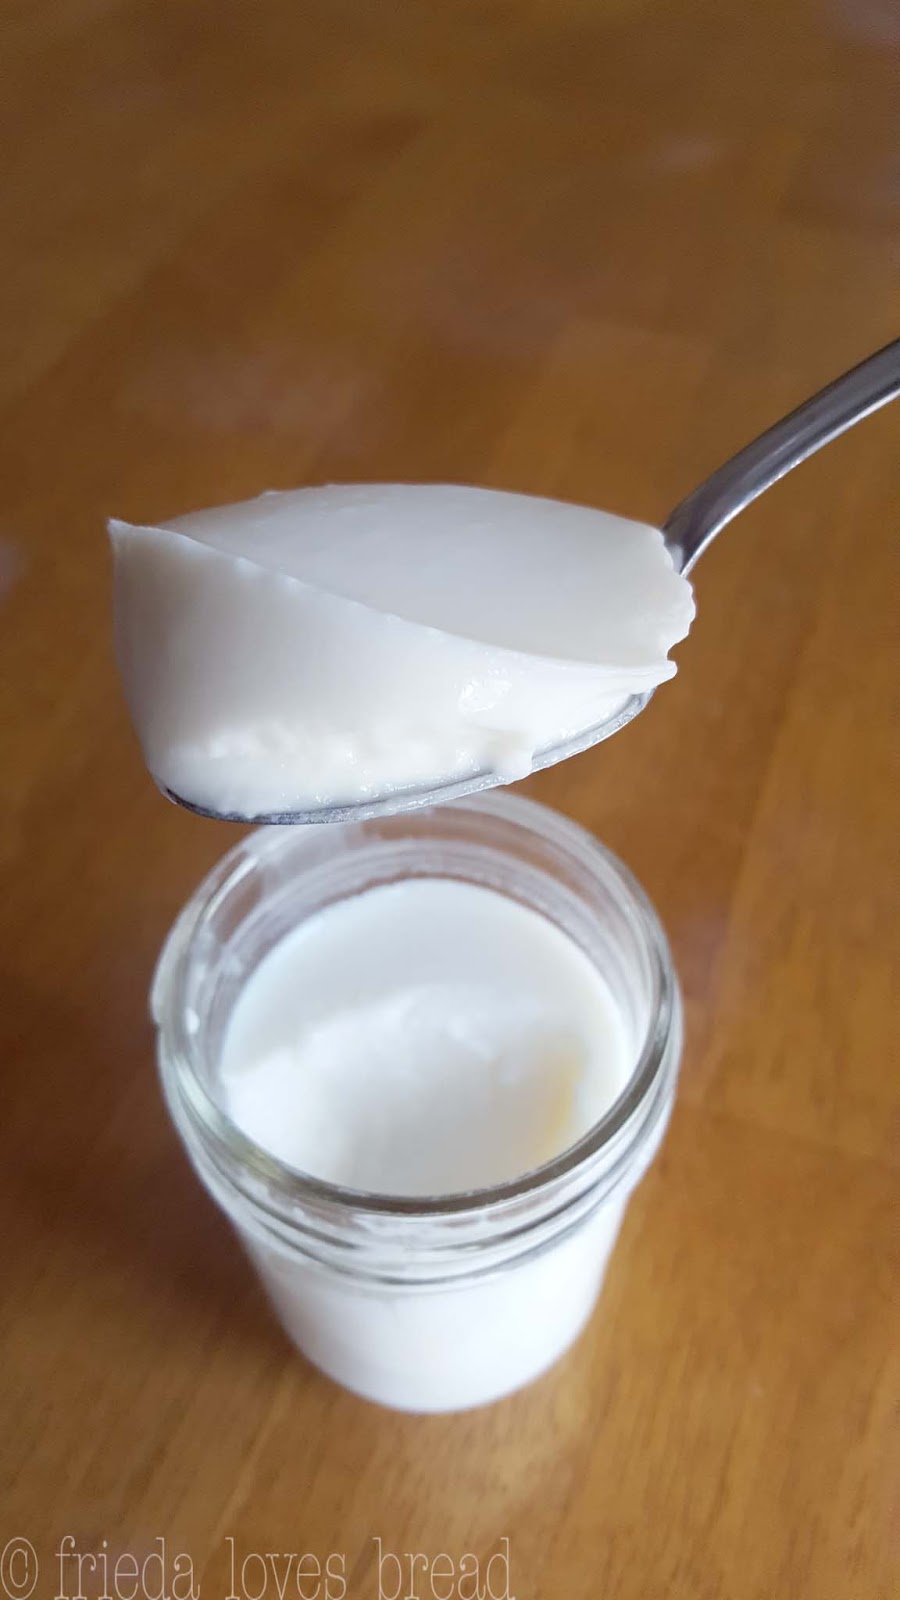
Goat milk yogurt has different milk proteins than cow's milk and needs a thickening agent to help it set like a traditional yogurt. Using the correct amount of gelatin helps keep the right consistency.
Ingredients
8 cups fresh or pasteurized goat milk, reserve 1 cup for gelatin
2 Tablespoons fresh, plain yogurt or powdered yogurt starter*
2 Tablespoons unflavored gelatin (I used Knoxx)
*If using powdered yogurt starter, follow directions on the package
Instructions
1. Start with a very clean pot and utensils. Put several ice cubes into the pot. After a few minutes, pour out the ice water; do not wipe the pot dry. 2. Pour your 7 cups of goat milk into the pot. Reserve the extra cup of milk for step 4.3. Heat your milk by using the BOIL cycle as directed by your Instant Pot model, to your desired temperature. 165°F is recommended for a clean taste. 180°F will give you a more 'cooked' taste. Check mid-cycle at the 15 minute are and test your temperature with an accurate thermometer.4. While your milk is heating, sprinkle 2 Tablespoons (about 2.5 packages) of unflavored gelatin into the cold, reserved milk. Allow it to sit and soften (bloom) for at least 10 minutes.5. After your milk has heated to your desired temperature, whisk your bloomed gelatin into the hot milk. Mix well.6. Cool your milk to 100°-110°F by setting your pot of hot milk over a large bowl of ice water or sink filled with cold water. Whisk and take the temperature every couple of minutes. It should take less than 5 minutes.7. When you have reached your cool down temperature, take a cup of your cooled milk and stir in your 2 Tablespoons of yogurt starter or powdered starter, and mix well. Pour this mixture into your pot of cooled milk and stir well to combine.8. Incubate your yogurt by setting your Instant Pot on the Yogurt Normal cycle (based on your model), which defaults to 8 hours. Push the +/- buttons to increase or decrease the incubation time. 9. When the cycle is complete, your Instant Pot will beep and display YOGT. 10. Flavor your yogurt with 1 teaspoon of vanilla extract and your choice of sweetener to taste. 2-4 Tablespoons of warmed honey or granulated sugar works well. Mix well.11. Put yogurt into a container or individual containers with a well fitting lid and place in the refrigerator for 4-6 hours. Yogurt will look thin, but set up once chilled. *You can cut this recipe in half, using 4 cups of milk, 1 Tablespoons of yogurt starter and 1 Tablespoon of unflavored gelatin. Keep the same incubation times.
Details
Prep time: Cook time: Total time: Yield: 10 servings