Showing posts with label Canning. Show all posts

11/7/17

7 Vanilla Spice Pear Butter - Pressure Cooker & IP Canning Instructions


Vanilla spiced pear butter - is really pear "sauce" that is reduced down to a jam-like texture. This Pear Butter is sweet, bright and citrus-y, with notes of pure vanilla, cinnamon and nutmeg. It is a perfect spread for toast, muffins, or stirred into your morning oatmeal, homemade yogurt, or as an ice cream topping, very much like you would use Apple Butter.

Using a pressure cooker greatly reduces the cooking time to soften the pears and using the Saute or browning setting helps reduce your pears into a wonderful, thick, jam-like sauce.

It is sweet, so feel free to adjust the amount of sugar in this recipe to your desired taste. I am canning this pear butter, and sugar contributes to the color and shelf life of the butter. It also freezes well and makes a nice gift for a family member, neighbor, or friend.


I am using Anjou pears that happened to be on sale, but you can also use Bartlett pears.

Peel, cut in half, and use a melon ball scoop to core the seeds out.


A paring knife works well in removing the stem and the blossom end (bottom) of the pear.

Slice the pear into wedges and put them inside your pressure cooker pot.


Ad your orange juice, lemon juice, zest, spices and sugar.

Using a citrus zester is a great way to add a flavor boost to any dish. A wooden citrus reamer will help you juice the orange or lemon.


Cover your pressure cooker and lock it. I LOVE using this ceramic non-stick pot for pressure cooking! It's great for any foods that may stick, apple butter, rice, mac N cheese, etc.

Set it for HIGH pressure, and time it for 15 minutes. When the cook time has ended, allow the pressure cooker to release naturally for 15 minutes. Open the pressure valve.

This smells amazing and reminds me of fall....


An immersion blender is super handy to puree the fruit directly in the pot, without dirtying another dish. You can use a potato masher or a stand blender.

Use the Saute or browning setting of your pressure cooker to help reduce the sauce. Stir often to prevent sticking, or use a ceramic non-stick liner to help reduce sticking and burning. If your browning setting is cooking your sauce too hot, choose a slow cooker setting if you have one.

You will know it is thick enough when it mounds on a spoon, or when a dollop is put onto a chilled plate, it sets up and is not runny.

Enjoy!


Print Friendly and PDF
Vanilla Spice Pear Butter
(inspired by this recipe and Ball Blue Book Guide to Canning)

Ingredients
7 pounds ripe pears; about 20 med pears (Bartlett or Anjou), peeled, cored and sliced
3 Tablespoons Orange juice
3 Tablespoons Lemon juice
1 Tablespoon zest (orange or lemon)
2 teaspoons pure vanilla extract
1 teaspoon cinnamon
1/2 teaspoon nutmeg
4 cups granulated sugar

Instructions
Put peeled, cored and sliced pears into the pressure cooker.
Add juices, zest, vanilla extract, spices and sugar. DO NOT STIR.
Close the pressure cooker lid and set the valve to Sealing.
Use High pressure, time for 15 minutes.
When cook time finishes, allow pressure cooker to release naturally for 10 minutes. (NPR)
Open pressure valve to release any remaining steam.
Use an immersion blender, potato masher, or stand blender to puree the pears.
Saute Low, or use browning setting to cook and reduce the sauce to desired thickness.
(With the IP, you will need to re-set SAUTE every 30 minutes, so set a kitchen timer)
Can use keep warm setting (about 145°F) to help thicken.
As mixture thickens, stir frequently to prevent sticking and bubbling.
Test thickness by putting a small spoonful on a chilled plate.

20 min to prep pears
10 min to prep butter
10 min to get to pressure
up to 2 hours of saute to thicken

Makes approximately 7-8 cups.
Keep covered in the refrigerator, 1-3 weeks.
Freeze in freezer safe containers, up to 3 months.
Water bath or Steam can, up to two years shelf life.

Canning Your Pear Butter


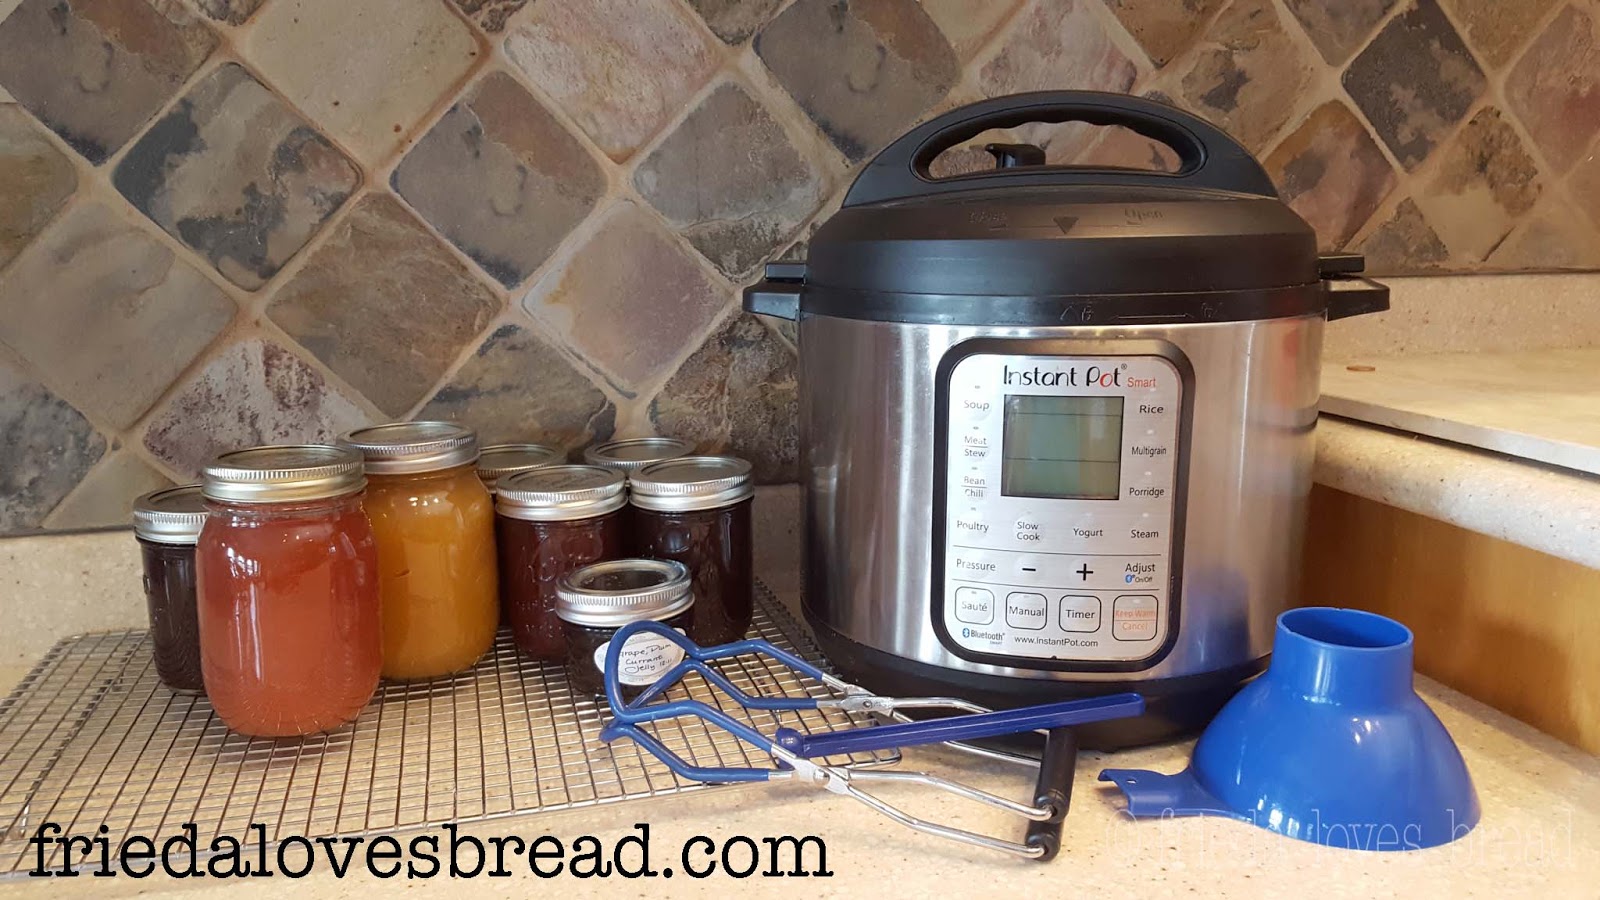
This recipe made 7 half pint jars of Pear Butter. I was able to fit seven, 8 oz wide mouth jars in my 6 quart Instant Pot, when set on a trivet. The tops of the jars must be level with the top of your pressure cooker pot, to make sure the lid closes correctly.

IMPORTANTIf you are new to canning or Steam Canning with an Instant Pot (which does NOT use pressure), please check out the following posts first. There are important guidelines to follow and ensure safe canning.

If you do not want to use the steam canning method, you can water bath can your Pear Butter. You can see how water bath canning is used for Jalapeno Jelly, here.

Safe Steam Canning Rules
Safe Steam Canning with Your Instant Pot 

Video: Removing jars from the IP. You can hear the seal "pop."


Canning Pear Butter in Instant Pot

yield approximately 7-8 cups, or 4 pints
Ingredients & Equipment
Instant Pot
Hot Pear Butter, made as directed above
4 pint jars or 8 half pint jars with lids and rings
3 1/2 cups water, in the IP pot liner (at least level with the trivet)
Canning funnel
Plastic knife
Clean, damp paper towel
Jar lifter, tongs, or silicone gloves
Wire cooling rack

Instructions
1. Clean jars with hot, soapy water and rinse well. Keep hot until ready to use.
2. Using a canning funnel, ladle hot Pear Butter into each jar, leaving 1/4" head space.
3. Remove any air bubbles with a plastic knife.
4. Remove funnel, and using a clean, damp paper towel, wipe the jar rims clean.
5. Place new canning lid onto the jar and secure with canning ring, turning it finger tip tight.
6. Put jars onto the trivet, inside the IP. (Make sure you have water in the IP!)
    If stacking a second layer, off-set the jar to sit over two jars - not directly on top of the jar.
7. Cover with the IP lid and lock.
8. Remove the pressure valve. (This is important!)
9. Push the STEAM button.
10. When a full stream of steam comes out of the valve AND the float pin comes up, begin the timing process, according to your altitude on the chart below:

0-1,000 feet = 10 minutes
1,001-3,000 feet = 15 minutes
3,001 - 6,000 feet = 20 minutes
6,001 - 8,000 feet = 25 minutes
8,001 - 10,000 feet = 30 minutes

After the processing time is up, turn off the IP or unplug it.
When the float pin drops, carefully open the lid, keeping steam away from your face.

Using tongs or silicone gloves, remove each jar carefully to a wire cooling rack.
Do not disturb for at least 12 hours.
If any jars do not seal, immediately put into the fridge to enjoy.

Label, date and store sealed jars in a cool, dark place for up to one year.

9/18/17

50 Steam Water Bath Canning in Your Instant Pot: Part Two, Strawberry Jam


Did you know you can steam can your fruits, jams, jellies and pickles in your Instant Pot? Steam canning in your Instant Pot is a great way to preserve smaller batches of food as it takes less water, less overall time to process, and doesn't heat up your entire kitchen! Making smaller batches is actually preferred when making jams and jellies, as you will get a consistent batch each and every time.

Before starting, you will want to become familiar with the rules of Steam Canning and test your Instant Pot using water and a thermometer. I have tested my 6 quart Duo at 4,500 feet altitude and there can be some variance due to size and altitude, so do a WATER STEAM CANNING TEST first.

You can view a step by step video instruction, here, and watch me process some delicious Apple Butter, here.


Print Friendly and PDF
I made some Strawberry Jam in my Ball FreshTec Automatic Jam/Jelly maker and was thrilled with the results of how easy and simple it was to make. The Automatic Jam/Jelly Maker does all the cooking and stirring, which left my hands free to get my jars, lids and rings ready to process the jam. You can find this recipe in the Ball Blue Book for Canning & Preserving.

1. Wash & Inspect your jars with hot soapy water and rinse them well. Using your dishwasher is fine.

Inspect your jars for any chips or cracks. Run your finger along the top of the rim - it should be smooth and free of any chips that may prevent your jar from sealing.

It is important to keep your clean jars HOT. You can keep them hot in your dishwasher, or pour boiling water over your clean jars in the sink.


OPTIONAL: Use your IP to sanitize your jars.

Trivet, 1 cup of water, put clean jars in IP, close, lock, set valve to Sealing, set time for 1 minute. Keep jars in IP till ready to use. 


2. Make your Jam. 
You can find the recipe here or in the Ball Blue Book of Canning. This takes about 25 -30 minutes to make, which is about the same time as it takes to prepare and fill the jars for canning.

I was able to make jam while a batch was processing and do 3 kinds of strawberry jam, back to back, taking 1.5 hours total to steam can 15-16 eight ounce jars of jam!


3. Fill your jars. 
When your jam is ready, empty out a HOT jar and set a canning funnel inside the jar. Fill it with your HOT jam, up to 1/4" from the top of the jar. This is called the "head space," which will allow your jars to seal properly.

If you have any jam left over that will not fill a jar up to the 1/4" head space, put it in the fridge to enjoy.


4. Wipe Rims.
Remove the canning funnel. Wipe the rim of the filled jar with a clean, damp paper towel.

If there is any food on the rim, it will keep your jar from sealing properly.


5. Lid & Ring. 
Put a NEW** canning lid on top of the jar of jam, and screw on the canning ring.
Do not turn it super tight - as it will prevent a proper seal.
Finger - tip tight is what you want. This means to screw on the lids and STOP when you start to feel resistance.

**If you are an experienced canner, did you know that you do not need to heat your lids? That is great news! (Source)

I still like to use the magnetic lid wand - I want to make sure everything is clean and sterile!


6. Put Jars in the Instant Pot.
Place the metal trivet (steam rack) inside the pot.
Put 3 1/2 cups* of water into your Instant Pot liner. Water should be at the height of the trivet.
Place your hot jars on the trivet.
If you are processing more than 7 half pint jars, you will want to make a foil sling for the center jar. (*If you are using the 8 qt IP, pour water up to the trivet line).


Fold the aluminum sling down and over the top of the jars. The foil sling will help you remove the center jar and allow you to use a canning jar lifter or hot pads to grab the rest of the jars.


7. Check Seal, Close/Lock Lid.
Check your seal - make sure it is seated correctly, all the way around the underside of the lid.

Put the Instant Pot lid on the pressure cooker and turn it completely to lock it.

Make sure the pressure valve is set to VENTING.


8. Process the Jars.
Push the STEAM button. Watch your pressure cooker.

When the float valve comes up AND you see a full stream of steam coming from the pressure valve, start the processing time according to your altitude.

Processing Time for Strawberry Jam is 10 minutes at sea level - no adjustment necessary.

Add time for altitudes higher than 1,000 feet.

I am at 4,500 feet, so I need to add 10 minutes to my processing time, for a total of 20 minutes. 


9. Turn off the IP.
At the end of processing time, Press Cancel/Keep Warm to turn the IP OFF and wait for the float valve to drop.

When the float valve drops, you can open up your pressure cooker.

10. Cool the jars. 
Carefully remove the jars, using a jar lifter or hot pads, and set each jar on a wire cooling rack. 

Do not disturb the jars for at least 12-24 hours.


As the jars cool, you will hear the JOYFUL pings of jars being sealed. The new canning lid design will let you know how to see if the jar has sealed - the jar on the right has sealed.

The jar on the left still has the 'bubble,' and will seal in a minute or two.

Resist the urge to touch the tops of the jars until 12 hours have passed.


After 12 hours, if you have any jars that have NOT sealed, you have 2 options.

1. Re-process with a new jar, new lid, with the same method (heating jam, jars, etc) and the same processing time. (Lids are a one time use). -or-

2. Put the jar of food in the fridge to use immediately. (I prefer this option)

When proper canning procedures have been followed, it is rare for a jar not to seal.

Reasons for jars that don't seal can be any of the following:

  • Jar was not filled properly with required amount of "head space." If you do not have enough food to fill the jar, put it in the fridge to enjoy.
  • The top of the jar was not clean. Any food or reside can prevent a proper seal.
  • The top of the jar has a nick or a crack on the rim. 
  • The lid was not centered. 
  • The ring was screwed on too tight. Air needs to escape to create a vacuum and seal.

When canned and stored properly, your Strawberry Jam will keep for 18-24 months.

I have successfully Steam Canned Applesauce, Strawberry Jam (several varieties, including Strawberry Kiwi and Strawberry Vanilla), Strawberry Lemonade Concentrate, and Strawberry Lemon Curd. 

Enjoy!

34 Safe Water Bath Steam Canning With Your Instant Pot Pressure Cooker: Part One


One of the most frequent questions that I see is, "Can I use the Instant Pot pressure cooker to can foods?"

Of course you can.

But only using certain foods and a safe way to do it.

This is Part One of a two part post. This post introduces you to basic canning and this second post shows you step by step how to do it. 

I have been canning for over 30 years. I watched and learned from my mother how to carefully prepare food and water bath can many fruits, jams, jellies, and pickles. I have done pressure canning, and more recently, have been steam canning. Some canning practices have changed over the years, so it it important to keep up to date.
Print Friendly and PDF
Statement about canning from Instant Pot:
"Instant Pot can be used for boiling-water canning. However, Instant Pot has not been tested for food safety in pressure canning by USDA. Due to the fact that programs in Instant Pot IP-CSG, IP-LUX and IP-DUO series are regulated by a pressure sensor instead of a thermometer, the elevation of your location may affect the actual cooking temperature. For now we wouldn't recommend using Instant Pot for pressure canning purpose." 
Sorry, folks. No pressure canning allowed in the Instant Pot.
Pressure canning is for foods that are low in acid.

You can  watch a short video on the 7 Rules for Safe Steam Canning.


What is a Low Acid Food?
From the NCHFP:
"Low-acid foods have pH values higher than 4.6. They include red meats, seafood, poultry, milk, and all fresh vegetables except for most tomatoes. Most mixtures of low-acid and acid foods also have pH values above 4.6 unless their recipes include enough lemon juice, citric acid, or vinegar to make them acid foods. Acid foods have a pH of 4.6 or lower. They include fruits, pickles, sauerkraut, jams, jellies, marmalades, and fruit butters.
Although tomatoes usually are considered an acid food, some are now known to have pH values slightly above 4.6. Figs also have pH values slightly above 4.6. Therefore, if they are to be canned as acid foods, these products must be acidified to a pH of 4.6 or lower with lemon juice or citric acid. Properly acidified tomatoes and figs are acid foods and can be safely processed in a boiling-water canner."
Fruits like tomatoes, figs, asian pears, melons, persimmons, papaya, white peaches and white nectarines, and bananas are often just a bit too low in acid in their natural state for safe canning. 
(Source)


What is Water Bath Canning?

Water bath canning, or Open Kettle canning, is when prepared jars are submerged by 1"-2" of continuously boiling water. No pressure is used, and you can use a any well fitting lid to prevent rapid evaporation of your water. If you do not have a lid that fits, you can find an Instant Pot clear lid here.
There are some limitations to water bath canning with the IP:

1. You must use the trivet to keep the jars off the bottom of the pot. Direct contact of jars on the bottom of the pot puts your jars at risk of breakage. Because of this, you must use short jars, as the water needs to come to at least 1" above the jars. 8 oz jelly jars or shorter can only be used.

If you overfill your IP, the water can boil over and get in between the pot and the Instant Pot, potentially causing damage to your Instant Pot.

2. I am uncertain as to which setting you can use to maintain a rolling boil - it must be a rolling boil during the entire processing time of your food.

You can use any large pot of water. You must use a rack, or trivet, between the bottom of the pot and the jar, to prevent any possible breakage with direct heat/contact with the jars.

Instant Pot Trivet

If you do not have a trivet, or steam rack for your Instant Pot, you can find one here, at the Instant Pot Store. 


Let's talk about Steam Canning and how it works...

STEAM CANNING 

Also known as Atmospheric canning, it uses steam, which is the same temperature as boiling water, to process your foods.

Steam canning has been around for over 80 years, but the process just got research tested approval from Utah State University Extension Services and University of Wisconsin Extension Services in 2015! Woot!


This is the steam canner I have from Back to Basics.

PROS OF USING A STEAM CANNER

1. It only uses a couple of inches of water, versus up to 4 gallons with water bath canning.
2. It heats up more quickly, as 4 gallons of water can take 30 minutes.
3. Less water, less time, helps keep the kitchen cooler.
4. No more lugging big pots of water onto the stove.
5. No risk of water boiling over.
6. It is not a complicated machine with dials and knobs. It is very easy to use.

This is AMAZING for me, as I live in a desert, and water is a precious commodity.

With a steam canner, all you do is put the shallow part of the steam canner on your stove, place your trivet/rack into the canner, fill it up to the rack with water, set your prepared bottled foods on top of the rack, cover with the top canner pot and begin to boil your water. When a full line of steam comes out of the little hole (as indicated by the RED arrow in the picture), you can start the timer to process the food.

This got me thinking....I wonder if I can use my Instant Pot as a steam canner?

Before you jump into Steam Canning, let's go over the rules, which are summarized from the above statements from USU and UW , which you will need to follow for steam canning in the Instant Pot.


WHY USE SAFE CANNING PRACTICES?

One of the reasons for canning is to preserve food. Foods that are properly canned will keep well for 2-5 years in a cool, dark place. Shelf life primarily is determined by the type and quality of the food and how it is preserved.

If you do not can your food properly, you can get Botulism.
Botulism is a rare, but deadly illness that is caused by a germ called Clostridium Botulinum. The germ is found in soil, and can survive, grow, and produce a toxin, especially when food is improperly canned. The toxin can affect your nerve, paralyze you, and even cause death.
You cannot see, smell, or taste the botulinum toxin - but taking even a small taste of food containing this toxin can be deadly.

When in doubt, throw it out!
     If there is any doubt that safe canning practices have not been used, throw it out. Do not use taste or smell to determine if the food is safe to eat. If any of questionable food spills, clean up the spill by using 1/4 cup liquid bleach mixed in with 2 cups of water.

7 RULES OF SAFE STEAM CANNING

1. Food must be HIGH acid.
     High acid foods are: fruits, pickles, jams, jellies, marmalades, & fruit butters.

2. Must use a research tested recipe. Do not change or adapt the recipe.
Use recipes from the Ball Blue Book Guide to Preserving,  National Center for Home Food Preservation, or your State or County Extension Service. Please do not use any methods or recipes that do not follow these guideline, even if it is from a trusted friend or family member. 

3. Jarred food must be processed in pure steam.
Make sure your IP is vented (you can remove the pressure valve), and when a full column of steam appears, you can begin the timing process. Full steam is the same temperature as boiling water, at your altitude. You can remove the float valve assembly and insert an accurate probe thermometer to test for 
4. Jars must be heated prior to filling.
Heating the jars and keeping them hot until they are filled with hot liquid, will minimize any breaking of your jars and process your food more accurately and safely. If cold jars are allowed to touch hot steam, they can break. If cold foods (raw pack) are used without hot liquid, the processing time will be off, your food will not be completely processed and may be unsafe to store and eat. 
5. Processing time must be adjusted to your elevation.
Water boils at different temperatures depending on the altitude. The higher the altitude, the lower the atmospheric pressure. That is why, at higher elevations, more time is added to the overall processing time. You will need to find your altitude and use this chart to adjust your processing time. I'm at 4,500 feet, so I would add 10 minutes to my processing time. If you do not know your elevation, you can check the chart below, look online with this elevation tool, or use your smart phone to ask, "What is my altitude?"

6. Processing time must be 45 minutes or less, including adjusted times for elevation.
Since the IP is smaller than a steam canner, this processing time requirement may be even less, as it is limited by the amount of water used. (See Water Test, below) When processing food, the IP should not be opened at any time to add more water. 
If the IP boils dry before the processing time is up, the food is considered under-processed and will need to be immediately re-processed using the water bath method or refrigerated.
7. Hot jars must be cooled in a safe place away from drafts, for 12-24 hours.
Cooling of hot jars must happen in still, room temperature air. Set your hot jars carefully on a wire cooling rack or a thick towel, away from drafts. Do not put hot jars into the refrigerator. to hasten the cooling. Cooling jars should not be disturbed for 12-24 hours.


Water Test your Instant Pot for Steam Canning!

It is recommended that you test your IP for canning before beginning your canning process. You will want to know your altitude, boiling point, and how long your IP will consistently keep the steam at a constant temperature before starting any canning or processing.

You will want to purchase a probe thermometer to test your Instant Pot for steam canning. I chose the ThermoPro Digital thermometer based on the size of the probe and the customer reviews. It was also a great deal, at 50% of regular price.

1. Put a couple of pennies in the IP liner. As the water heats, the pennies will begin to rattle, and if they stop rattling, that means your pot has boiled dry.

2. Place the wire trivet (steam rack) in the IP liner. Fill the liner with enough water to reach the level of the trivet. For the 6 quart, this is 3.5 cups of water.

3. Remove the Instant Pot float valve assembly by removing the plastic grommet, removing the pin, and placing these parts in a Ziploc baggie, so you don't lose them. Removal of the float valve assembly is ONLY FOR TESTING. You will need to keep it intact and in place for actual processing.

4. Insert the probe through the hole left by the float valve. I put the float pin on top to help keep any excess steam from escaping.

5. Check your IP lid seal. Make sure it is seated correctly.

6. Close the lid. Make sure the tip of the probe thermometer is NOT touching the bottom of the IP pot liner or the trivet.

7. Open the Pressure Valve, or set it to VENTING.

8. Push the STEAM button. As long as the pressure valve is set to VENTING, your Instant Pot will continuously heat the water, with no fluctuation, and will not come to pressure.

My current elevation (altitude) is 1374 meters, or 4508 feet, so my boiling point should be at least 203.5°F. According to my thermometer, it is reading at 205.7°F.


9. Once you see a full stream of steam coming from the pressure valve, set your timer for 35 minutes.

10. At the end of 35 minutes, push Cancel/Keep Warm. Open the IP lid.

If your water does not boil dry within the 35 minute period, you can try steam canning with your Instant Pot!

When hot, prepared jars are added to the pot for processing, the water does not evaporate as quickly. Make sure your seal is seated correctly and that no steam is escaping from the sides. 

My test batch used 3.5 cups water, the trivet, 5- 8oz jars of Strawberry Jam, hot packed. The float valve assembly is NOT REMOVED  for the actual processing, only for testing. Keeping the float valve assembly intact helps keep the steam inside the pressure cooker. Here are my results:
  • 5 min to reach full steam, float valve came up
  • 20 min to process (according to my altitude)
  • 2 min to NPR (Natural Pressure Release) for float valve to drop
  • 2 cups of water remained in the pot liner!
HOW MANY JARS WILL MY INSTANT POT HOLD? What Equipment will I need?

You can do a dry fit of your jars, with the lids on and set them on the trivet. All the photos are of my Instant Pot Duo, 6 quart size. If you have the 8 quart, you will need to see if your jars will fit. Put the trivet in the pot, and place your jars on top of the trivet.

Use regular mouth jars, not wide mouth jars, for the best fit.

This is the height clearance of 8 oz jelly canning jars. Because they are set on the trivet, they are too hight to water bath, but are fine for steam canning.


When 1/2 pint canning jars are set on the trivet, they are the same height as the IP pot liner. You do not want to use jars that are taller than your pot.  Four pint jars fit well in the 6 quart. 


The shorter, 4 oz jelly jars can be double stacked, as long as they are not stacked directly on top of each other. Off set the jars and use a foil sling for the center jar, as shown in the next picture. A total of thirteen, 4 oz jars will be the max for the 6 quart.


To help remove the center jar, you will need to make a foil sling that is folded over itself a couple of times and is at least as wide as the jar.


Fold the foil sling flat, as to not interfere with the lid or sealing ring.


You can see that six or seven 8 oz jelly jars fit nicely.

Once you remove the center jar, it will be easier to remove the other jars.


To remove the rest of the jars, you may want to consider using a hot pad, silicone mitts, or a canning jar lifter. You can find the jar lifter and other canning equipment in an expensive kit in the link below.


In summary, in the 6 quart, you can easily fit the following jars:
4  Pint jars
6-7 Eight Ounce Jelly jars (half pint)
13 Four ounce jars

You may also want to use a wire cooling rack to help your jars cool evenly.


Are you ready to begin steam canning in your Instant Pot?

Do the steam canning test and take a look at my step by step IP Steam Canning post for processing Strawberry Jam.

Enjoy!


8/30/17

1 EASY Thick No Sugar Added Applesauce - Pressure Cooker FAST!


Applesauce is so basic, so good, and so simple to make. Soon it will be fall and apples will be ready to harvest. If you have ever wanted to make applesauce, now is the time to try!

I used to cook my quartered/cored apples in a large stock pot on top of the stove. The steamed, cooked apples would go into a food mill, where the apples would be pushed down with a large, wooden stick. The sauce would come down a large funnel, and the peelings would come out of the other end.

It was messy, hot work, but now, there's an easier, faster way - using your pressure cooker!

OXO Good Grips Digital Scale

Choosing Your Apples
Some apples work better for freezing. Some are more suited for eating and others are better for making applesauce. Which to choose? Here are some suggestions. You can mix or match apples to create your own custom made applesauce.
  • Braeburn - sweet/tart
  • Cameo
  • Cortland - similar to McIntosh, but sweeter/tarter
  • Crispin (Mutsu)
  • Empire - very sweet when baked
  • Fuji -sweet/tart,watery
  • Gala - thin skinned, but grainy texture
  • Golden Delicious - sweet, thin skinned
  • Gravenstein
  • Ida Red
  • Jonagold - sweet, thin skinned
  • Jonamac
  • Jonathan
  • Liberty
  • McIntosh - strong structure of pectin
  • Newtown Pippin
  • Rome Beauty - mild, thick skin
  • Stayman
  • Winesap
Apple Corer, Slicer, Peeler - All in One!


Skin On or Off? 
Leaving the skins on will give your applesauce a pink or rosy color. Skins can be fibrous, and if you have a food mill, it will catch all the skins and leave you with a silky, smooth applesauce. If you have a good food processor or blender, you can use it to finely pulverize the skins.

I like to use a Slicer/Corer/Peeler - It saves SO much prep time! It took me 6 min to prep 3 pounds of apples, about 10 medium apples.

Don't throw away the peels! Use them to make your own Apple Cider Vinegar... 

Truly liquid gold in a jar!


If you want to leave your skins on, you can try this Apple Slicer/corer.


Core the Apples?
Yes, you will want to core the apples. The seeds are tannic and will impart a bitter taste.

Size?
When cutting your apples, you will want to cut them into quarters or smaller. Try to keep them uniform in size. An apple corer/slicer or peeler works great!

Sweeten and when?
Apples are naturally sweet, so you will want to taste your applesauce and adjust it to your taste. You can use your choice of sweetener, apple juice, brown sugar, especially if you are using tart apples. Brown sugar can give a caramel taste to your applesauce.

Can I Double the Recipe?
If you are using a 6 quart pressure cooker, I would not recommend it. Apples foam when cooking under pressure, and pressure cookers should not be filled more than half full.

If you fill your pot more than half full, you will not be able to quick release the pressure valve without applesauce spraying out from the valve and clogging it.  If you want to make a bigger batch of applesauce, you will need to make multiple batches.


You may note that this recipe only uses 1/4 cup of liquid. Apples will give off a lot of liquid on their own and 1/4 cup is enough to get the pressure going. This amount will also help you create a nice, thick applesauce. You can use water, apple juice, apple cider, or yogurt whey. 


I like to use an immersion blender, directly into the pot. It saves me another dish to wash, and I can control the texture; ultra smooth, or a little bit chunky. You can use a food processor, or an inexpensive potato masher.


Enjoy warm, or chill for a refreshing treat. Enjoy!

6 min prep
8 min to pressure
4 min cook time
2 min QR
TOTAL TIME: 20 min, Start to Finish


print recipe

Easy Thick Applesauce - Pressure Cooker
Use your pressure cooker to enjoy no sugar added, thick applesauce! Choose a blend of baking apples or a sweet/tart apple (such as Fuji). This recipe doesn't need a lot of liquid, as apples naturally release liquid in the form of juice to help create pressure. Do not fill the cooker more than half full, as apples foam and can spray through the pressure valve during the release.
Ingredients
  • 3 pounds (8-10 medium apples) cooking/baking apples
  • 1/4 cup water, apple juice or yogurt whey
  • 1 teaspoon ground cinnamon or 1 cinnamon stick, optional
Instructions
1. Wash, peel, quarter and core the apples. If you have a thin-skinned apple, you can leave the peels on.2. Pour 1/4 cup liquid of your choice into the pressure cooker.3. Add prepared apples into the pressure cooker.4. Close lid, close pressure valve, select HIGH pressure, and time for 4 minutes.5. At the end of the cook time, open the pressure valve (Quick Release). 6. Remove the cinnamon stick, if used.7. Use an immersion stick blender or potato masher to blend the cooked apples to your desired consistency.8. Taste for sweetness and add your choice of sweetener. Examples: brown sugar, granulated sugar, honey, maple syrup, etc.Applesauce will keep well in the fridge for 1-2 weeks or in the freezer for 1-2 months. You can water bath can your applesauce for longer storage.
Details
Prep time: Cook time: Total time: Yield: 4 cups


Related Posts Plugin for WordPress, Blogger...
Pin It button on image hover